Sani Pass Self-Drive Adventure: How to Conquer South Africa’s Most Thrilling 4x4 Route
The 13 hairpin turns and the 1:3 gradient up/down the Drakensberg Escarpment well, let's say it's not for the faint of heart. So, if you're seeking a thrilling road trip with jaw-dropping scenery and a real sense of accomplishment, driving the Sani Pass should be high on your list…
*Note: All informations is up to date as of April 2025
If you're like me, then when planning trips you'll find one thing, maybe a place to stay or a sight to see, latch onto it, and then build an entire itinerary around that.
On my one-month road trip around South Africa, the thing I latched onto the most was self-driving the Sani Pass, a notorious 9km stretch of tumultuous terrain connecting the country with the mountain kingdom of Lesotho.
Why did I choose the Sani Pass experience? Truthfully, I'm not sure. It's just one of those things that when you know, you know.
The 13 hairpin turns and the 1:3 gradient up/down the Drakensberg Escarpment well, let's say it's not for the faint of heart. But, in some false-confidence part of my brain, I told myself the spectacular views of the mountains would be well worth the effort (and by effort, I mean risk).
So, if you're seeking a thrilling road trip with jaw-dropping scenery and a real sense of accomplishment, driving the Sani Pass should be high on your list.
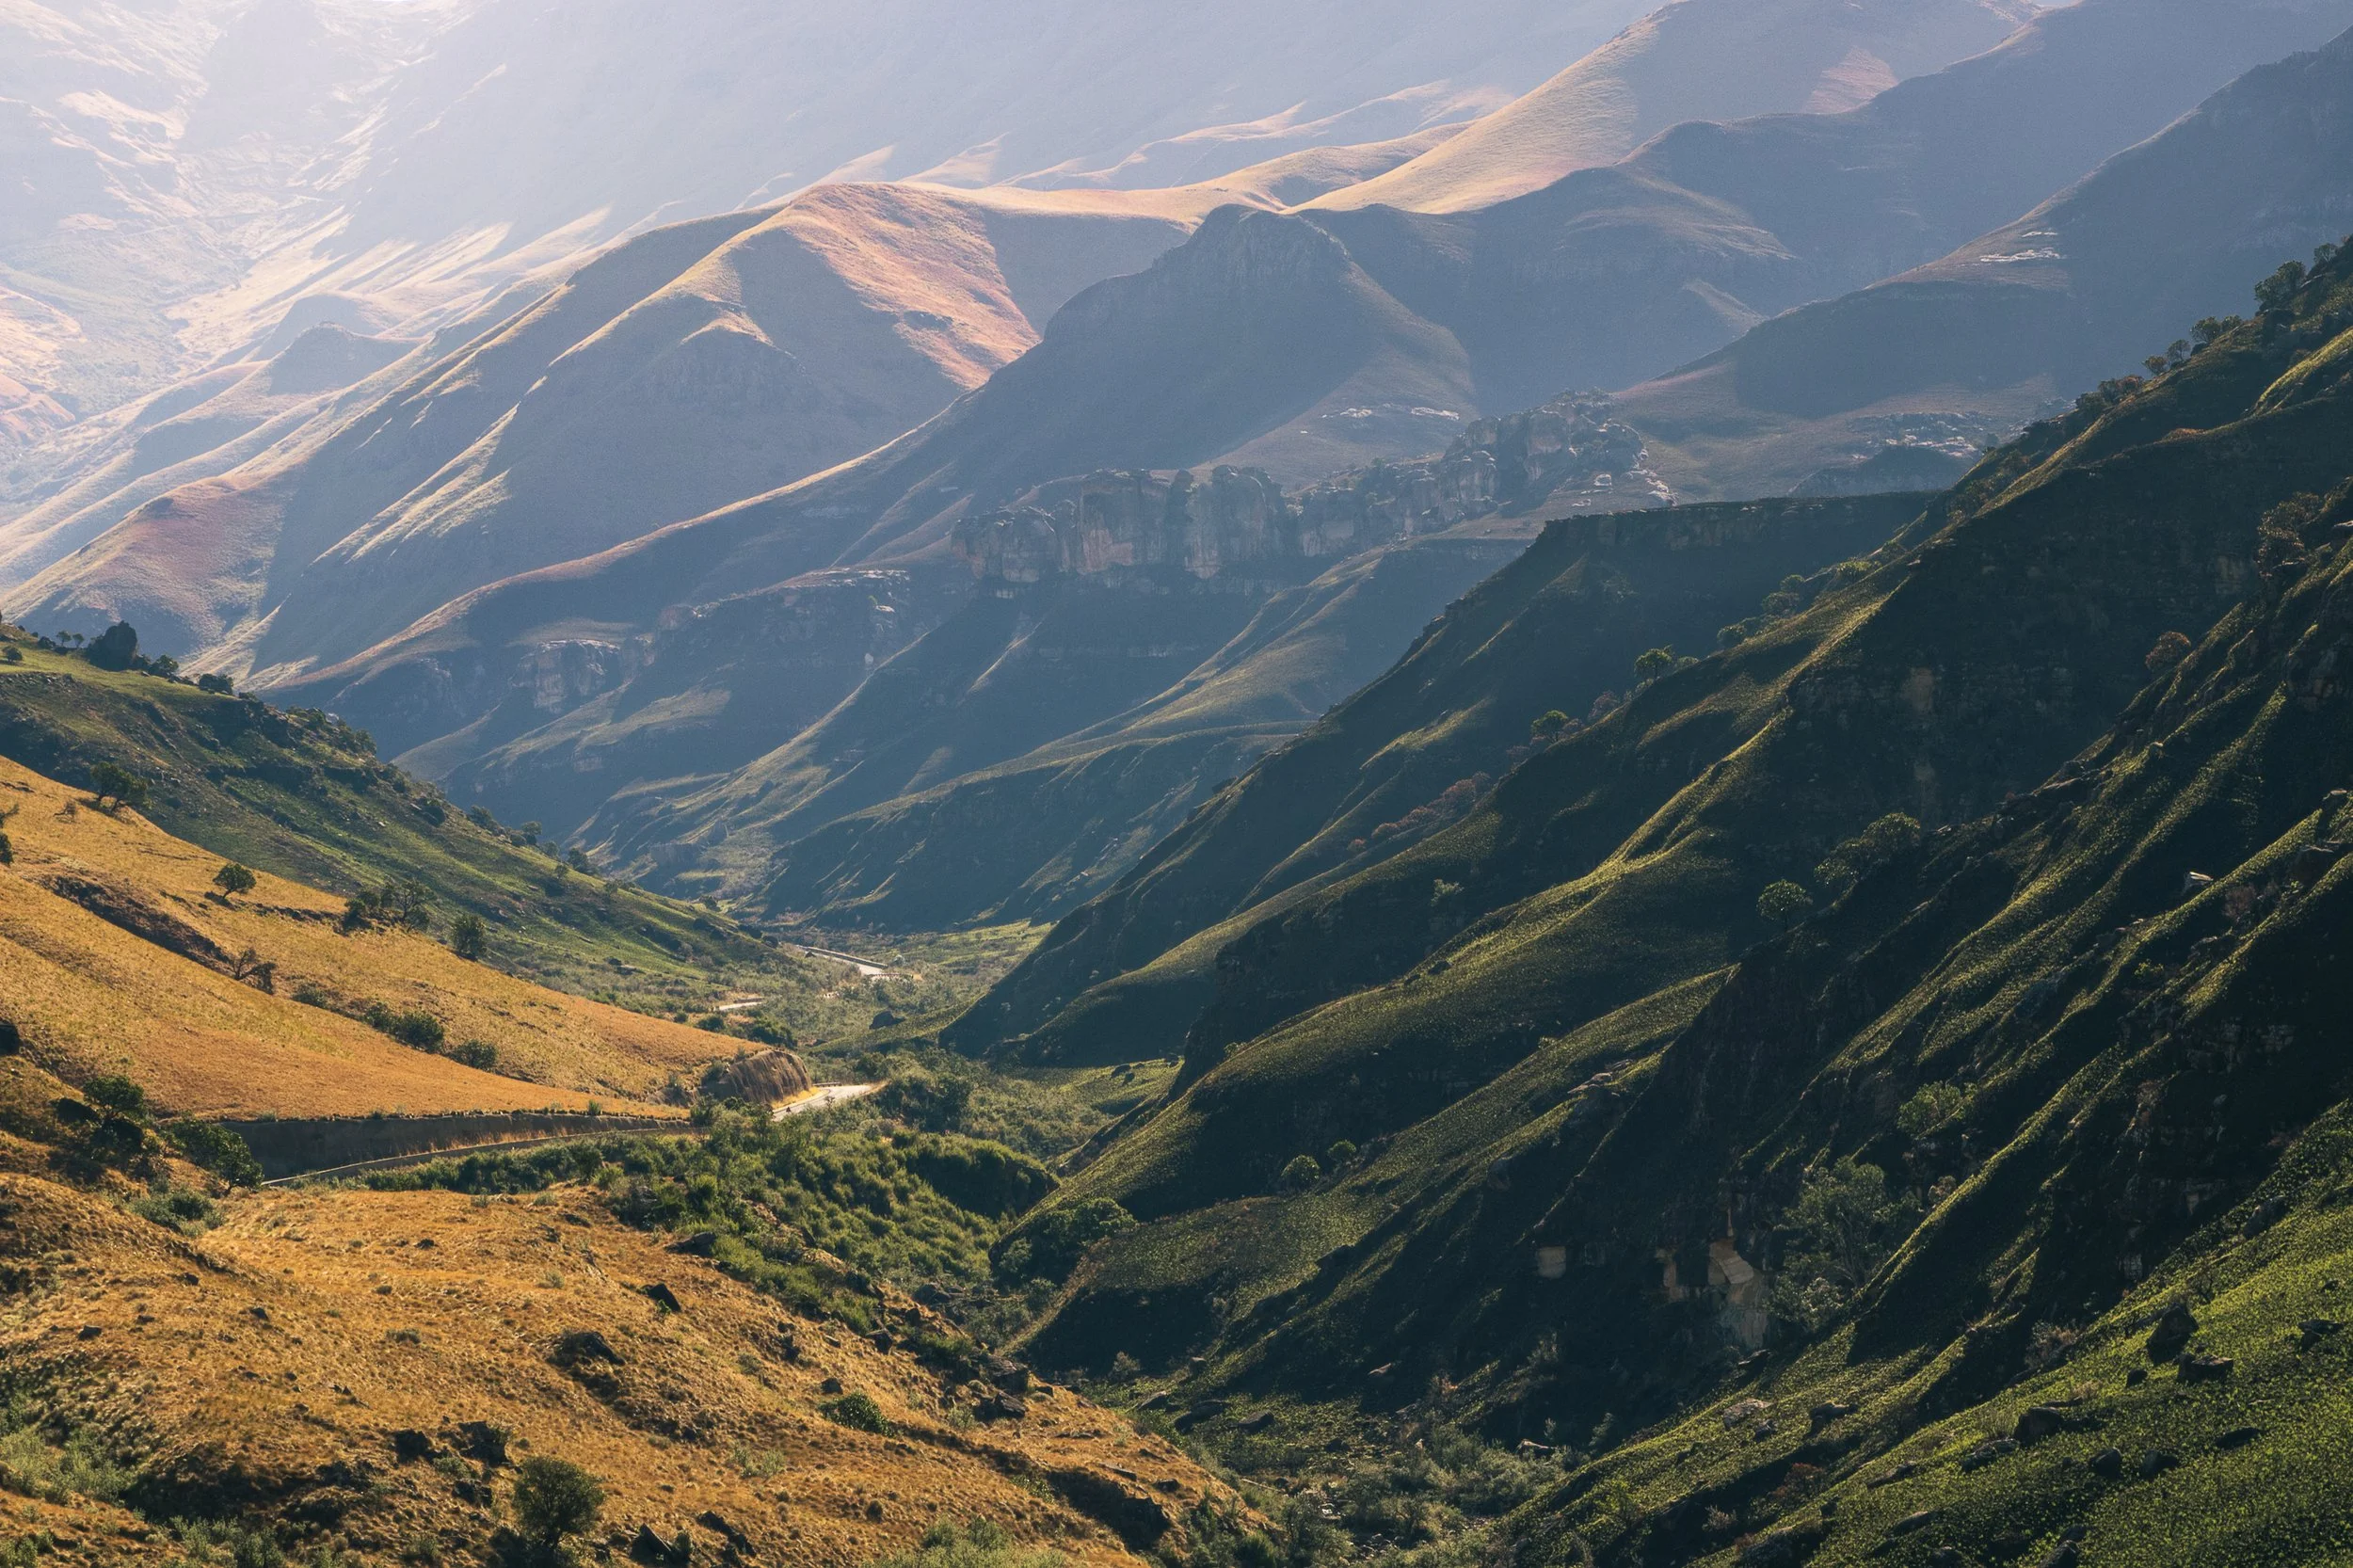
Winding from the lush foothills of KwaZulu-Natal, South Africa into the highlands of Lesotho, this is one of Africa's most iconic mountain passes — and a must-do for adventurers (don't forget to buckle up).
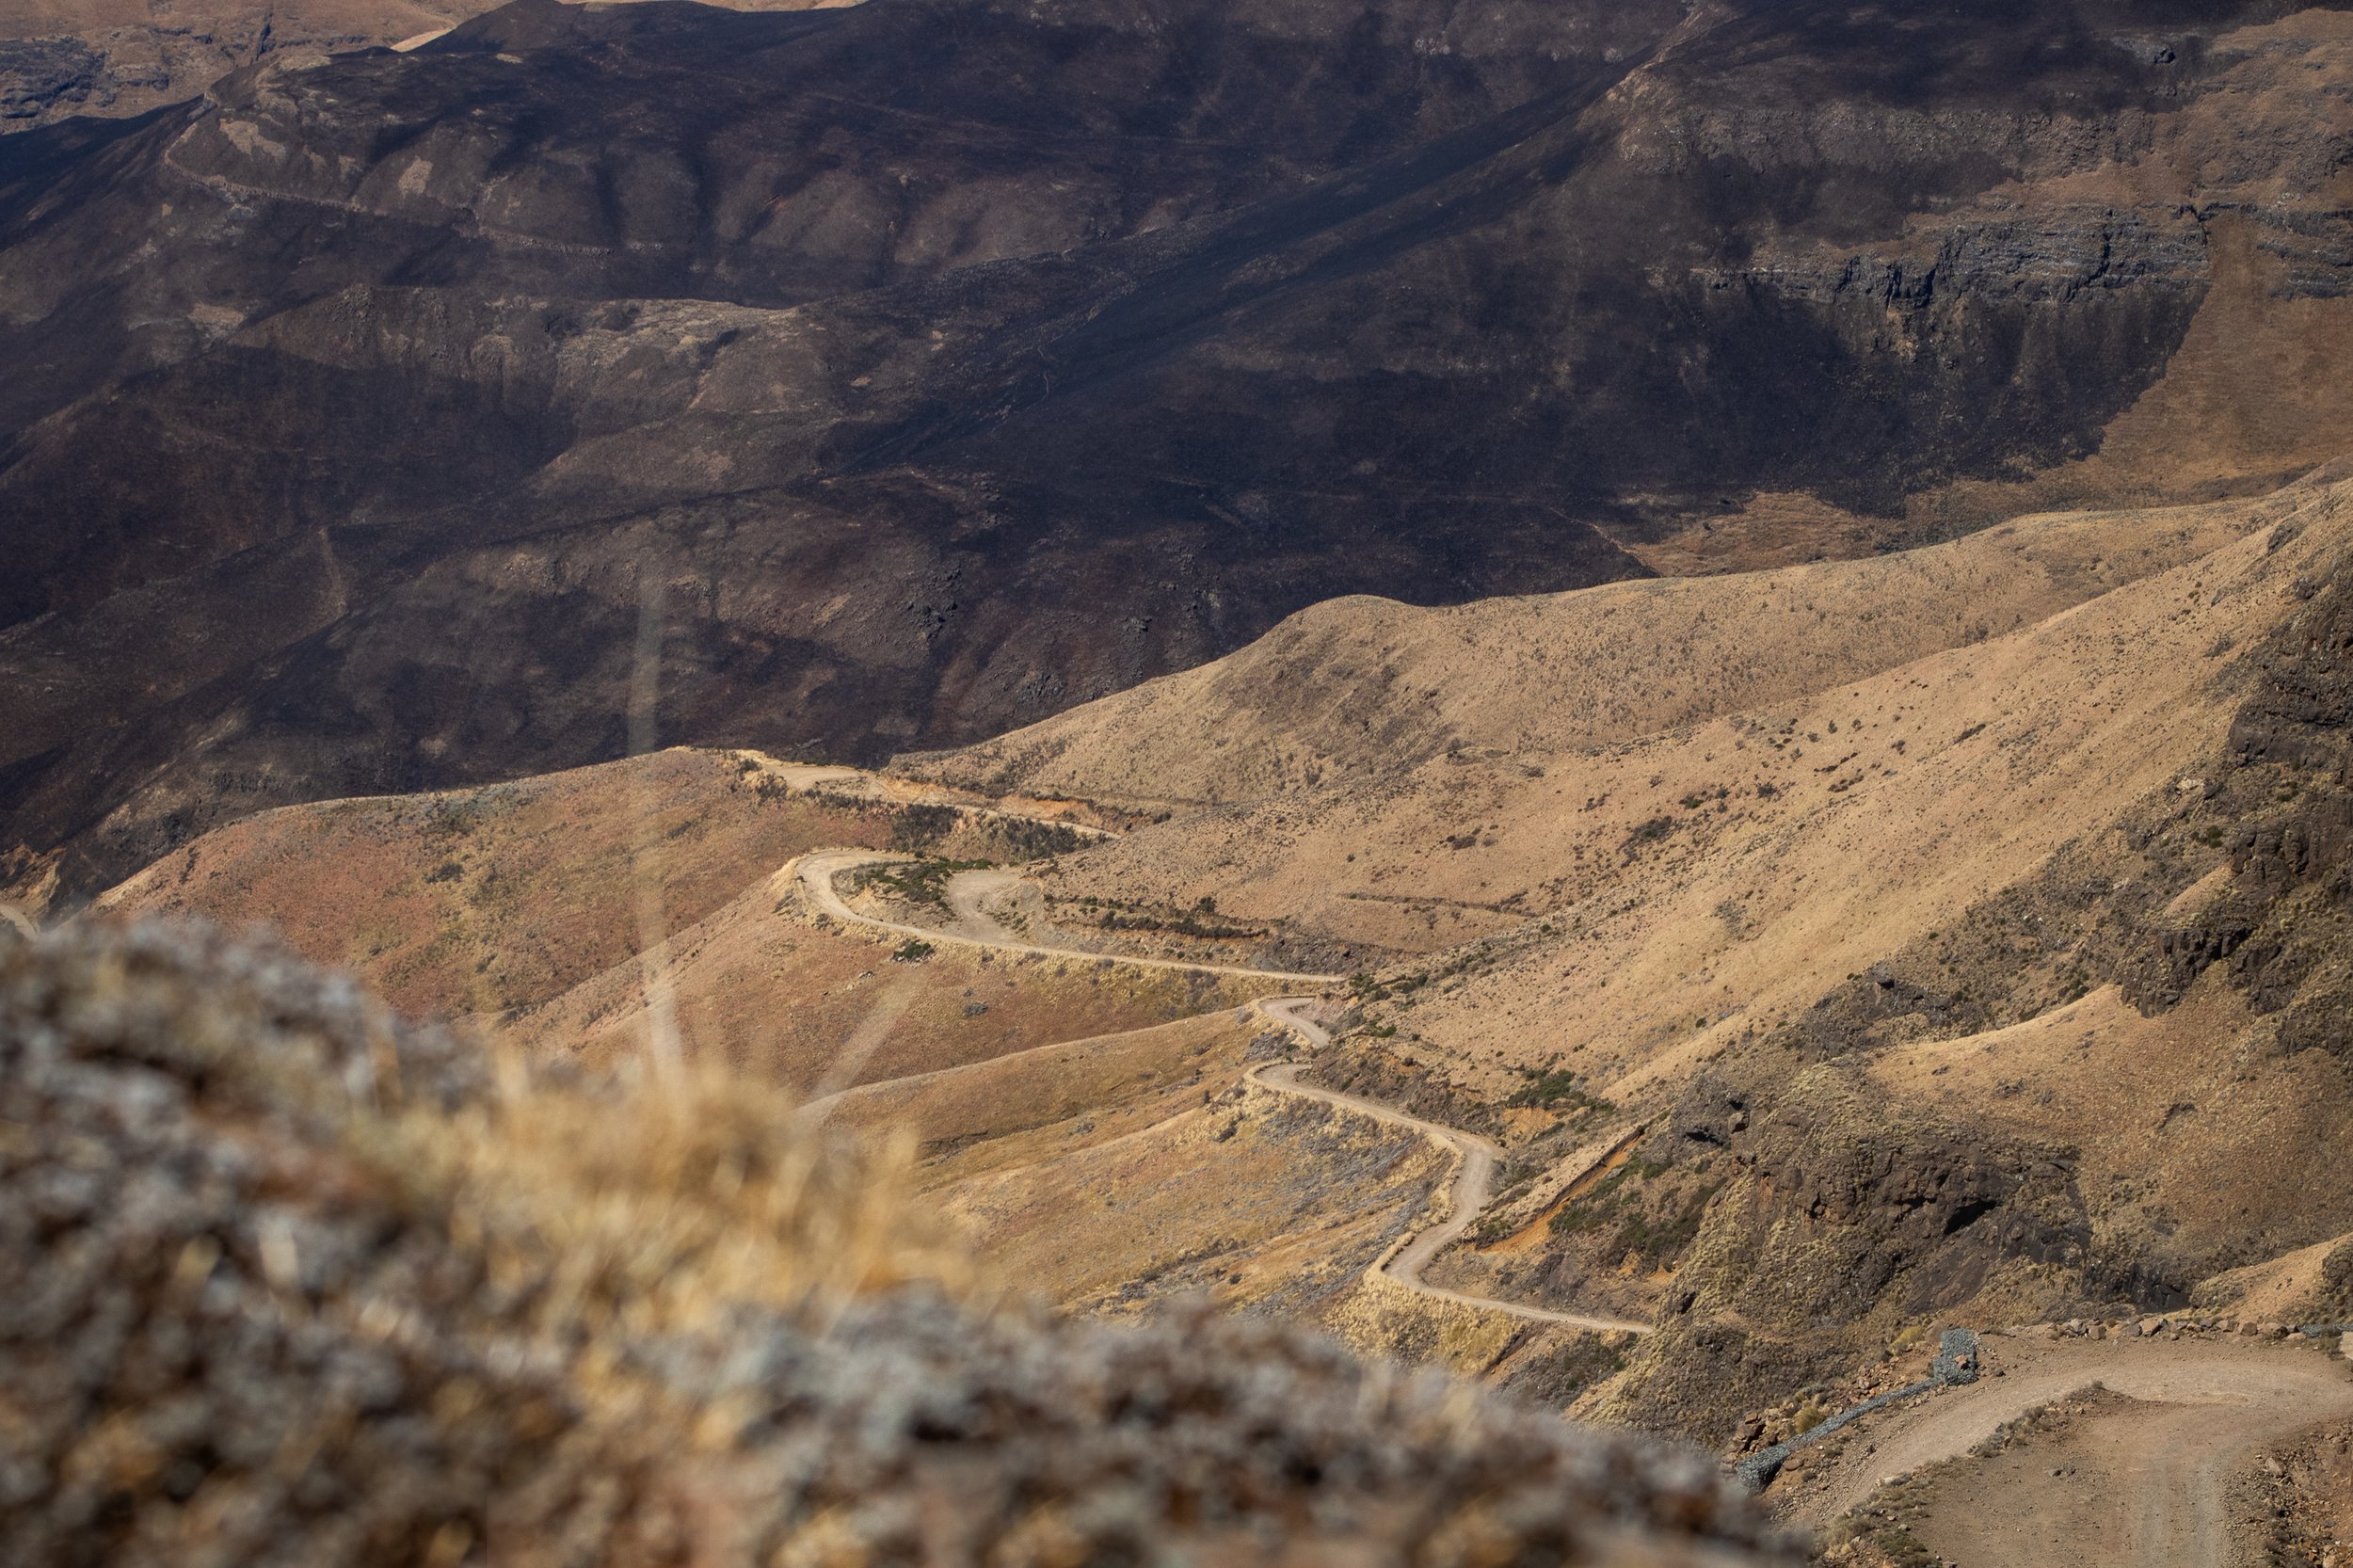
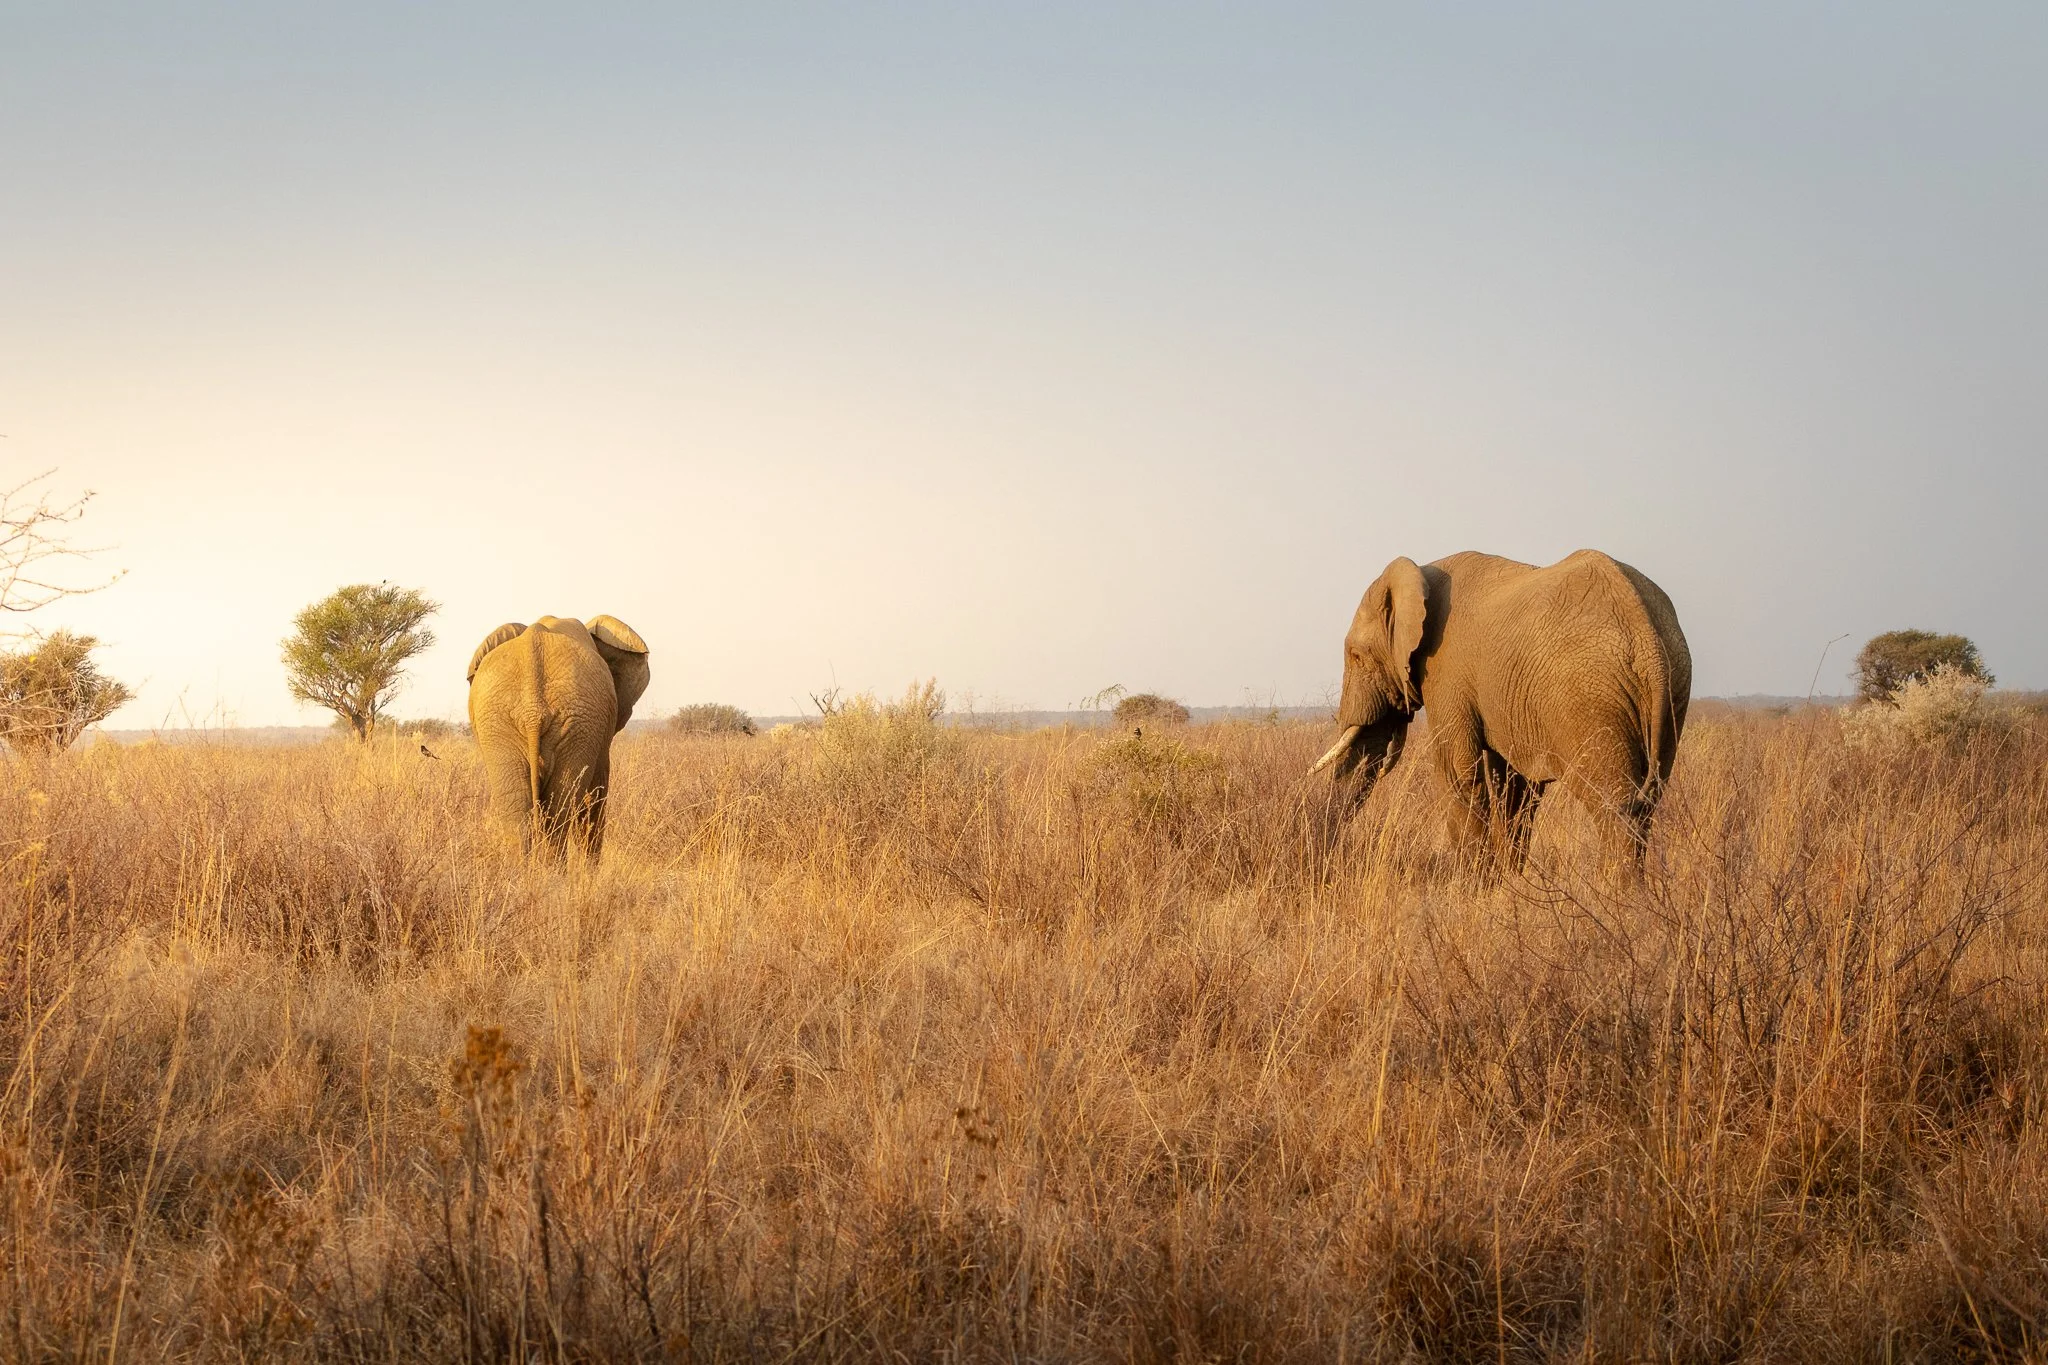
The infamous Sani Pass winds its way from Lesotho down into South Africa
What is the Sani Pass and why is it so special?
The Sani Pass is a high mountain road that links the borders of South Africa and Lesotho (the only border in Kwazulu-Natal), ascending over 1,000 meters in less than 10 kilometers.
Completed in 1950, the road starts at 1544m in elevation on the South African side and rises to 2876m on the Lesotho border, earning it’s name as the “Roof of Africa”. Previously utilized for pack animals, it is now one of the most challenging and dramatic 4x4 drives in Southern Africa and attracts off-road enthusiasts, photographers, and curious travelers alike (I'm the latter).
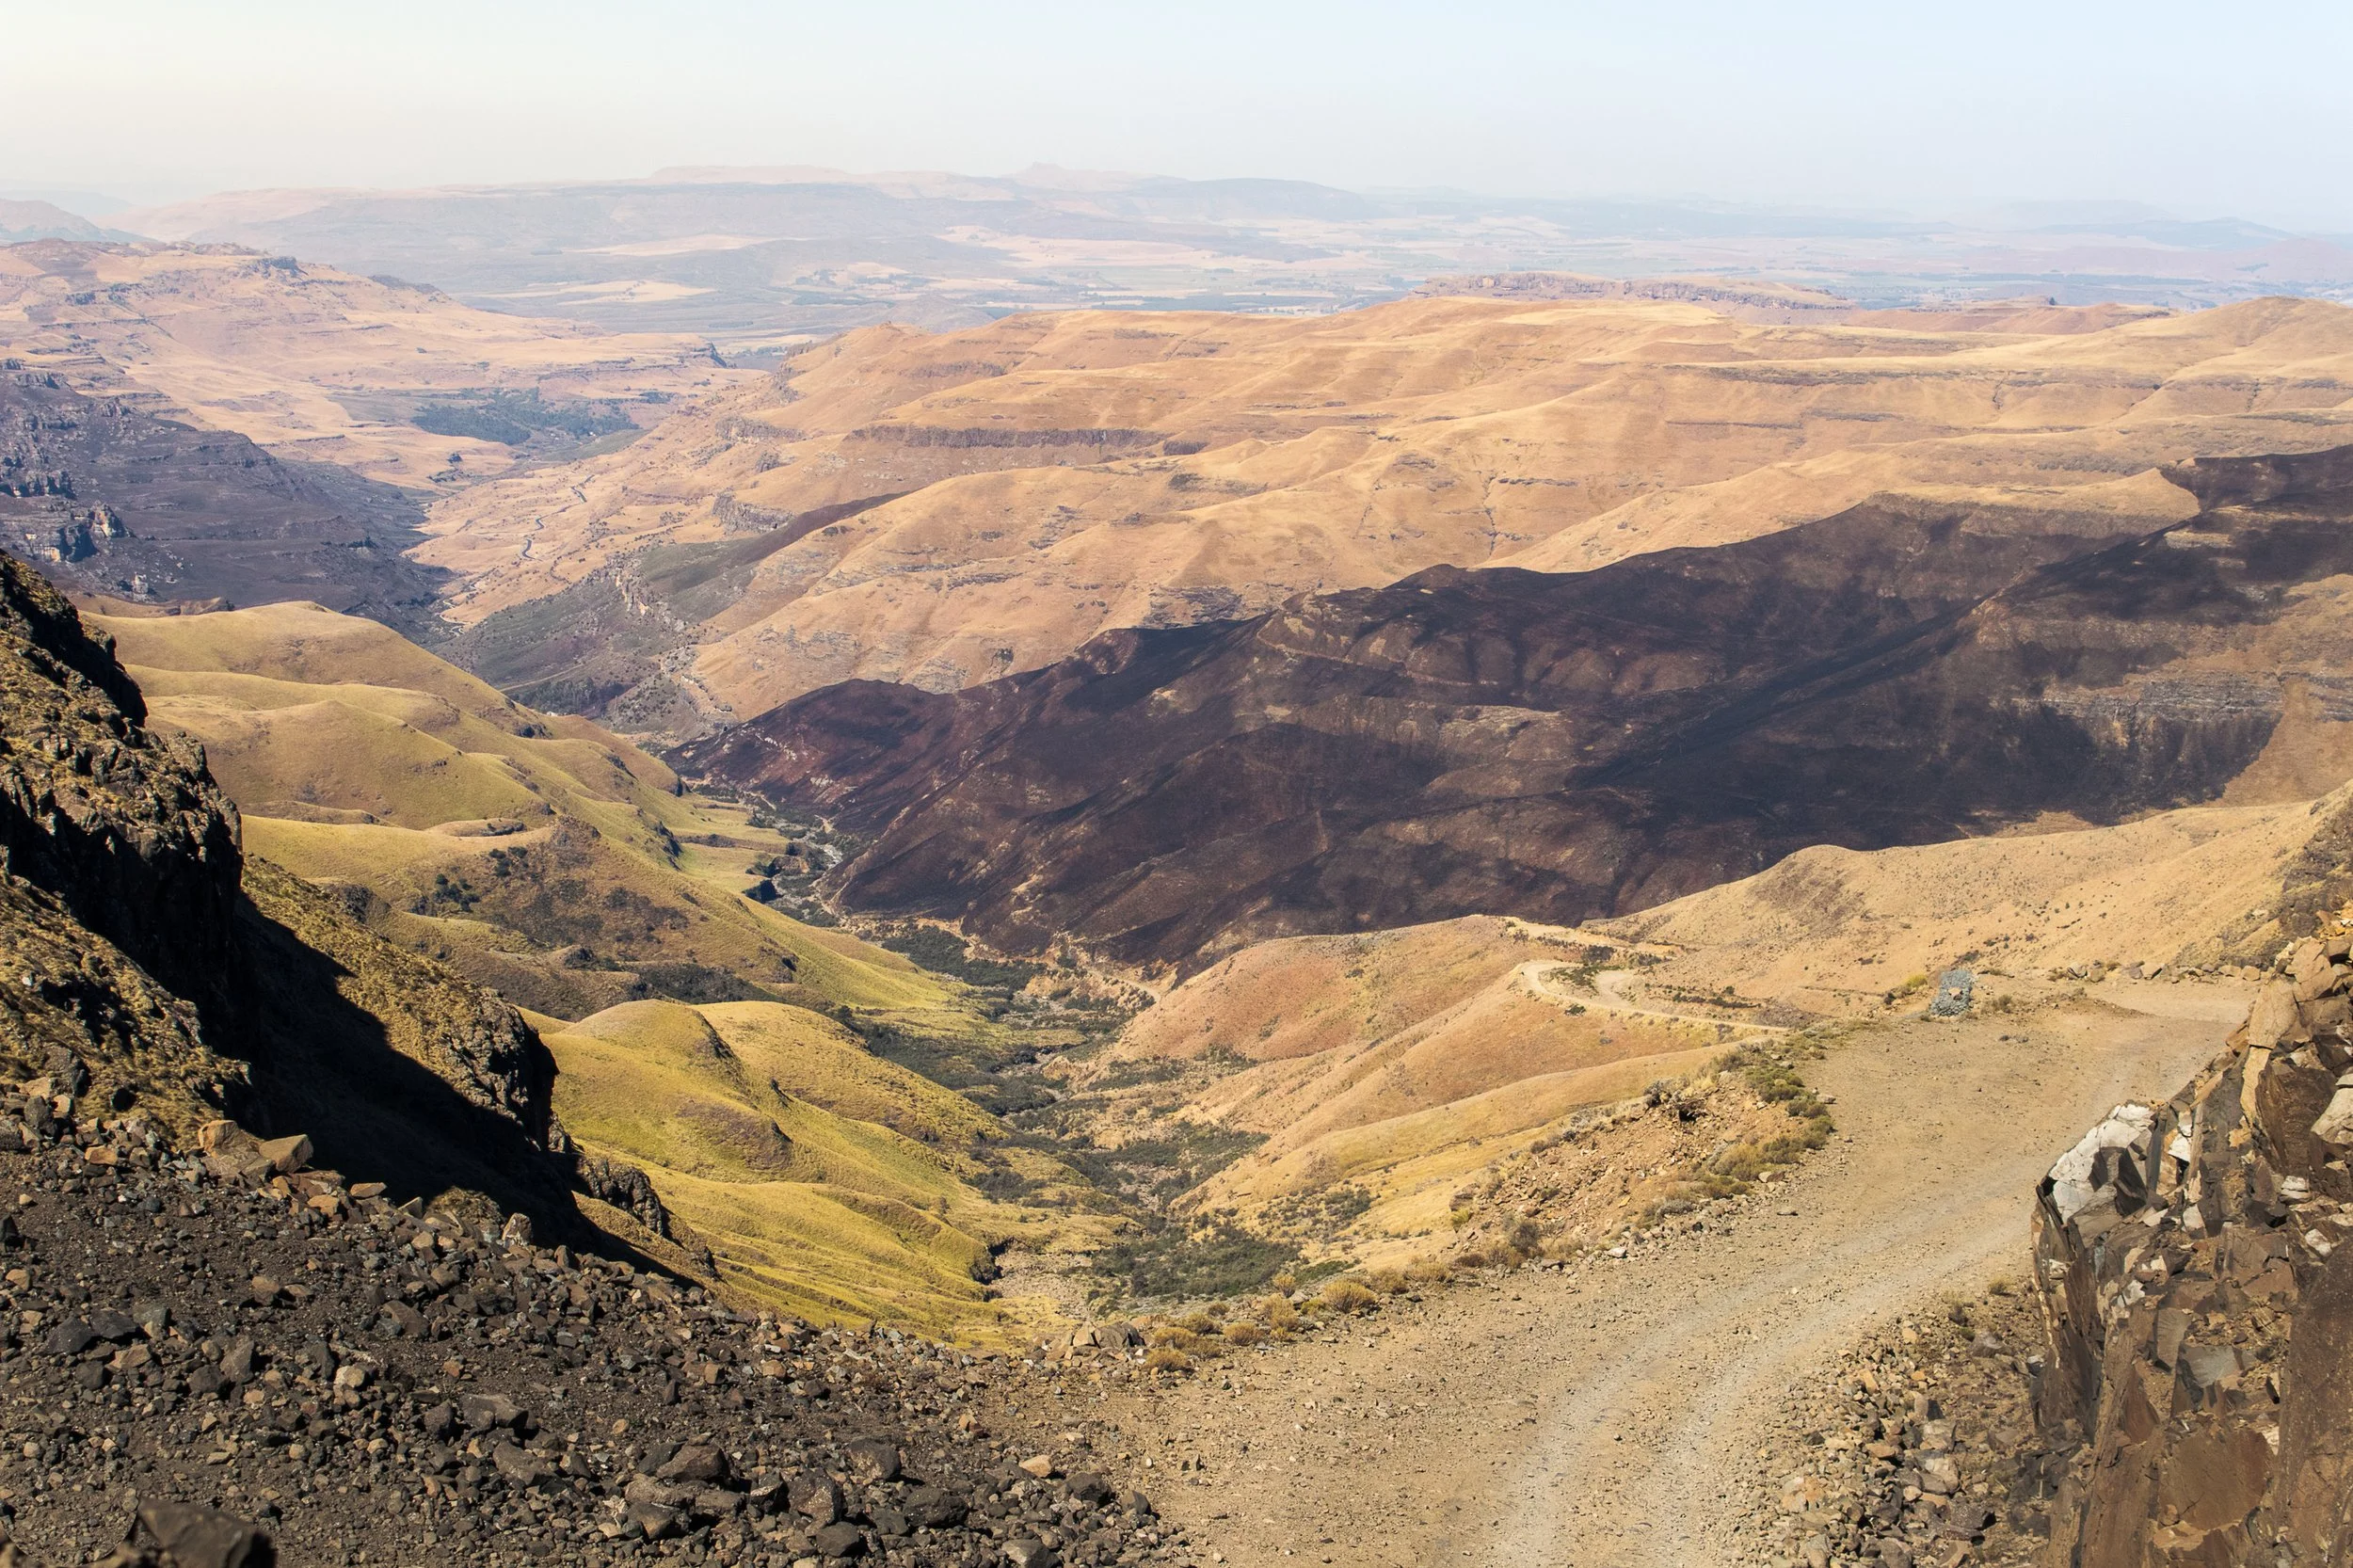
If you can brave the occasionally maintained loose gravel track, test your nerves on Devil's Corner and Suicide Bend, and survive being flanked by a steep drop-off for the entirety of the journey, you'll be treated to spectacular views of the surrounding Drakensberg Mountains, and a trip to the Highest Pub in Africa.
The beauty in this particular journey is in the remoteness. Nothing comes close to the feeling of standing on top of the pass, peering over the edge to see the winding road below. Meanwhile everything is eerily silent except for the wind whipping about, reminding you of just how forceful Mother Nature can be.
Ready to leap, or in this case slowly and arduously drive? Let's get into the details.
Looking for more South African adventures?
How difficult is it to drive the Sani Pass?
Make no mistake — driving the Sani Pass is not for the faint of heart.
With tight turns and oncoming traffic, it's important to have some prior driving experience not just for your safety but for everyone's. Remember, you won't be the only one on the road.
Despite re-graveling and flattening every month, the road is steep, rough, and unpredictable, with hairpin bends testing even experienced drivers. This, combined with the ever-changing weather, it’s best to have an alternative plan incase you’re forced to forego the drive that day.
It's not uncommon for drivers to embark on the Sani Pass before turning around and bailing out but, if you're committed to it, the drive requires 1.5-2 hours of constant concentration.
This is long enough to go slow, pull over for breaks, and pictures, or to give yourself a little pep talk, and still make it to the top safely.
Although I did a solo self-drive Sani Pass experience, it's safest to go with at least one other person to help you pick your lines of clearance. Some parts of the road can be a challenge and one wrong move can send you closer to the steep drop-offs.
The Sani Pass is made up of steep declines, narrow paths, and abrupt drop-offs
Sani Pass Requirements
First things, first, is a 4x4 required to drive the Sani Pass? Yes. It’s mandatory and is actively enforced at the South African border.
Even if you do have a 4x4, the border patrol agents have been known to turn away vehicles they deem not fit for the current conditions.
In addition, you'll need to meet the following requirements:
Passport.
No visa is required for Lesotho if visiting for 14 days or less.
Proof of Ownership of Vehicle.
It’s standard practice to provide registration documentation when entering and exiting any country.
Letter of Authority.
Rental cars must obtain a letter of authority from the agency that gives the driver permission to cross specific borders. This comes at an additional cost to the rental rate, usually around R650, about USD 35.
Spare Tire.
It's not necessarily a requirement that's checked, but it is safest to have one. The road is often littered with rocks and boulders, and if I have a choice between a flat tire and veering towards the ledge, I'm choosing the tire every time.
Finally, it's important to note that both the South African and Lesotho borders open their gates between 6 am and 6 pm. You must clear both by that time, otherwise, you'll be stuck.
This means that for a round-trip adventure, assuming a slow 2-hour journey, plan to start from South Africa no later than 12 pm and be checked in at Lesotho immigration by 2 pm.
Spend an hour or so snapping pictures and calming your nerves at the Sani Mountain Lodge, maybe purchase a quick souvenir from one of the small shops at the top of the pass, and exit Lesotho no later than 4 pm.
When to Drive the Sani Pass
Best time:
The best time to drive the Sani Pass is during the dry months. May to September offer clear skies and stable conditions.
Maybe it's not as photogenic (there will be less greenery on the pass), but it's still an unbelievable experience.
Avoid:
The worst time to attempt to drive is during the rainy summer months (November–March). Storms move through the mountains every afternoon, often striking at unpredictable times.
With such a steep gradient, you can imagine how prone the road is to landslides and flooding.
Winter note:
Winter on the Sani Pass is from June to August and is generally drier, making for an optimal experience. With that said, it's not uncommon for snow and ice to coat the road, making it slippery and un-passable.
It’s ideal to plan for winter months and when no recent storms have hit (easier said than done, I know).
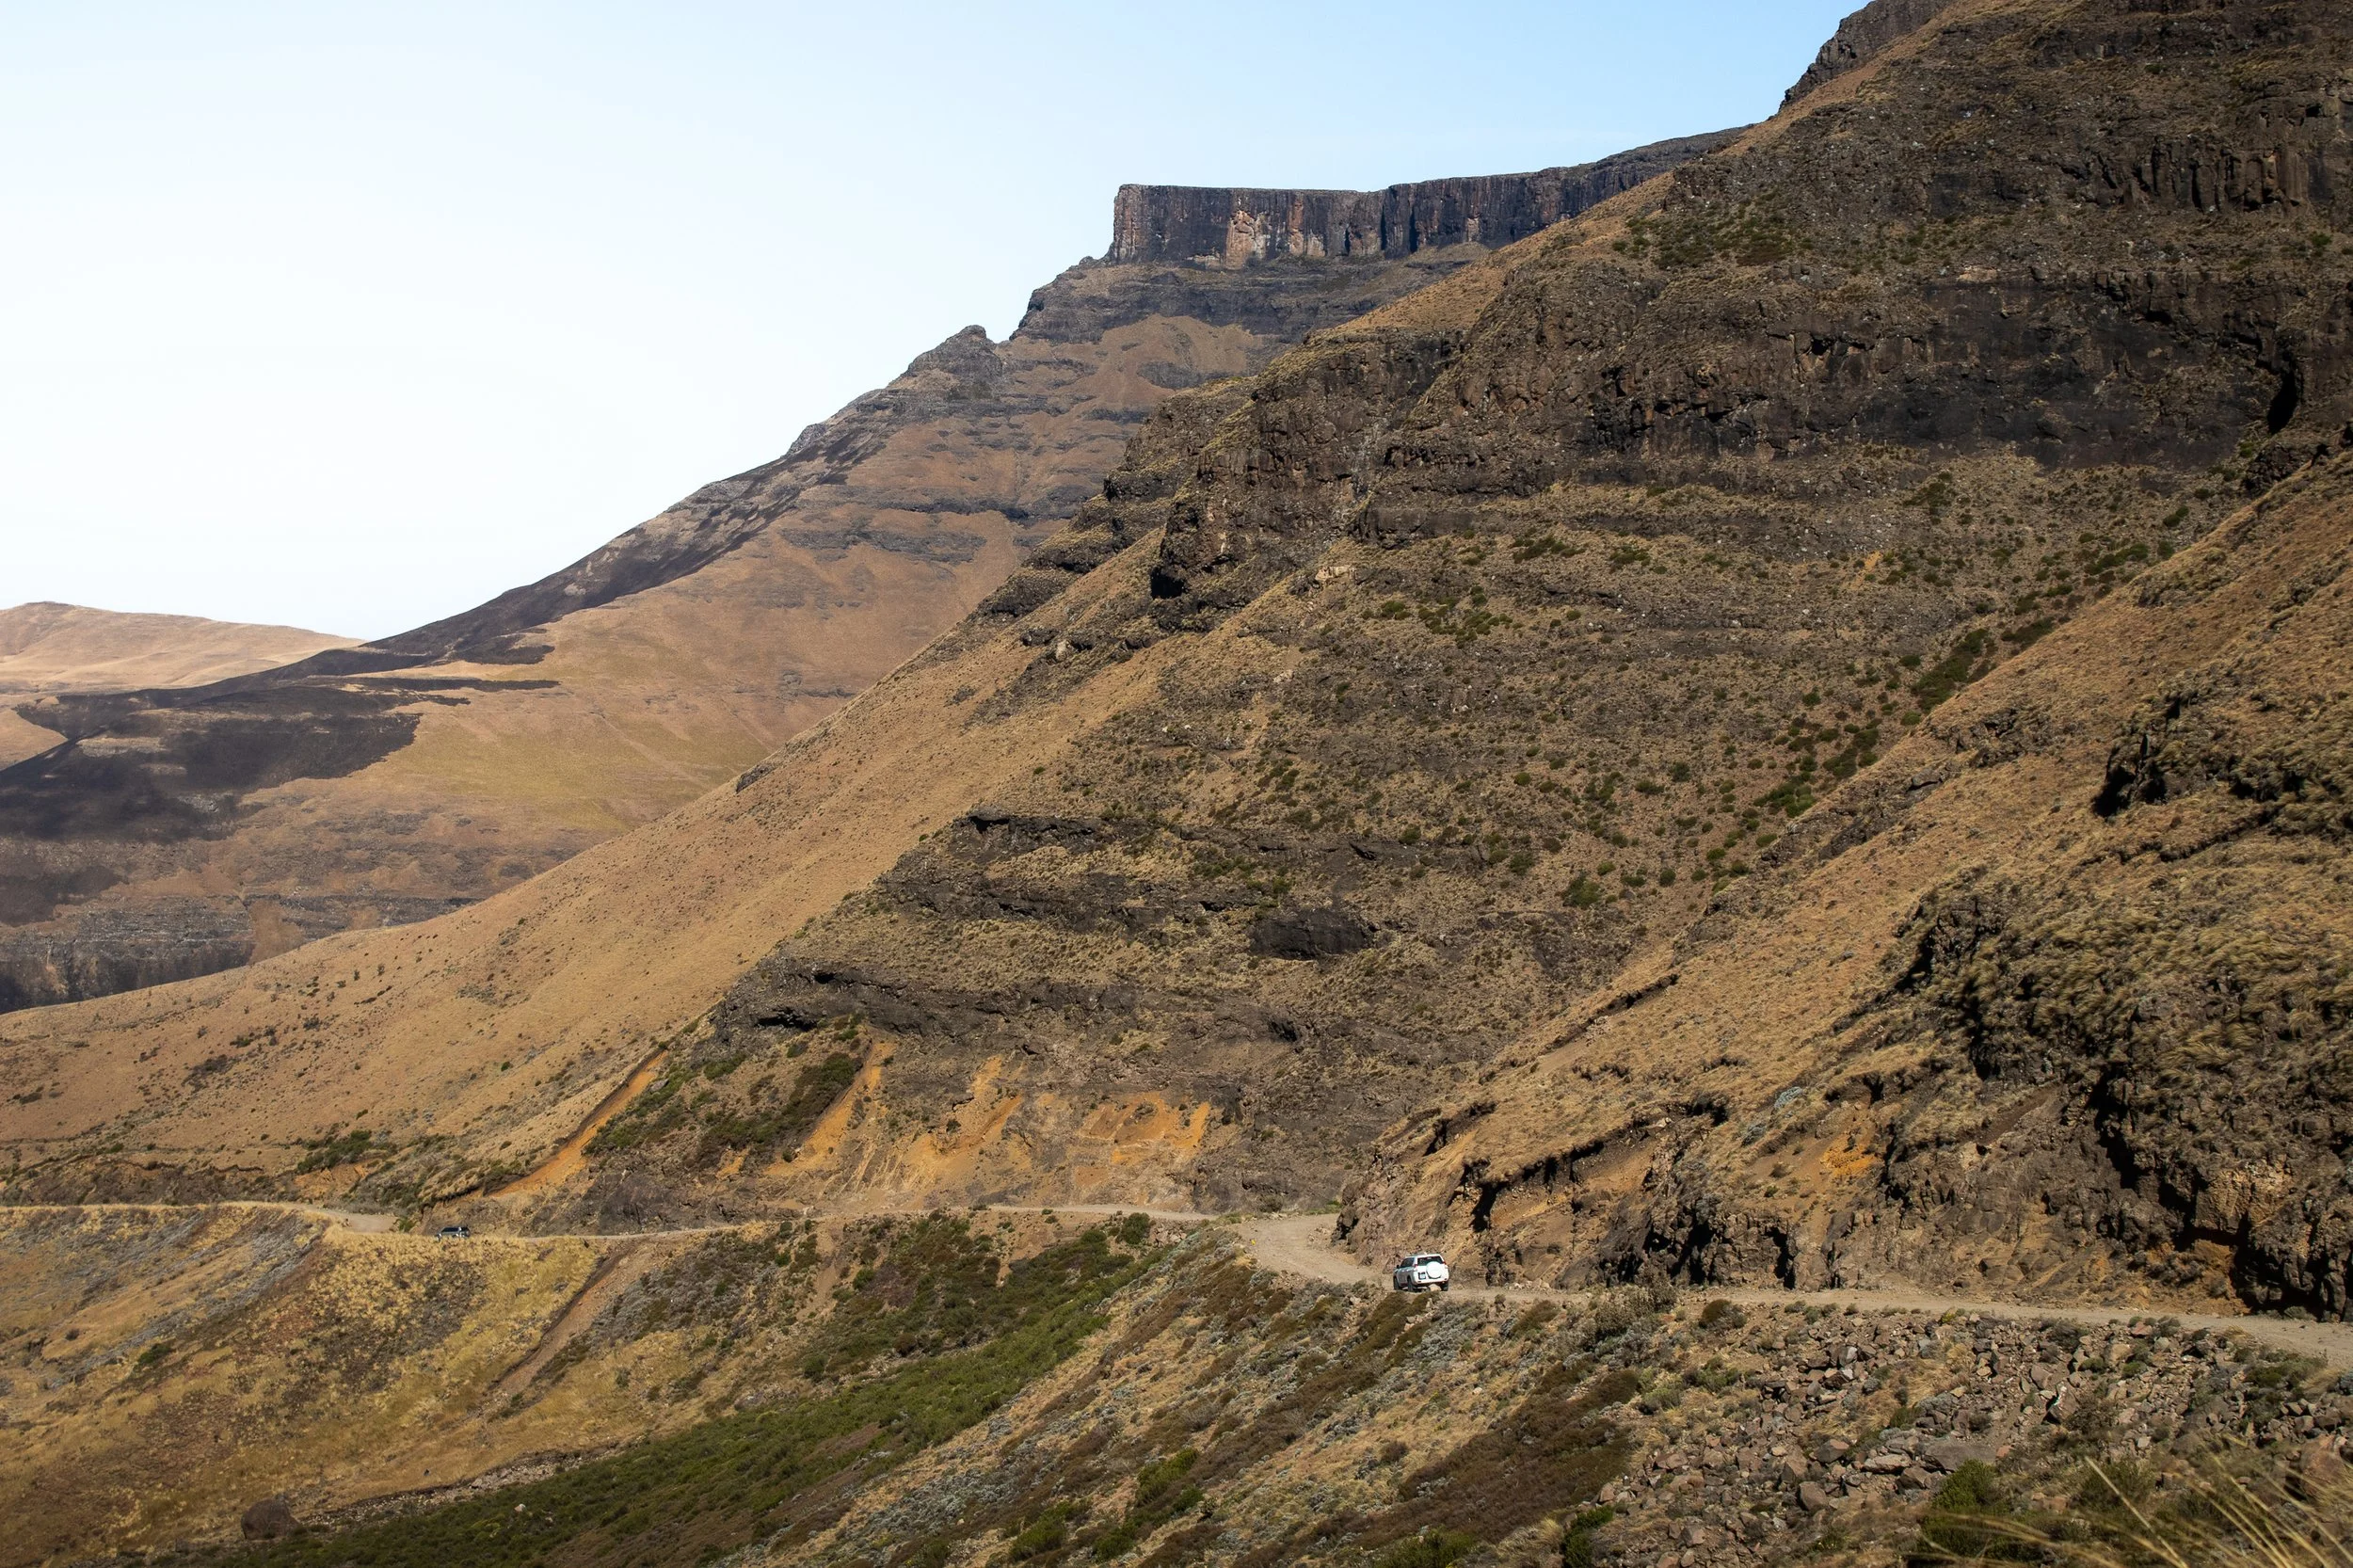
A car carefully drives the perilous Sani Pass
Best Sani Pass Tours (2025)
Still interested, but maybe you're questioning your ability (or sanity) at this point? Don't worry, there are plenty of daily tours leaving from Underberg on the South African side.
Most depart at 9 am and include lunch at the Sani Pass Lodge and a visit to a Basotho Village in Lesotho before descending the Sani Pass and back into South Africa.
Total time is typically between 6 and 7 hours.
Here are a few reliable options to check out (all departing from Underberg):
Private Sani Pass Classic Tour (Top Rated)
First-Hand Experience: What it’s like to drive the Sani Pass
Here's where I need to put a disclaimer, don't do what I did. But, before you pass judgment, let me explain.
As I mentioned earlier in this post, driving the Sani Pass was imprinted into my brain while planning my road trip around South Africa. I made sure to book a 4x4 in Johannesburg, thinking I would be driving up the pass, across Lesotho, and back into South Africa somewhere else.
Spoiler alert: that plan fell apart very quickly.
When I arrived at the rental desk, they told me no 4x4s were available and I would have to wait multiple hours if there was any chance of locating one, but it wasn't guaranteed.
Meanwhile, time is ticking away to check in at the Black Rhino Game Lodge and, at some point, the gates will close and I'll be out of luck.
Once the rental agency sent me to the garage to pick up a BMW, I immediately said no, trying not to laugh at them knowing what I had planned. Their second try yielded a Rav4 that was, at least, AWD and had a downhill lock for the breaks.
At that point a decision needed to be taken. Do I put my foot down and demand a 4x4, wait it out and hope for the best? Or do I stay on track and adjust elsewhere?
Ultimately, I decided to take the Rav4 and reverse my itinerary. Instead of ascending Sani Pass from the South African side, I would enter Lesotho and Caledonspoort and descend.
An overnight stay in Mokhotlong, Lesotho before attempting the Sani Pass
There were a couple of reasons for this. For starters, it's much easier to go down than up. I can see the track better, make safer decisions, and gravity is in my favor when trying to get over rough terrain. Secondly, I took a gamble that if Lesotho border patrol wouldn't check the vehicle's 4x4 capacity. By the time I got back down to South Africa what could they do? I felt I had a better chance of still driving the Sani Pass if I planned it like this.
Again, get a 4x4. The only reason this crazy plan worked, was because I lucked out with a beautiful day and dry conditions.
So, I crossed my fingers, drove across Lesotho, and reached the top of Sani Pass after staying the night in Mokhotlong.
From the warm comforts of the Sani Mountain Lodge, I watched the morning traffic slowly crawl to the top, carefully maneuvering over every rock and boulder, fighting the wind to stay stable.
Why was I doing this again? Is this really a good idea? But, at that point, the only other option was to drive straight back across Lesotho.
After striking a full-on athletic-dad stance to avoid the whipping wind at the overview to snap a few pictures and once the Highest Pub in Africa reached capacity with adrenaline-filled tourists, it was clear that my time was now or never.
I stumbled over to border patrol while fighting the wind and, before I could say anything, the agent looked at my passport, mumbled something under his breath, and handed back my booklet with an exit AND entry stamp, failing to see I had entered Lesotho elsewhere. Instead, he assumed I had just failed to get my passport stamped once at the top, probably a common theme as people are filled with the cathartic feeling of escaping death on Sani Pass.
Either way, my passport now has two entry stamps into Lesotho and only one exit, so I guess it's a good thing it's not an electronic system and no one has bothered to check!
As the car slowly rolled under the "Thank you for visiting Lesotho" sign, that was the moment I realized there was no turning back and I had to lock in.
The hairpin turns and steep decline came quick. The phrase 'slow and steady wins the race' has never been so true. So much so that I let tourist vans pass me on their way back down.
As you'll read later in this post, patience and humility are two keys to success when driving the Sani Pass. Let everyone else go at their pace! In hindsight, one of the best decisions I made was to arrive at Sani Mountain Lodge in the morning and wait for those ascending to finish.
Looking back up towards the Sani Pass, from the South African Side
I can't imagine having to descend with traffic on the way up. Instead, I ran into maybe one car on their way to Lesotho. This allowed me to remain fully focused on white-knuckling the steering wheel and methodically trying to plot every minor adjustment to the tire angles while also not killing the undercarriage of the car because, as a reminder, a Rav4 is generally not equipped for this South African adventure.
After about an hour of riding the gas pedal, the slope leveled out and the anticipation of being on South African soil and paved roads again became real. It wasn't long before the little roadside "Welcome to South Africa" sign came into view and I was greeted by the smiling border patrol.
"How are you," they asked.
"Better now," I replied, laughing as I stomped on the pavement.
The gentleman checked some documents, looked in my passport, and glanced up at me before stamping and returning it. Surely he would be curious about why I have two entry stamps into Lesotho, right?
Instead, as he handed my passport back, he asked "This is a 4x4, right?"
Panic set in. I mumbled some deflection about how it "got the job done".
He smiled unconvincingly, and I drove off into the literal sunset, parking farther down the road to look back on what I had just accomplished.
Long story short, yes the Sani Pass is self-drivable, even for solo travelers like me, but there are some important factors to consider.
It's one hell of an adventure and one that I won't soon forget!
What to do at the top of the Sani Pass
The Drakensberg Mountains are an incredible playground in the wild, full of natural beauty and trails and the Sani Pass drops visitors at the perfect starting point. Whether you plan a round-trip excursion or want to see more of Lesotho, here's what you can do:
Grab a Drink at the Sani Mountain Lodge
Unless you're on a tour, be careful with what "drink" you choose. Remember, at 2,874 meters above sea level, alcohol will have an amplified effect and you do not want to be compromised on your descent down the Sani Pass.
Grab a cappuccino and a warm ham and cheese toastie and marvel out the window at your latest accomplishment as you watch cars struggle up the pass. This is also the optimal spot for some photos from the top of the pass as it looks out across the valley below and surrounding Drakensberg Mountains.
Explore Lesotho's Highlands
Consider continuing into Lesotho's remote interior for a few days before heading back down the Sani Pass to South Africa, or do what I did in reverse and exit Lesotho via Caledonspoort to see both Lesotho's stunning terrain and spend some time in Clarens, SA.
If you choose to traverse the Moutain Kingdom during the winter months, be sure to stop over at AfriSki and carve some turns on the African continent!
Overnight Stay
Wanting to stay overnight at the top of the pass? Here are some options:
Sani Mountain Escape ($-$$)- From 1 May 2025 to 31 August 2025, all accommodation at Sani Mountain Escape will be closed for renovation.
The Highest Pub in Africa remains open, but as such a high-demand destination, it now requires a R100 entrance fee and can often reach capacity at peak hours (get there early).
Sani Lodge and Cottages ($$-$$$) - Nestled at the base of the Sani Pass in South Africa, they have a range of accommodation available ranging from campsites to Rondavels (a traditional, circular hut).
The lodge also partners with Drakensburg Adventures, a Fair Trade Tourism company, making it easy to get in and out of Lesotho.
Sani Stone Lodge ($-$$) - For a more authentic Basotho experience, book a stay at Sani Stone Lodge. A bed in a mixed dorm costs R250, around USD 15, while a twin room with ensuite will run R1,100, or USD 60.
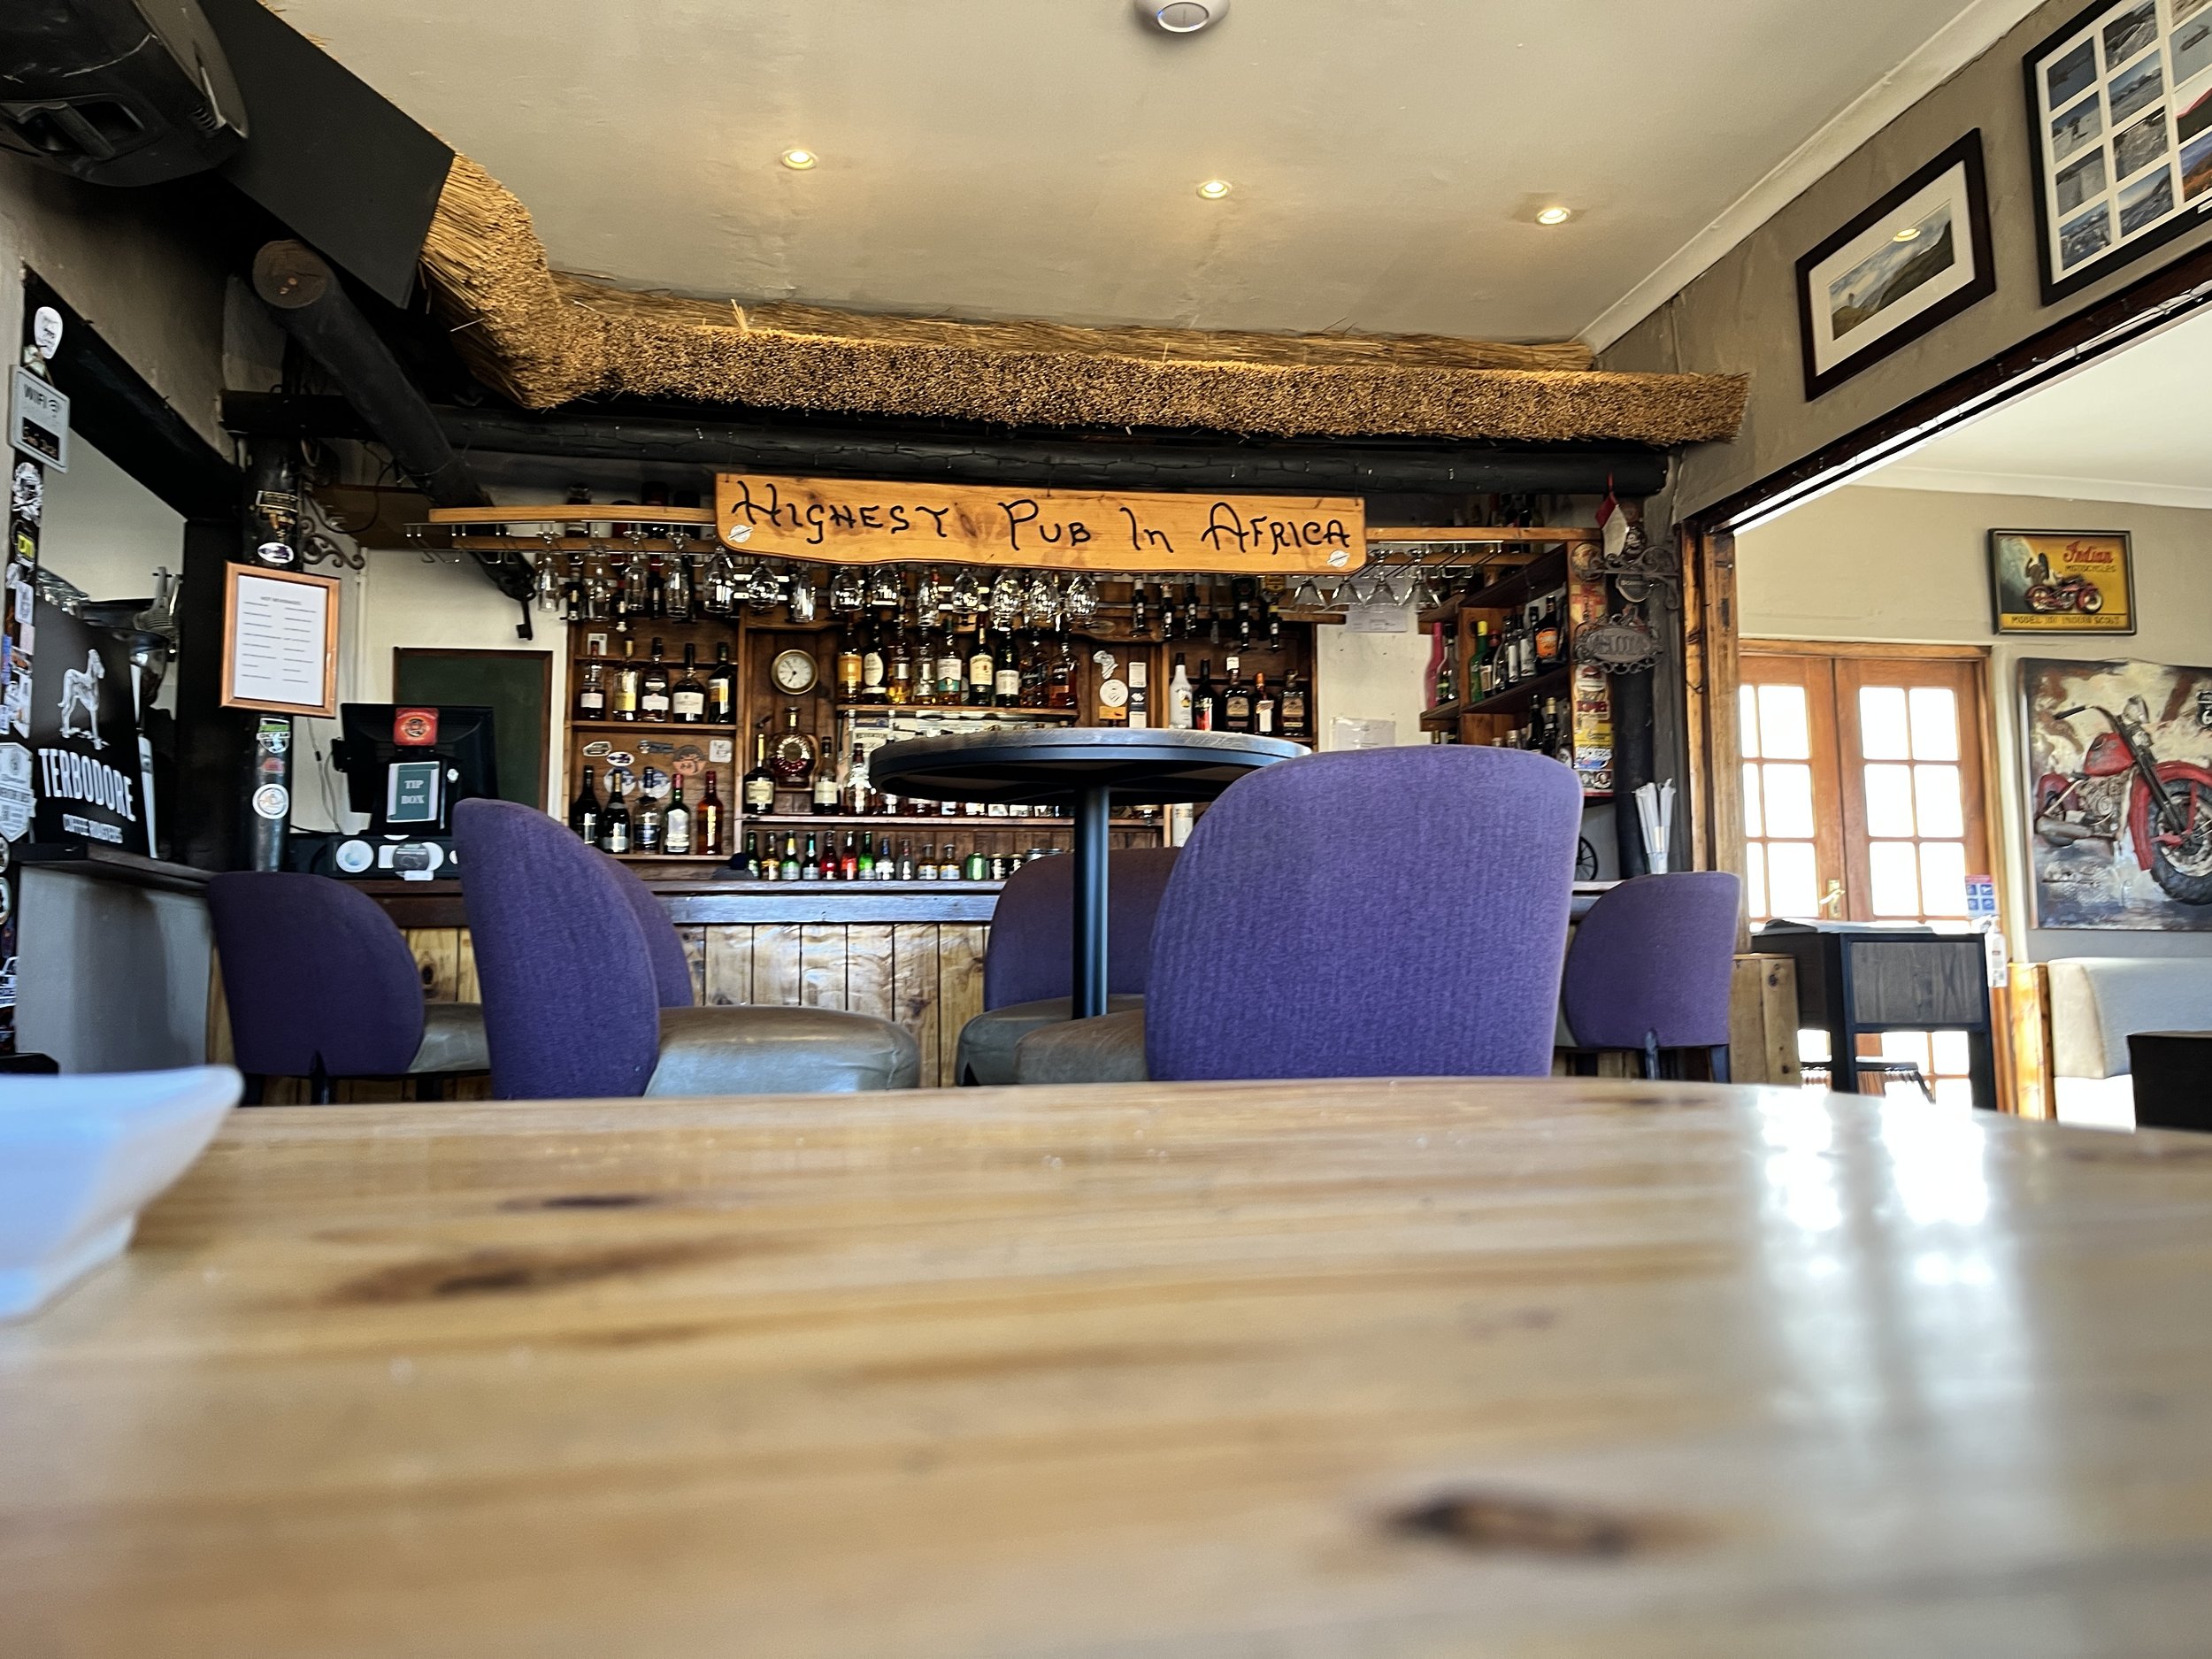
Take a break at the Highest Pub in Africa before heading down the Sani Pass
Top tips for self-driving the Sani Pass
Ready for your adventure?
This is truly one of the most beautiful drives in the world, but it's also one of the most challenging so it's important to come prepared. Here are some of my top tips for self-driving the Sani Pass:
Stick to the 4x4 Rule:
Don't attempt this in a regular vehicle. Seriously. Learn from the error of my ways.
What Goes Up, Must Come Down:
When I was unable to secure the 4x4 I had promised, I figured what goes up, must come down, right? In my experience, it was far easier to maneuver a Rav4 on the descent than the ascent, so I changed my route.
Consider which direction you want to drive and what makes most sense with your experience and expertise.
Less Congestion Equals Easier Maneuvering:
Morning drives offer better visibility and fewer vehicles, but it's also best to be aware of the tours.
I spent my morning sipping cappuccinos at the Highest Pub in Africa, watching the tour convoys haul their customers up and, when the restaurant became congested, that was my time to take off and descend the pass with far less ascending traffic.
How Low Can You Go:
Use low gear, especially on the descent. I cannot express this enough. You will be driving slower than you walk.
Thankfully, the Rav4 had downhill locks to keep sustained pressure on the breaks and limit the speed.
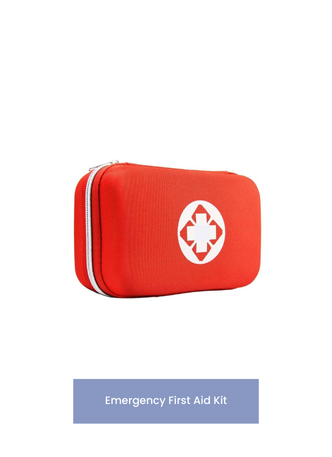
Pack Essentials:
This can mean different things for everyone, but in general consider water, snacks, warm clothing, a spare tire, and a sense of adventure.
Here are some of the things I brought along:
Hand warmer/power bank - Because you never know when you’ll need that little extra bit of warmth (or a flashlight, but hopefully just the heat).
Cotopaxi Fuego Down Vest - A great choice for layering. All the warmth, with more freedom! Add a windbreaker on top and you’re ready to brave the Sani Pass.
Mini Tripod - You won’t want to miss capturing the views, but at the same time it’s crucial to stay focused on the road. Set the tripod up in the car and rest assured you’ll collect some great images and videos.
First Aid Kit - It sounds unnecessary until it’s not and I didn’t want to risk the car rental not providing one, so I brought along my mini first aid kit.
Pocket Knife - Again, you never know when it comes to the Sani Pass. Better to be prepared for the unexpected.


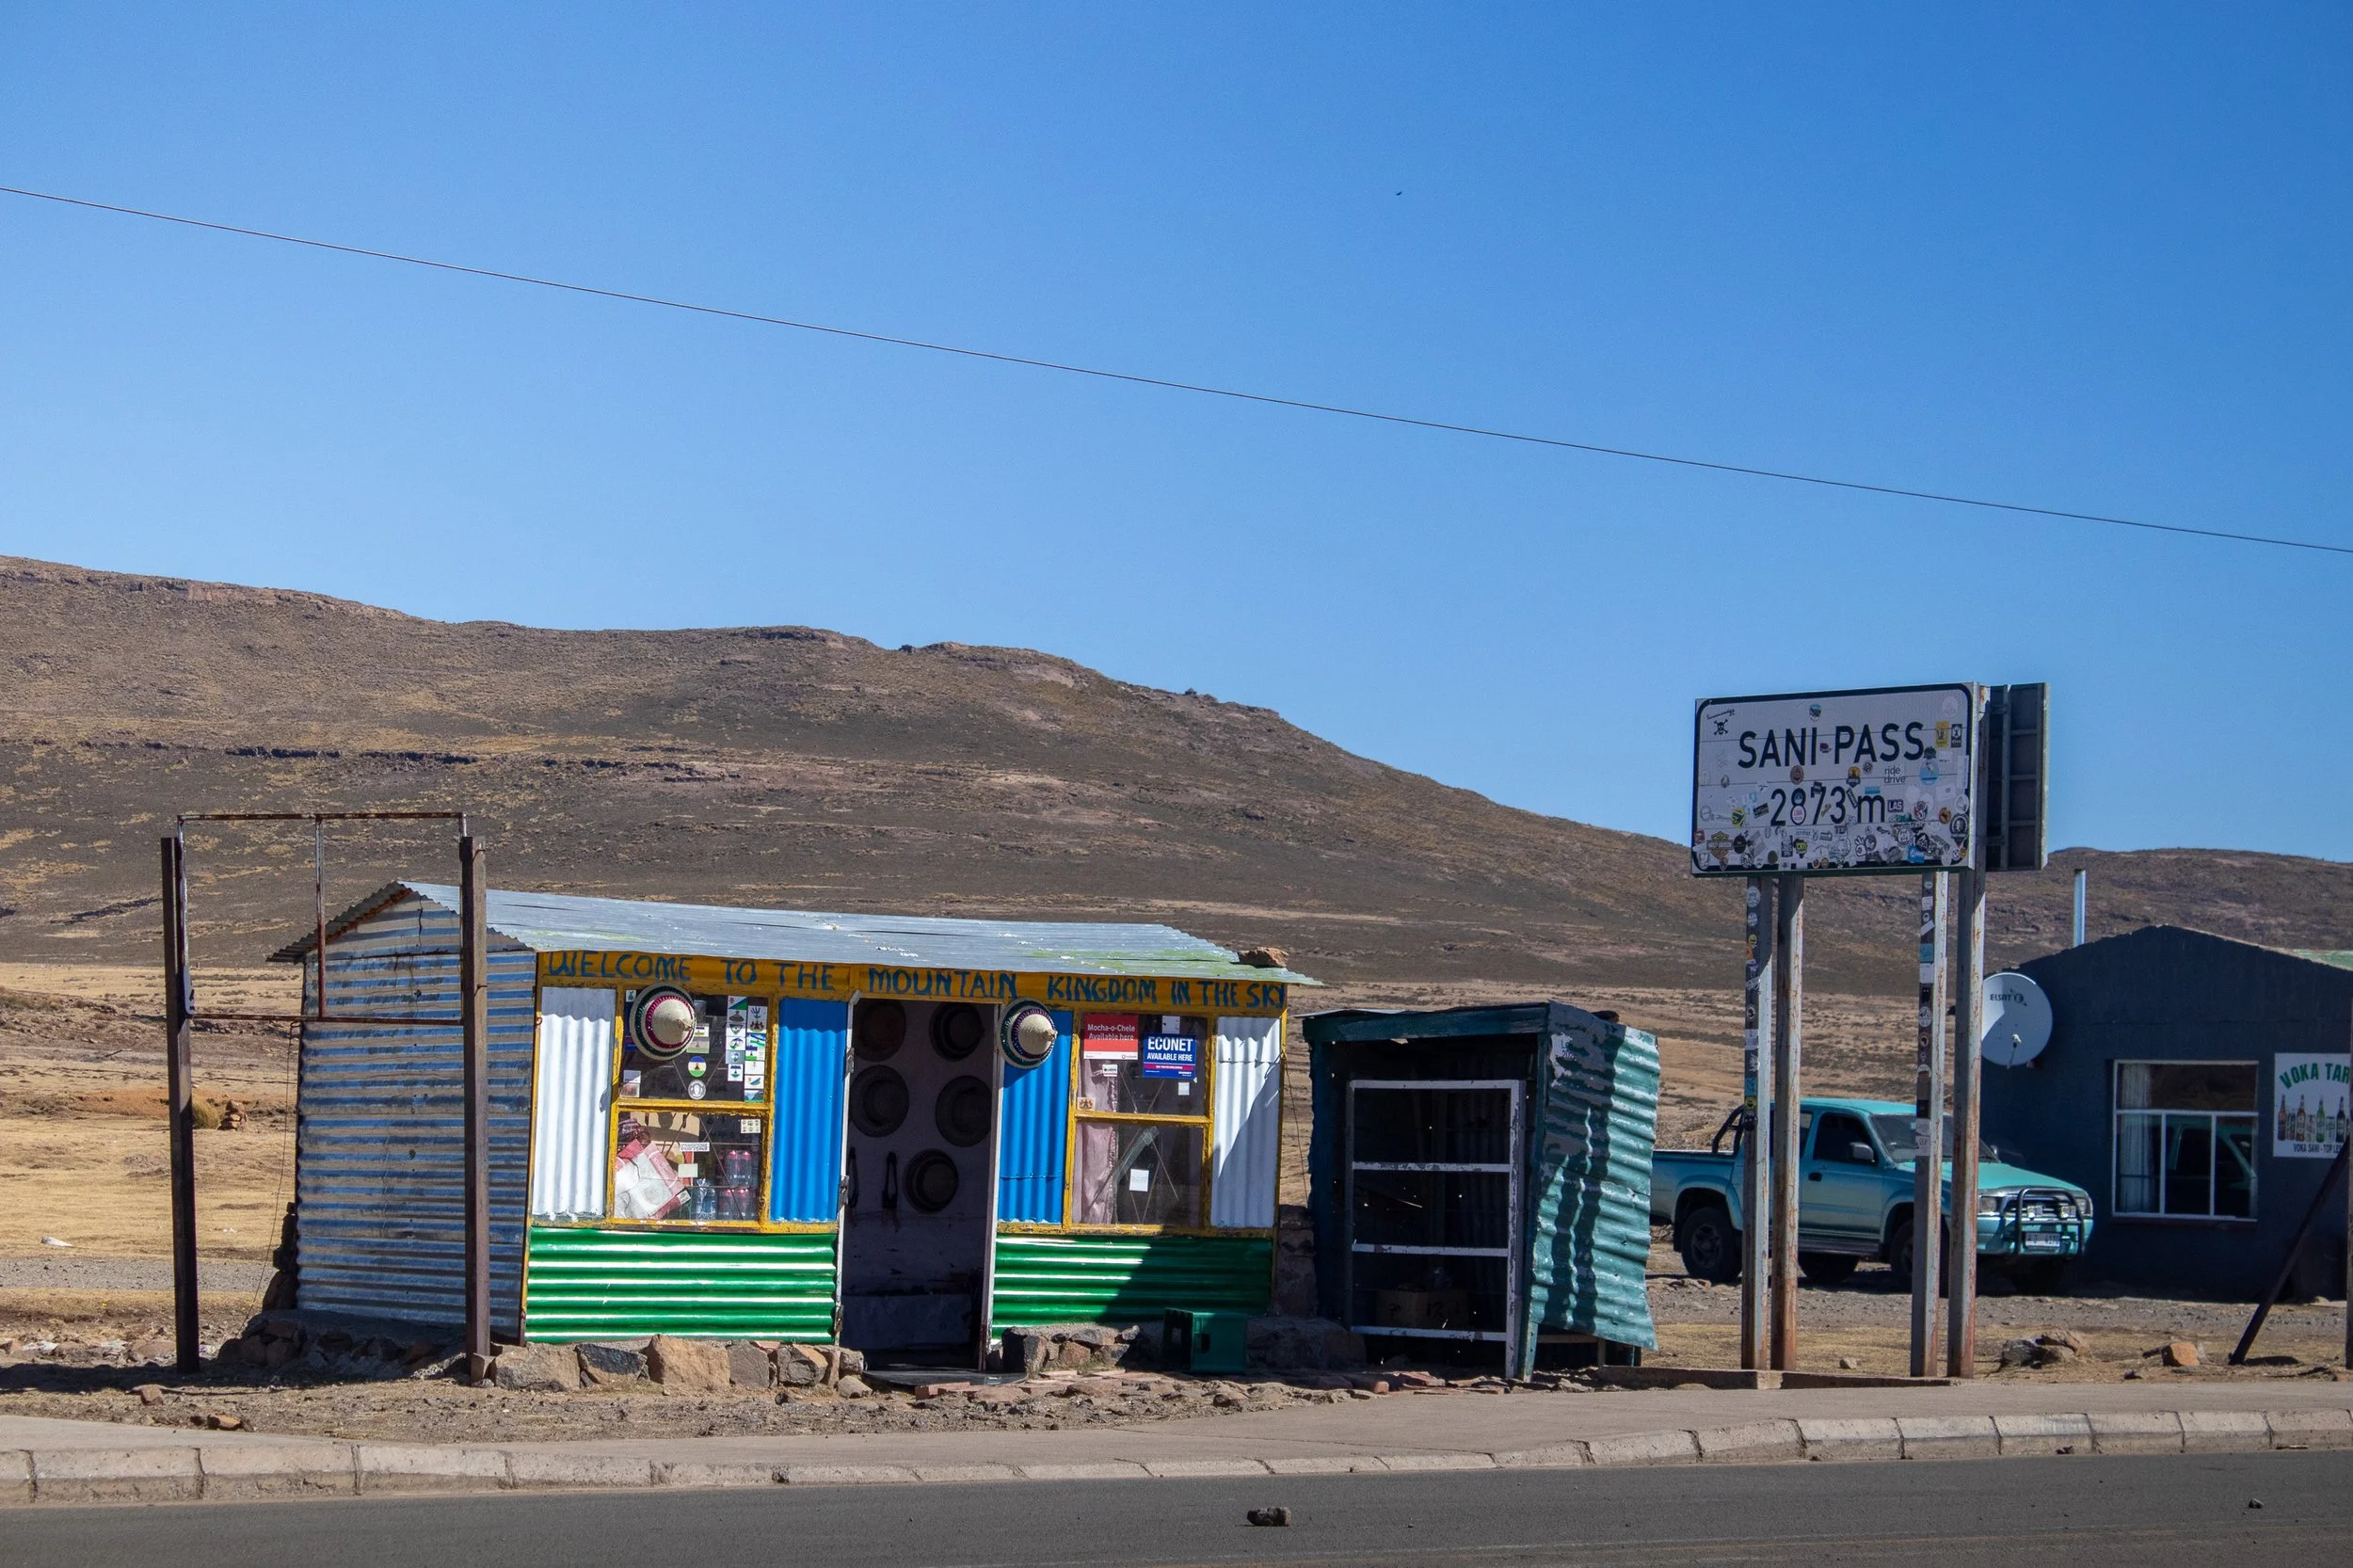
Small shops line the roads at the top of the Sani Pass
Don’t Forget…
Fill the Tank:
Petrol is not readily available on either side of the border, so plan to fill up in Underburg (if coming from South Africa) or Mokhotlong (if arriving from Lesotho).
Don't Feel Pressured:
Yes, self-driving the Sani Pass is one of the most difficult 4x4 road-trips in South Africa, if not the southern part of the continent. It is still a route used by local transportation and many locals drive the road for leisure.
Don't panic if someone is passing you or ascends in 45 minutes. That's fine. Be patient, stick to what you're comfortable with, and trust the process.
Time doesn't matter, but remaining in one piece to share your adventure does!
Carry Cash:
The Sani Mountain Escape is now cashless and, oddly enough, even one or two of the small souvenir shops at the top of the road take cards, but it's best to still carry some cash.
The shop I wanted something from the most, of course, didn't take card and I was left with the memory (not a bad consolation prize, though).
South Africa SIM:
Be sure to use your South Africa SIM card in case of emergency.
If you haven't yet, try the Airalo e-sims. I've quickly grown to love the ease of flipping between SIM cards without fumbling through my bag to find something to open the slot with.
In the event of an emergency, the South African Border number is +27 033 202 1169.
Stamp the passport:
South Africa has a car park to pull into and it's very clear where you need to go. Lesotho, at the top of the Sani Pass, is a bit more relaxed.
Don't forget to walk over to the immigration window on both entry and exit. If you're doing a one-way self-drive, like me, be sure to tell them to avoid a wrongful assumption that you forgot to stamp into the country.
However it does make for a fun story, how I have two passport stamps into Lesotho and only one stamp out!
Sharing is caring! Pin this post for later.


Can you feel the excitement building?
Then it's probably time to book that trip to South Africa and experience the infamous Sani Pass in person!
Grab a drink at the Highest Pub in Africa, marvel at the surrounding geography, swap stories with other adventurers, and have the (literal) ride of a lifetime.
The Sani Pass awaits.
Anything I've missed? Have you visited before? Let me know in the comments below and, as always, stay safe & happy travels!


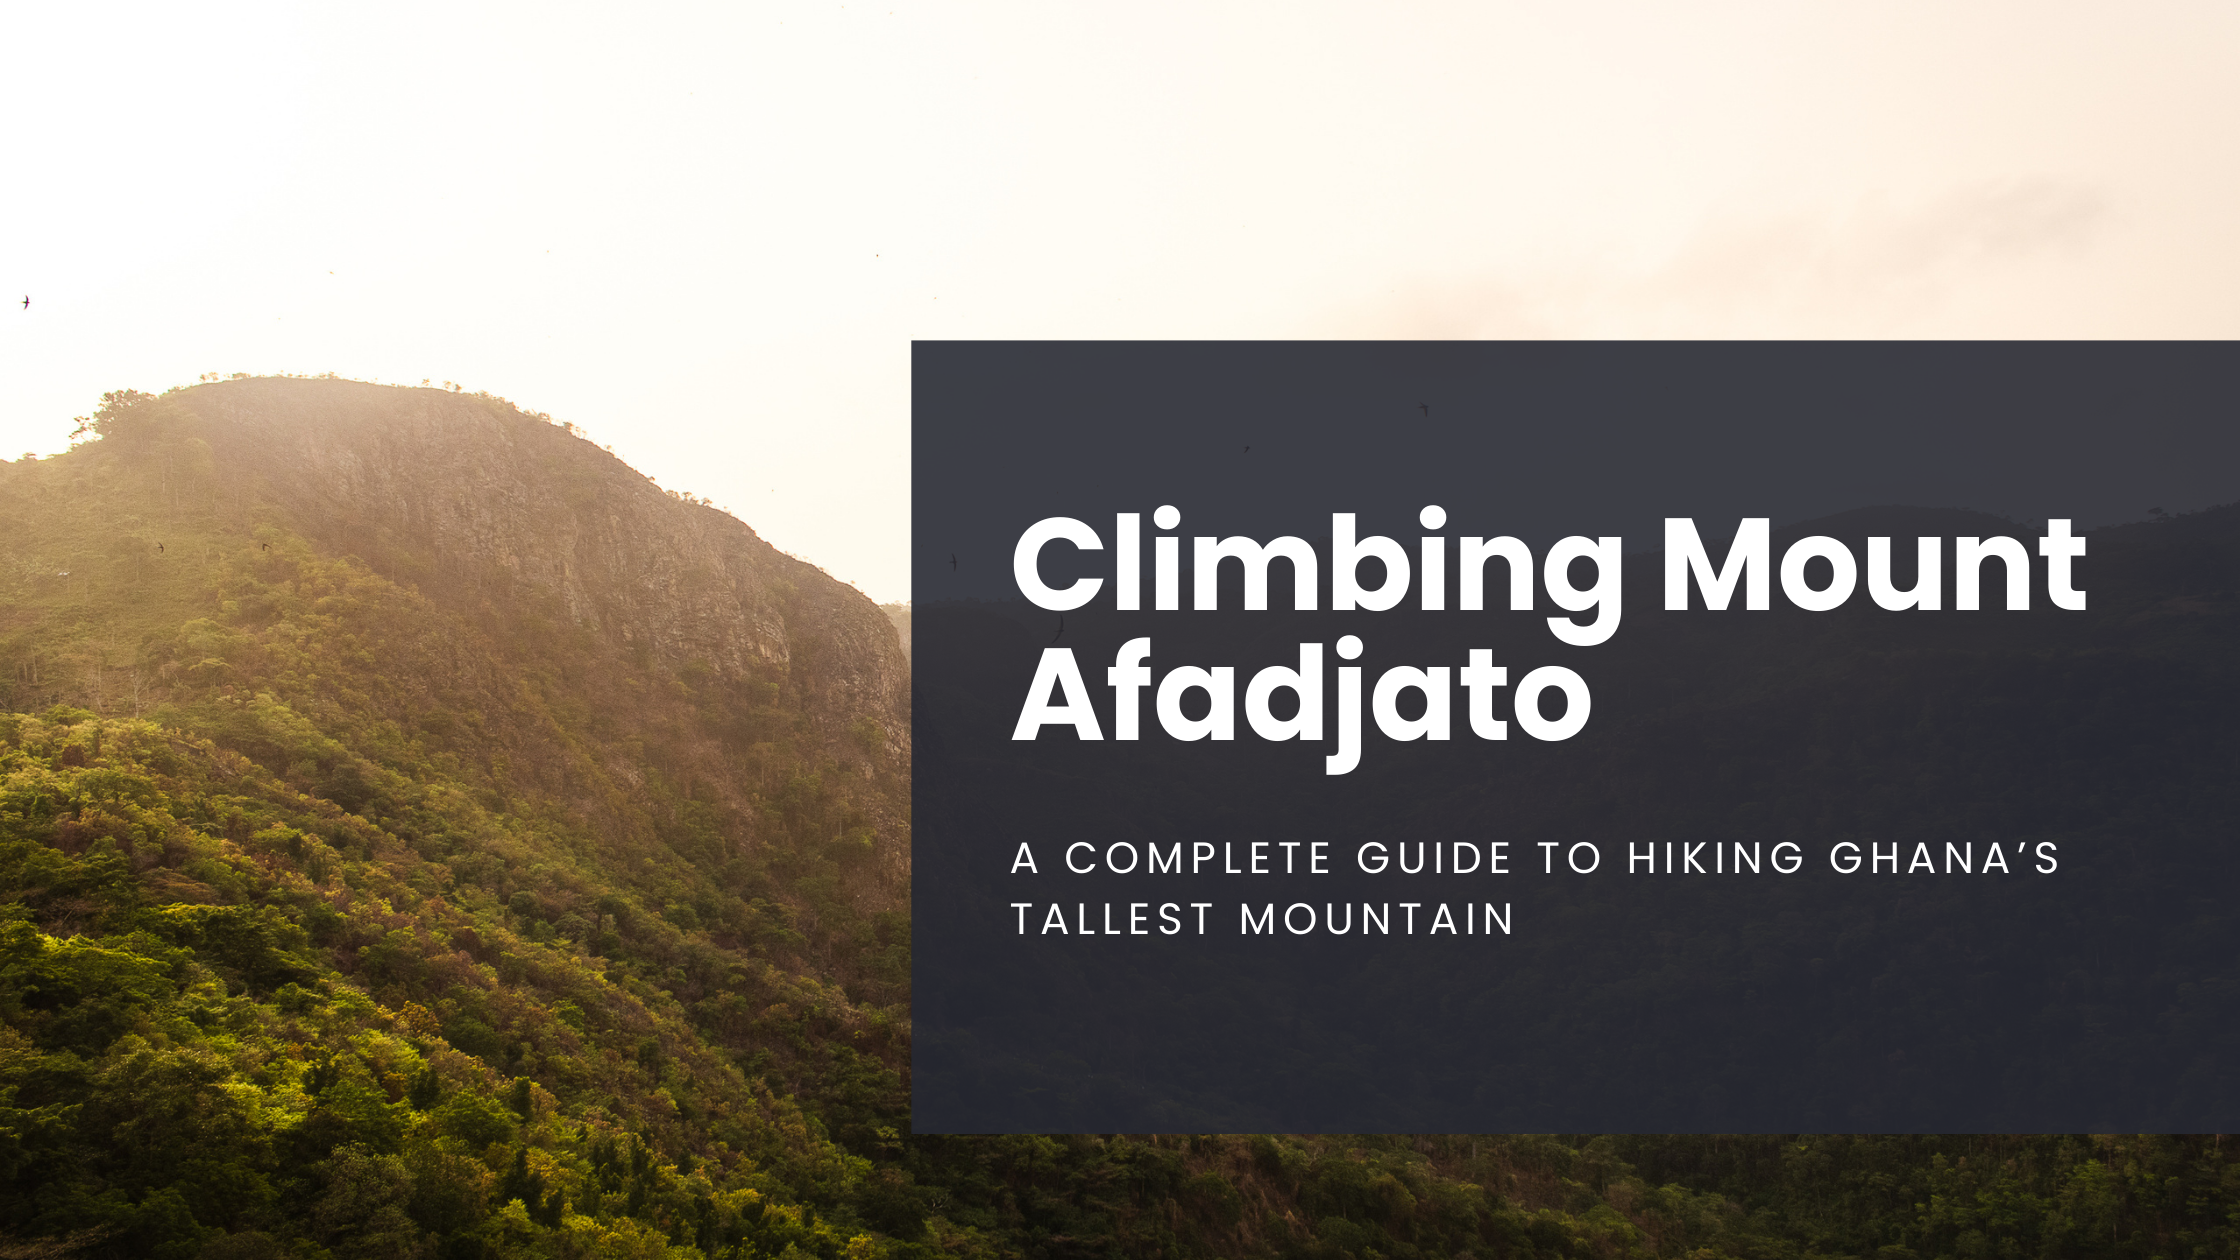
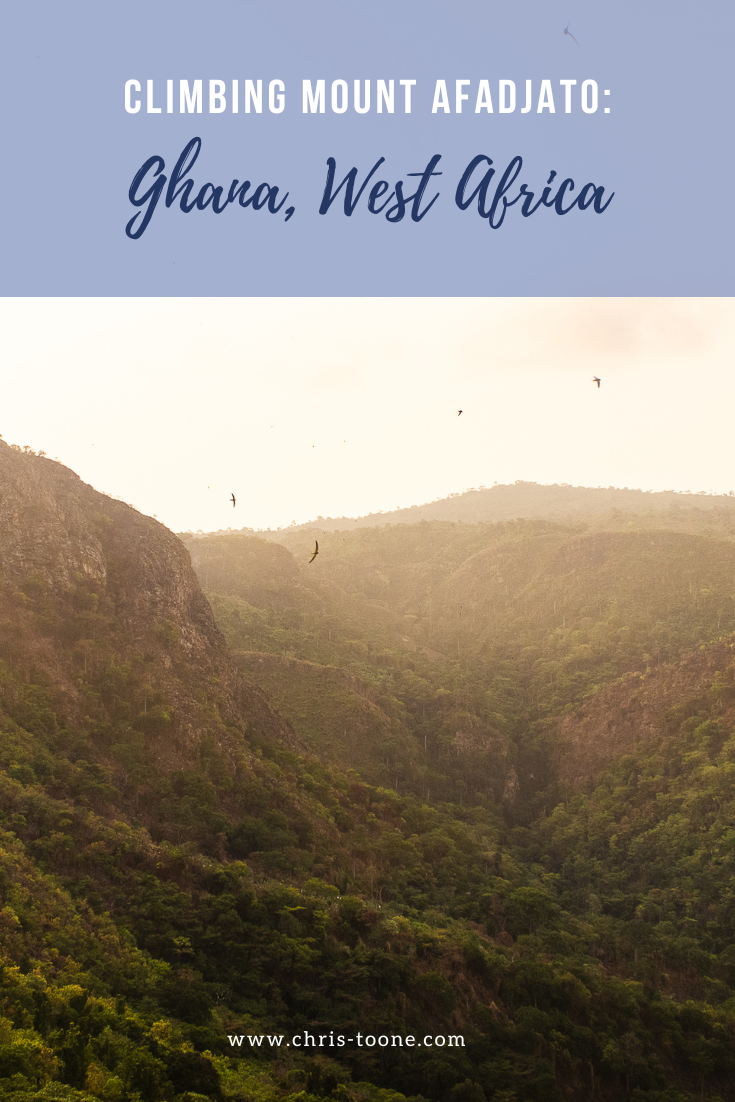
Climbing Mount Afadjato: A Complete Guide to Hiking Ghana's Tallest Mountain
If you’ve been on this blog before, it’s no surprise that this is yet another post about the unbelievable nature of Ghana’s Volta Region. When I first moved to West Africa, I immediately searched for “top places to hike in Ghana,” and every result pointed back to this mountain. So naturally, the surrounding forests and waterfalls of Mount Afadja have become my safe haven…
Note: All information below is accurate as of April 2025
If you’ve been on this blog before, it’s no surprise that this is yet another post about the unbelievable nature of Ghana’s Volta Region.
When I first moved to West Africa, I immediately searched for “top places to hike in Ghana,” and every result pointed back to this mountain. So naturally, the surrounding forests and waterfalls of Mount Afadja have become my safe haven.
Standing at 885 meters (2,904 feet), Mount Afadjato is Ghana’s tallest mountain and offers stunning views of surrounding villages, verdant forests, and even neighboring Togo.
Even more, it’s located in a small, peaceful village with plenty of other trails and waterfalls to explore, including my favorite place to stay: Tagbo Falls Lodge.
Fancy a bit of outdoor adventure on your trip to Ghana? Mount Afadjato is for you!
The view of the Volta Region while hiking Mount Afadjato in Ghana
History and meaning of Mount Afadjato
Mount Afadjato derives its name from the Ewe word “Avadzeto,” meaning “at war with the bush.”
As the Ewe tribe settled here from Togo, they were prone to attacks from wild animals. The village revolted, pushing them back into the mountains but as they reached the forest, they were overcome by plants making them itch.
Afadja, Afadjato, it’s all the same! Another way to break it down in the Ewe language: ‘Afar’ means ‘war’, ‘dja’ means ‘plant’, and ‘to’ means ‘mountain.
Despite the name and history, I’m happy to report that the itching plants have since been tamed and it is very safe to hike the trails (but consider long pants, just in case)!
The area remains a symbol of pride for the Ewe people, as Mount Afadja is believed to house the spirits of their ancestors who look over and protect the surrounding communities.
Interested in exploring more of Ghana’s Volta Region? Check out these posts:
Location and how to get to Mount Afadjato
Nestled in the mountains that border Togo, the trailhead is located in the small village of Liati Wote in Ghana’s Volta Region. Sounds great, right? Here’s how to get to Mount Afadjato:
By Car:
From Accra, take the Accra–Hohoe road and follow signs to Liati Wote. The roads are well-maintained (for the most part), making the drive smooth and scenic as you wind through the mountains. The drive should take ~6 hours.
By Public Transport:
Buses and shared taxis from Accra to Hohoe are affordable. From Hohoe, hire a taxi or take a shared ride to Liati Wote. Another option is to take a tro-tro to Golokwati, but this often requires 2-3 changes in vehicles along the way.
From Nearby Attractions:
If you’re already exploring Wli Waterfalls or Tafi Atome Monkey Sanctuary, Liati Wote is just a short drive away (20-40 min depending on where you’re coming from).
If you don’t want to plan your own transportation, consider one of these pre-arranged tours from Get Your Guide. They depart Accra and sort travel, food, and accommodations along the way!
Pro Tip: Whenever I can, I try to travel around Ghana on Sundays. Everyone is in church and this means much less traffic and dangers on the road – and I get to where I’m going quicker! I have my own car, but your safest option is to either rent or hire a reliable taxi. Although cheap, tro-tros (Ghana’s public transportation) are prone to breakdowns and accidents.
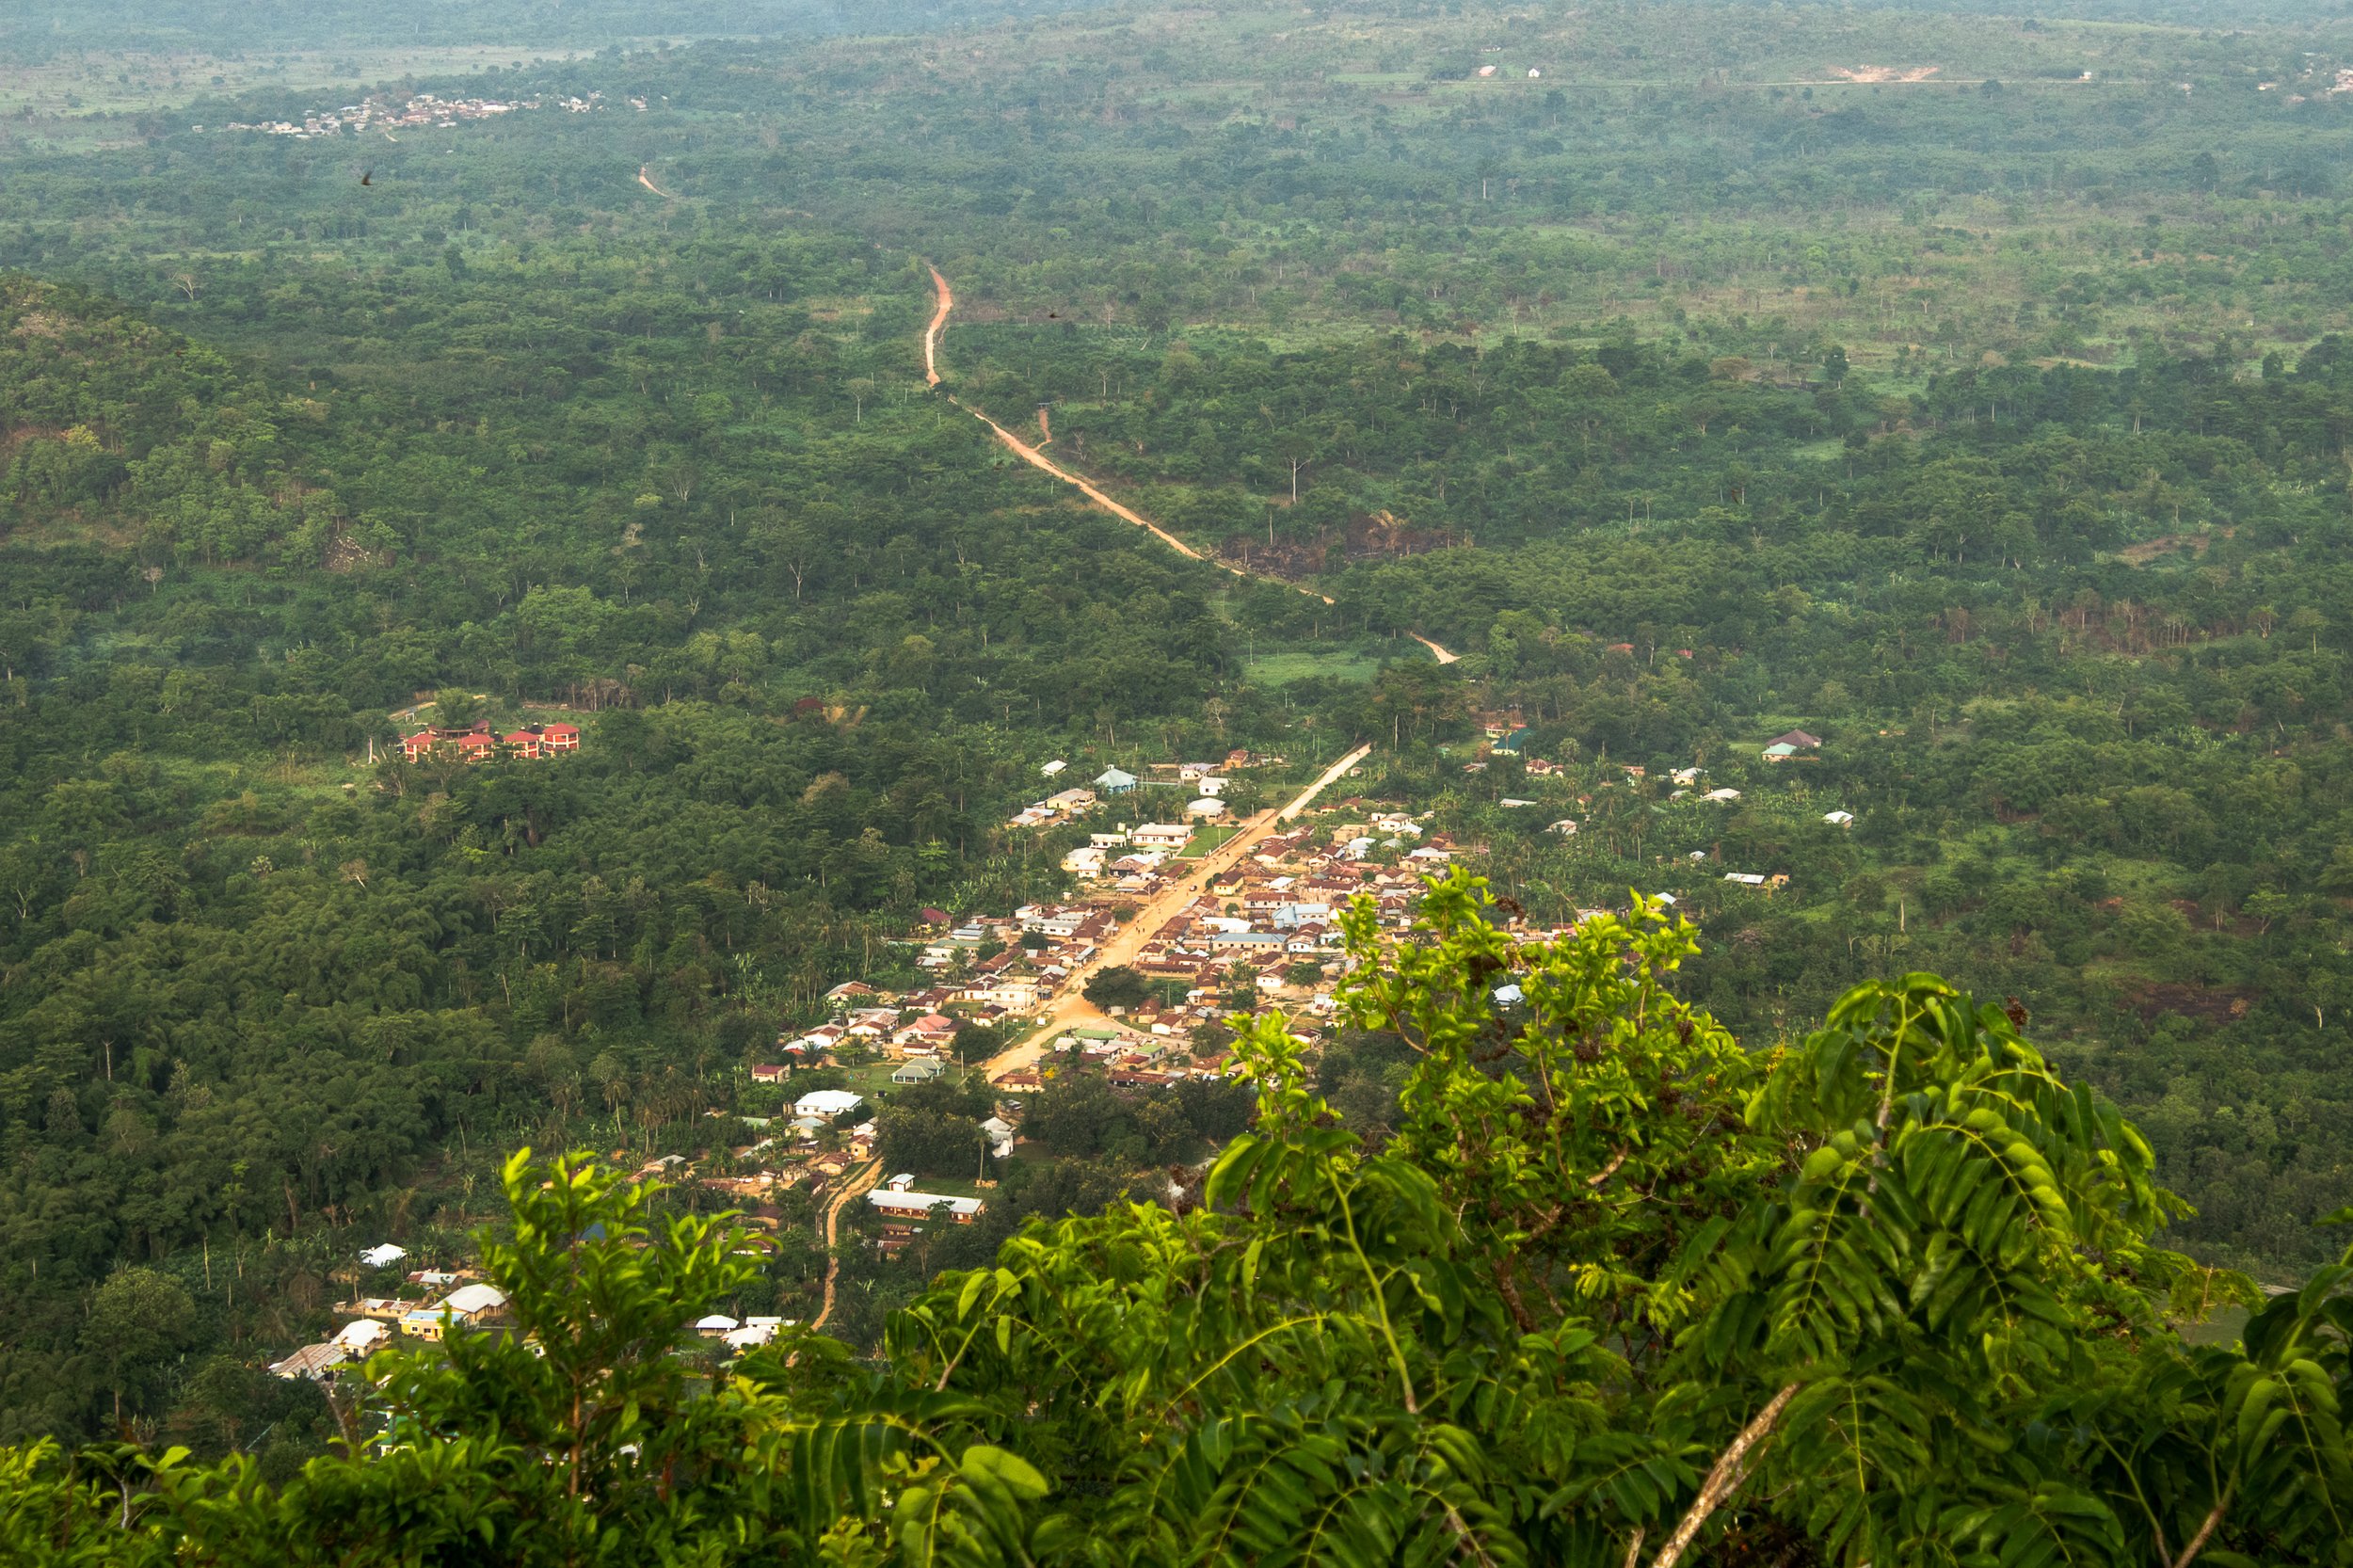
Aerial view of Liati Wote as seen from the trail of Mount Afadjato in Ghana’s Volta Region
Entrance fees & costs
Liati Wote markets itself as a tourist village (don’t worry, I was initially turned off by this as well, but it’s not what we’re used to when we see that tagline).
There are plenty of tours and options available around town, including multi-day hiking, local gin tours, and surrounding waterfalls, but be warned that each one requires a guide (this is used as a means to boost the local economy).
You can find a guide and look at the options available by checking in at the Liati Wote Toursim Office upon arrival, located at the base of Mount Afadja on the main road of town and typically open 8am, daily.
The tourism office accepts cash only, so come prepared as there are no ATMs within a one hour radius.
Hiking only Mount Afadjato requires a modest fee:
Ghanaians: 25 GHS (USD 1.60)
Non-Ghanaians: 50 GHS (USD 3)
You can add on and combine with a trip to Tagbo Falls (GHS 40/USD 2.50 for Ghanaians, GHS 80/USD 5 for non Ghanaians), or continue past Mount Afadjato to Mount Aduadu (GHS 70/USD 4.50 for Ghanaians, GHS 100/USD 6.50 for non-Ghanaians).
A Note on Guide Fees: Guides for hiking Mount Afadjato and surrounding tours don’t get paid from trail fees, so come prepared to tip them for their service to support their income. For this hike, GHS 50-100 is reasonable (USD 3-6).
The trail fees do, however, contribute to maintaining the paths and supporting local community projects, such as their recycling initiative – something that is unique to this village!
Pro Tip: There are many guides and not many visitors, meaning it’s important to find one of quality. The only one I’ll use is Faith (+233 55 083 0914). I will meet him at the reception office, pay the entrance fee, give him a tip, and often he’ll let me take myself on the trail!
What to Expect: Hiking Mount Afadjato
Although Mount Afadjato is considered a popular tourist destination in Ghana, let me be direct with you: It’s not for everyone. The trail starts on a flat path, but quickly becomes a leg burner, what feels like a perpetual stair climber machine.
Most people will tell you it takes, on average, around 2 hours round trip, which I found to be accurate, but it was by no means easy. It’s important to wear sturdy shoes and bring plenty of water and fuel.
Along the way you’ll come across convenient rest stops with scenic views, offering the perfect spot to recharge your legs and observe surrounding wildlife.
Did you know that Ghana is home to over 860 species for butterflies? Don’t worry, I didn’t before moving here, but spotting them is one of my favorite parts of spending time in the Volta Region!
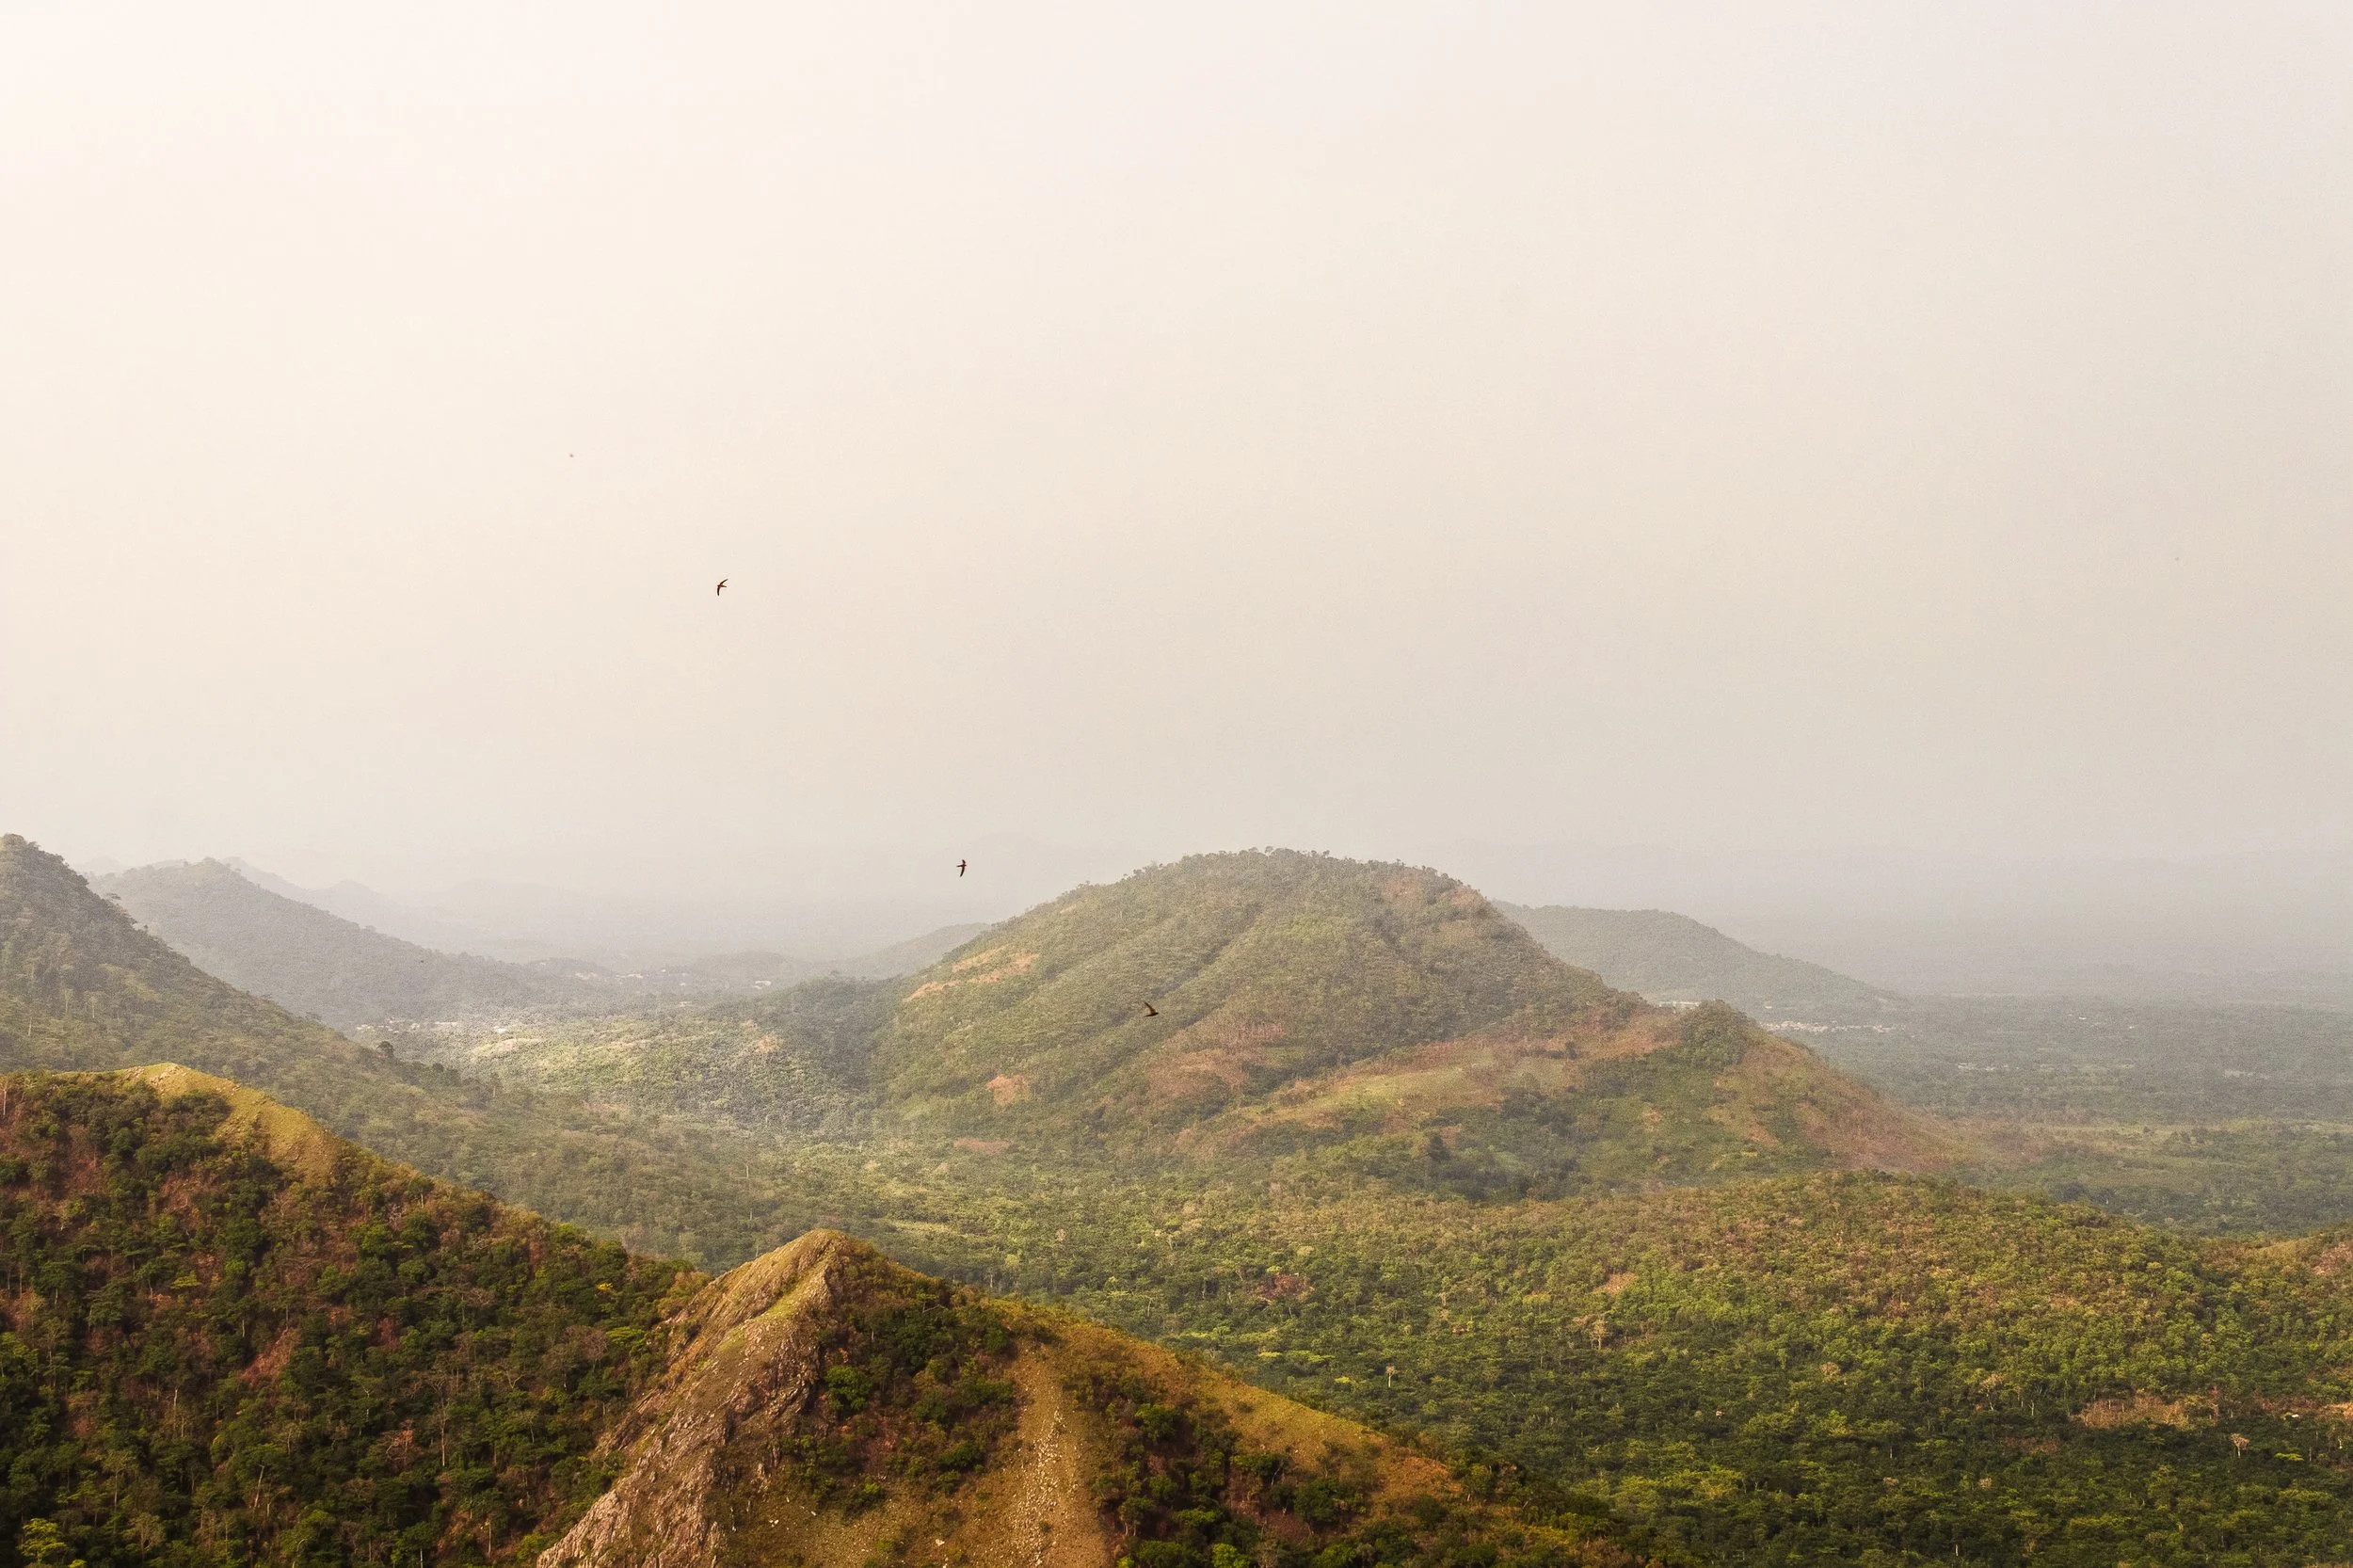
Finally, after 45min-1 hour you’ll reach the peak and soak up the sweeping views across Lake Volta, neighboring Togo, and Liati Wote below. You may even spot Togolese coffee farmers wandering the foohills!
The Volta Region is where both Kawa Moka and Jamestown, two of Ghana’s top coffee companies, produce their beans.
For the most part, the trail is well preserved and shorts and t-shirt will suffice, but if you’re planning to go beyond the peak to nearby Mount Aduadu as I did, be sure to wear long pants.
Reaching this secondary mountain requires bushwhacking lesser-frequented pathways and it’s not uncommon to come across snakes and biting ants.
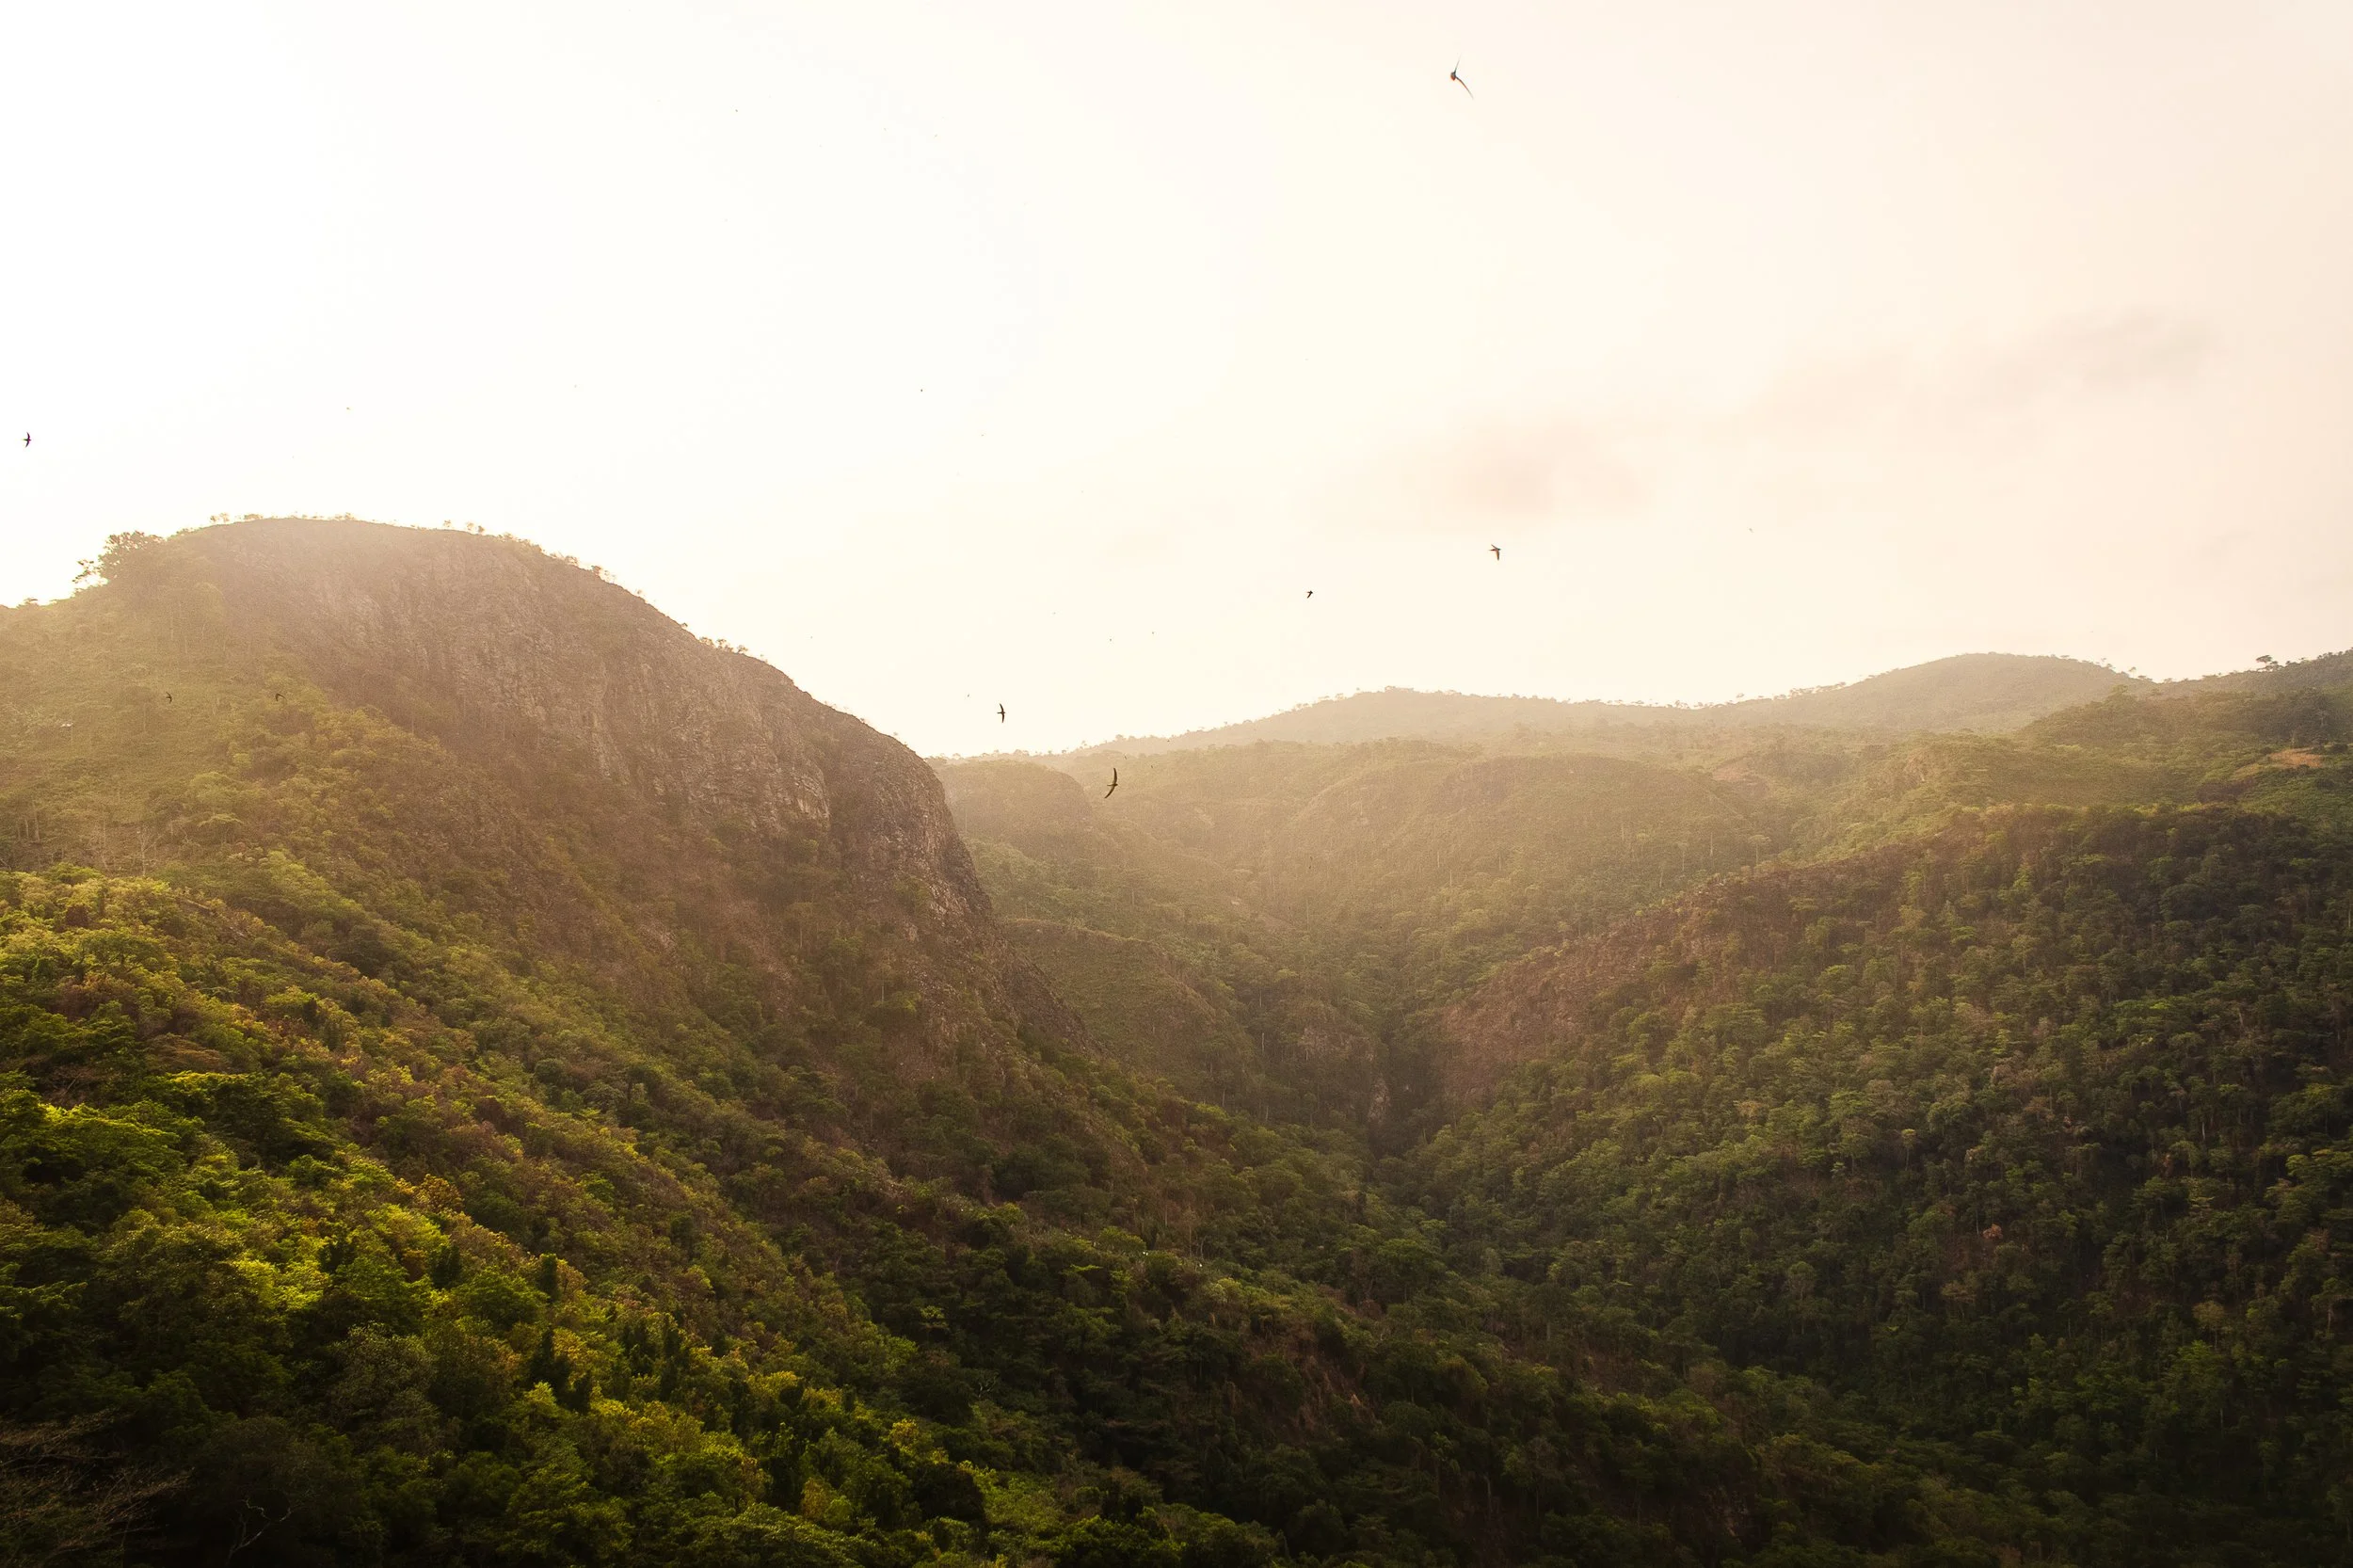
View of Mount Aduadu at sunrise, shot from the peak of Mount Afadjato
Nearby attractions
Tagbo Falls:
Located near Mount Afadjato, this tranquil waterfall is an excellent spot to cool off after your hike. I’d recommend climbing Afadja in the morning, and then continuing on (for an additional trail fee) to Tagbo Falls. It’s a flat, short, 40min hike and the trailheads start from the same location! It’s one on my favorite places to spend an afternoon swimming.
Wli Waterfalls:
Ghana’s highest and most famous waterfall is just a short drive away (20min) and offers another fantastic nature experience. Similar to Tagbo, this short trail is accessible to everyone and cooling off in the pool under the cascading water is a spiritual experience.
Amedzofe Village:
Amedzofe is Ghana’s highest-elevated settlement, originally established by the Germans during colonial times. The area offers cooler weather, more waterfalls, a better (and less frequented) canopy walk than Kakum National Park, and a small climb to the cross on top of Mt. Gemi. If coming from Ho, you’ll pass the turnoff for Amedzofe along the way (less than 1 hour from Liati Wote).
Best time to hike Mount Afadjato
The Harmattan, or dry season, (November to April) is the best time for hiking, as the trails are less muddy. However, the dust being blown from the Sahara can significantly reduce visibility (although makes for beautiful, glowing sunrise).
The rainy season (May to October) brings lush greenery, making the scenery even more vibrant, but the steep trail can get slippery, so be sure to wear proper footwear and plan accordingly.
Finally, beat the heat and hike Mount Afadjato in the morning. If arranged ahead of time, your guide can meet you at the tourist office before sunrise and you can start on the trail before fighting the humidity.
Top packing tips for your hike to Mount Afadjato
Shoes are essential. Especially if planning to visit during rainy season. The trail is steep and can quickly become slippery, so it’s safest to have good treads.
Sunscreen and insect repellent. The trail itself traverses dense forest, and the peak is completely exposed so you’ll have to plan for all elements. After years of sweating off my sunscreen in the humidity, I’ve finally switched over to using a stick instead and it’s been a gamechanger!
A good camera. The top of Mount Afadjato provides some of the most stunning views in the area. If you’re into landscape photography, this is the place to come. Personally, my Canon 80d has been my best travel companion over the years.
A quality dry bag. Hiking in West Africa can be unpredictable, especially during the rainy season. I’ll always bring my Marchway dry bag to protect my valuables.
Don’t forget a quick-dry towel. Whether caught in the rains or planning to add on a visit to Tagbo Falls, a lightweight towel is the perfect item to add to your pack.
Water and Fuel. Regardless of season or time of day, you’ll work hard to get to the top of Mount Afadjato. Come prepared with plenty of water and snacks. There aren’t many options available in town, but you can always also your guide where to pick up supplies.
A reliable SIM card. Traveling outside of Accra is never easy and it pays to have a reliable in-country SIM. Recently, I’ve been using Airalo on my travels and, although I enjoy collects SIM cards, they take away the stress of losing it or always looking for a pin to open the port!


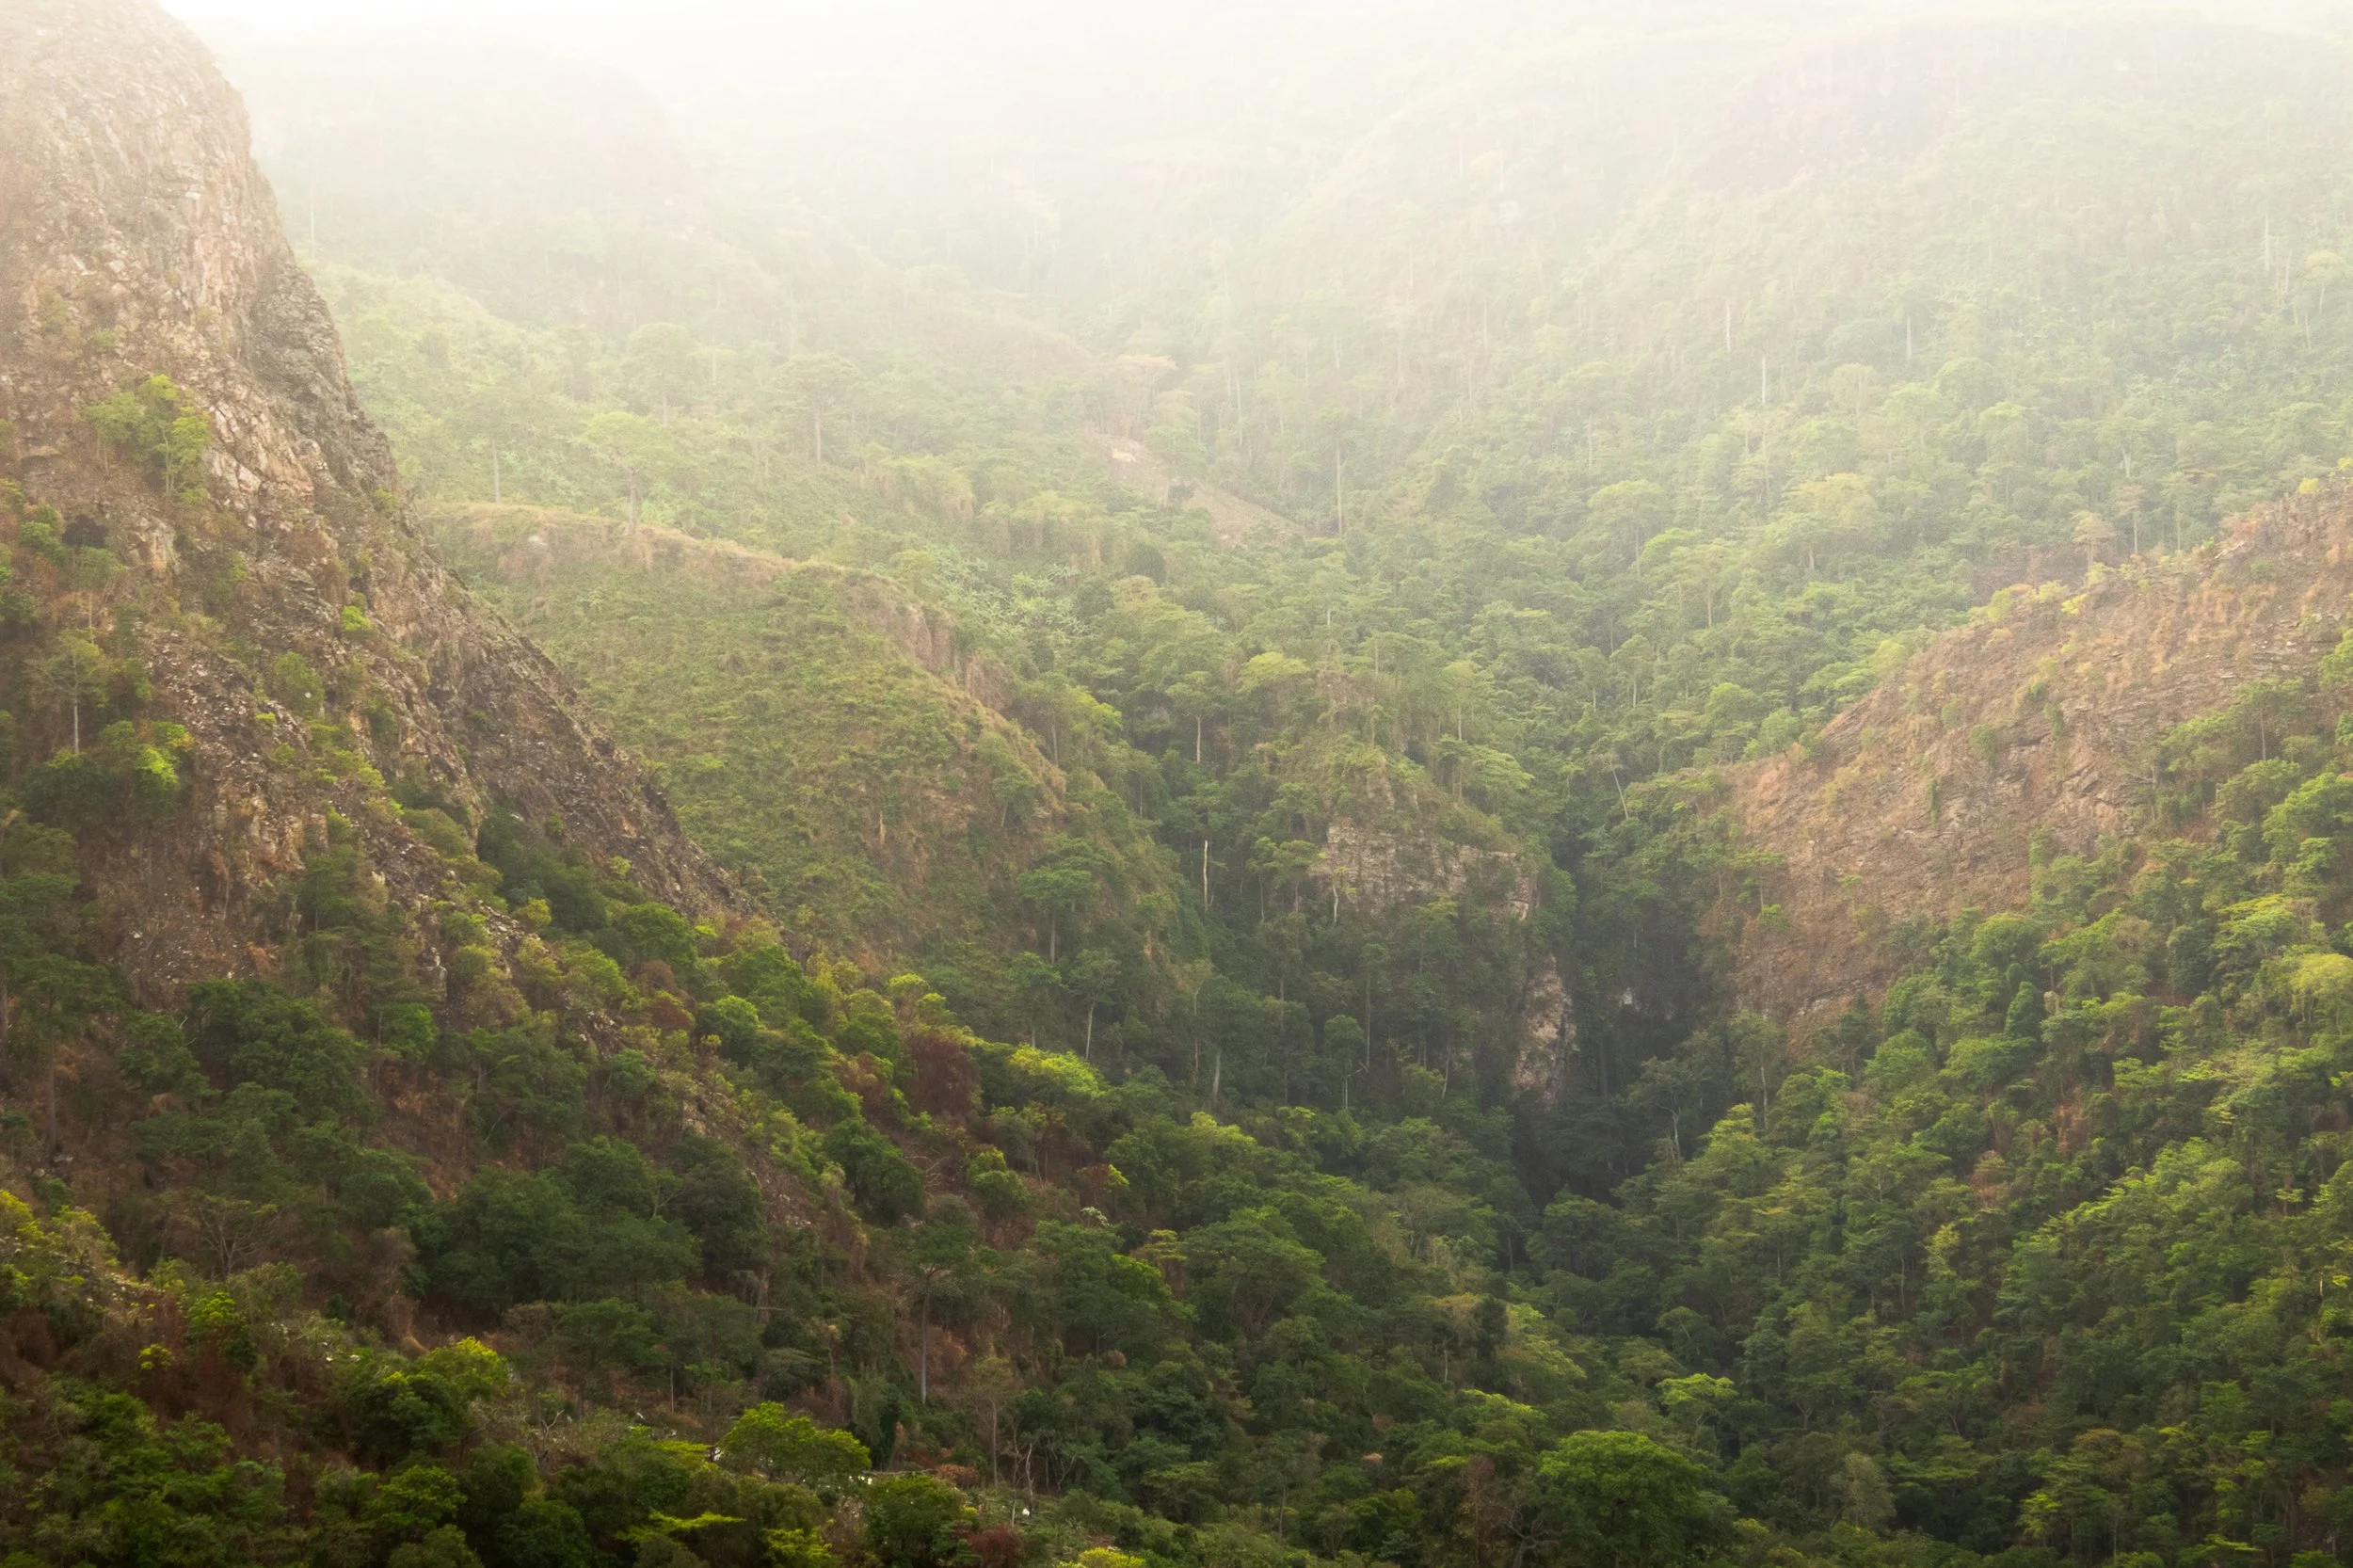
A view into the valley below, shot from the peak of Mount Afadjato
Standing on top of Ghana’s tallest mountain at sunrise is a scene I won’t soon forget. Accra is great, but experiencing the breathtaking nature in the Volta Region is a must during any visit to Ghana, and Liati Wote is the perfect place to base.
Explore, rest, and walk away refreshed from your time in these stunning mountains.
Have you conquered Mount Afadjato or plan to visit? Share your experience in the comments below. As always, stay safe and happy travels!
Sharing is caring! Pin this post for later.


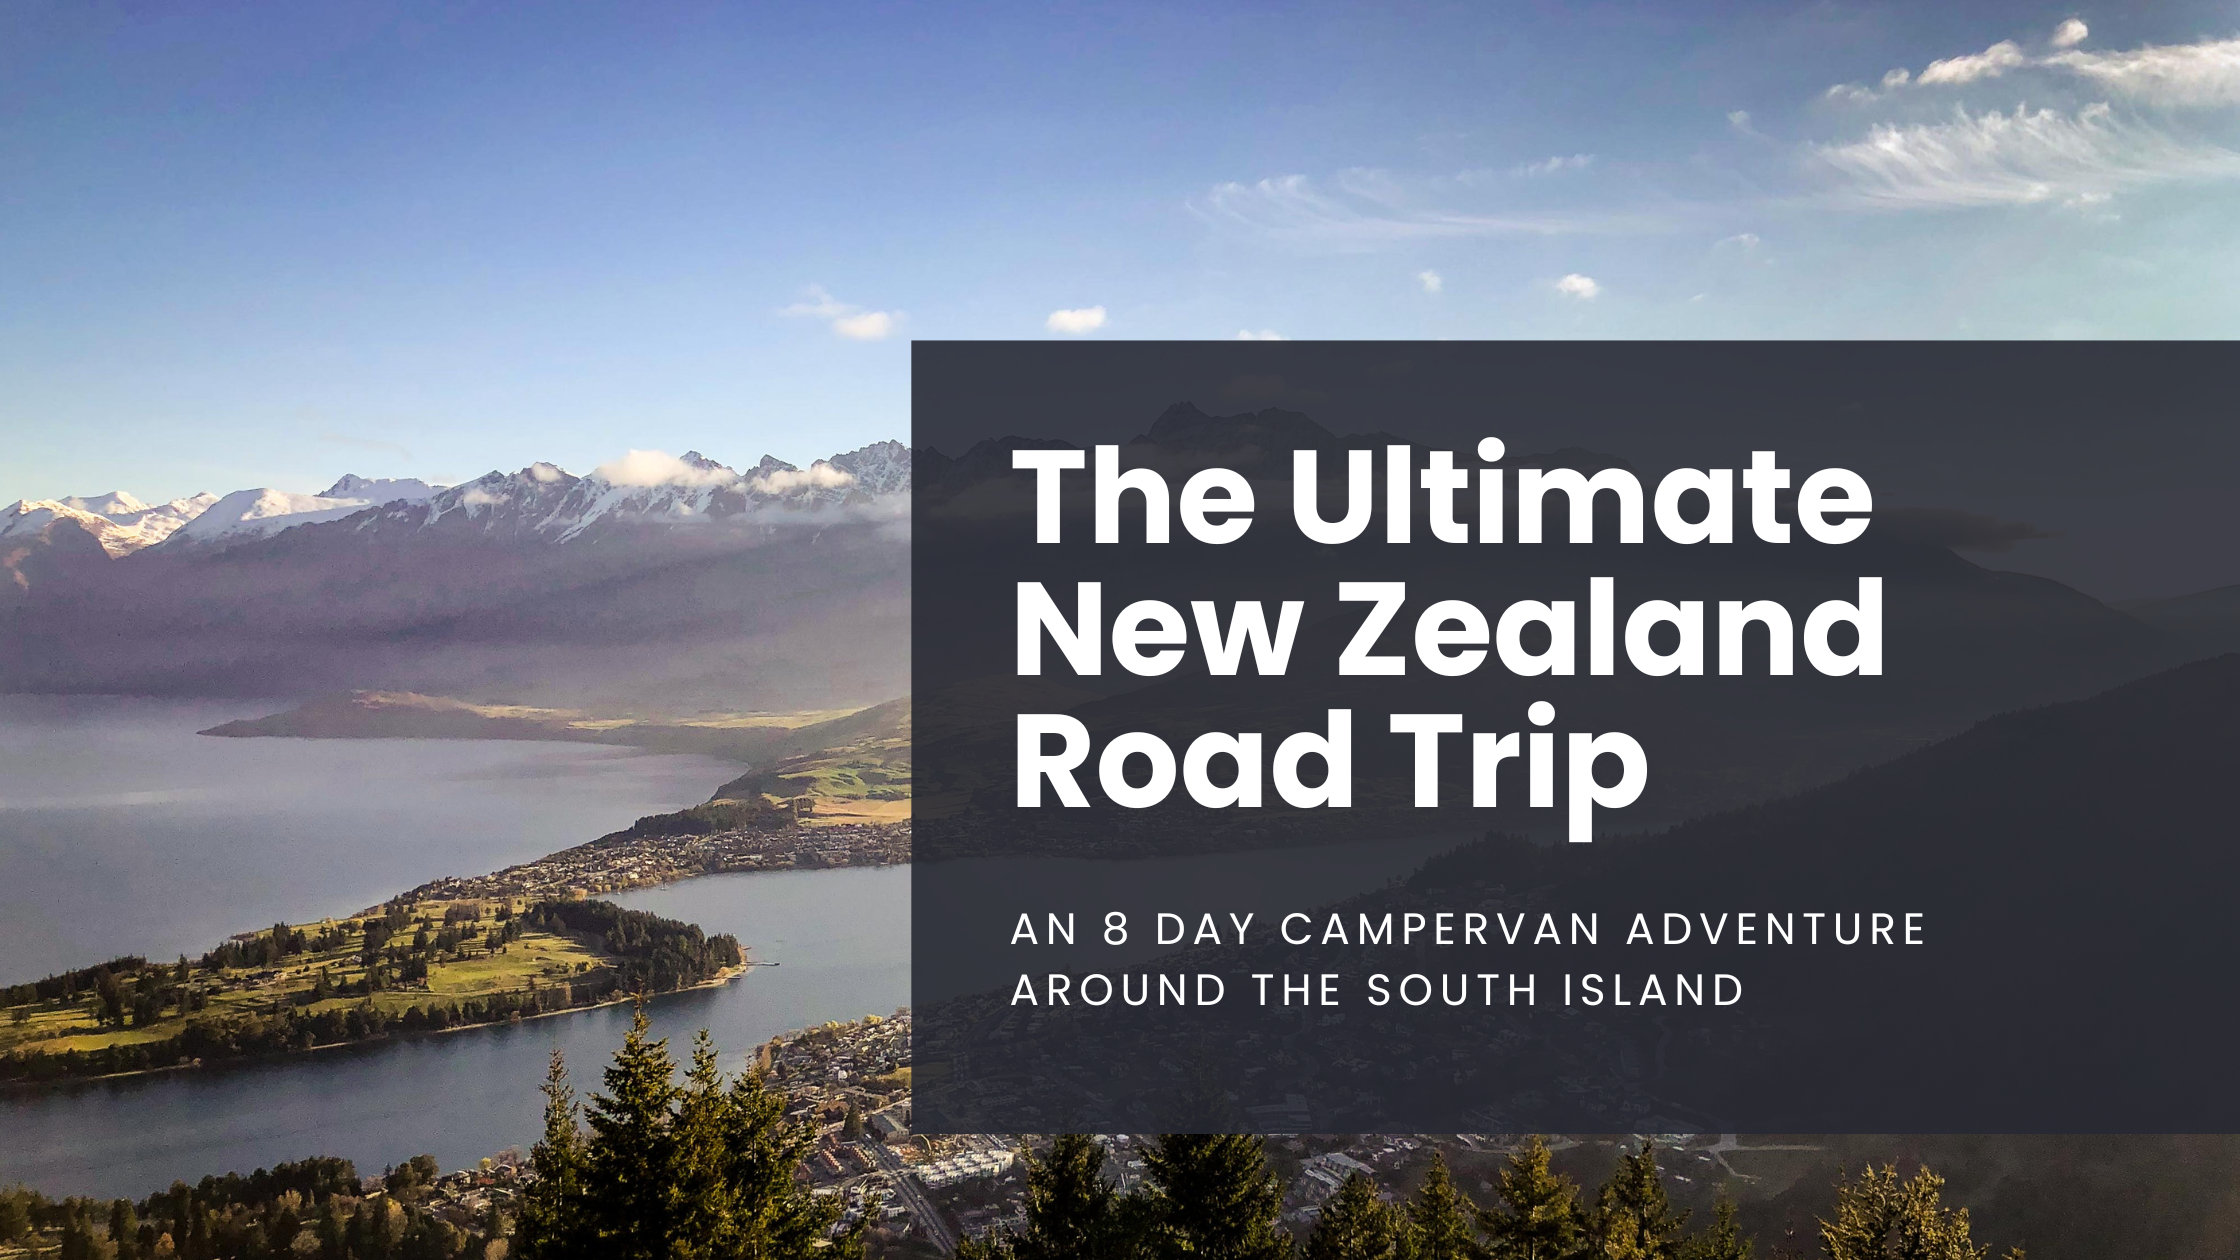
The Ultimate New Zealand Road Trip: An 8 day campervan adventure around the south island
Planning a trip to New Zealand? Be sure to check out this guide about traveling around the south island and discover some of the most beautiful landscapes on the planet. From choosing your route to where to stay and what to do, this post has everything you need to say “let’s go” and book that next adventure!
Please note: All info below is up to date as of May 2023
If I could handpick one destination for you to experience, it’d be New Zealand. An outdoor adventurer’s paradise, the two islands combine for a population of under 5 million inhabitants and come complete with sprawling scenery that begs to be explored. With nearly 33% of the country protected under the national parks system, it’s not hard to stumble upon pure and untouched nature!
It was just over a year ago that Heather and I crammed our backpacks full of winter jackets, caught a flight from LAX, and traveled south for our first campervan experience - driving around New Zealand’s south island.
With only eight days to spare, we knew it’d be long hours on the road and a lot of activities to cram into a short period, but we were committed to making it happen.
Whatever you choose to do and wherever you go in New Zealand, you won't regret booking a plane ticket!
One quick note about campervans in New Zealand: It’s vital to know the classification of the vehicle you’re renting and how that relates to your camping options. Many free sites around the country are for self-contained vehicles only, meaning that the van must be equipped with a toilet and grey water tank. After crunching some numbers, we calculated that springing for the slightly more expensive Jucy Chaser would save us money on accommodations because of it’s “self-contained” status.
BEGIN IN QUEENSTOWN
One of my favorite parts about visiting New Zealand is simply arriving. The flight path into Queenstown yields mind-blowing landscapes. It’s a pretty special feeling as you step onto the tarmac, look up and see The Remarkables in all their glory.
Pro Tip: Snag a window seat on the left side of the plane for the best views.
From here, we picked up our campervan and drove straight to Lake Pukaki for our first overnight.
Total Drive Time: 2hr 45min
Overnight Stay: Lake Pukaki Overnight Campervan Parking. Onsite toilets are available, but there are no powered sites. Non-self contained vehicles are allowed.
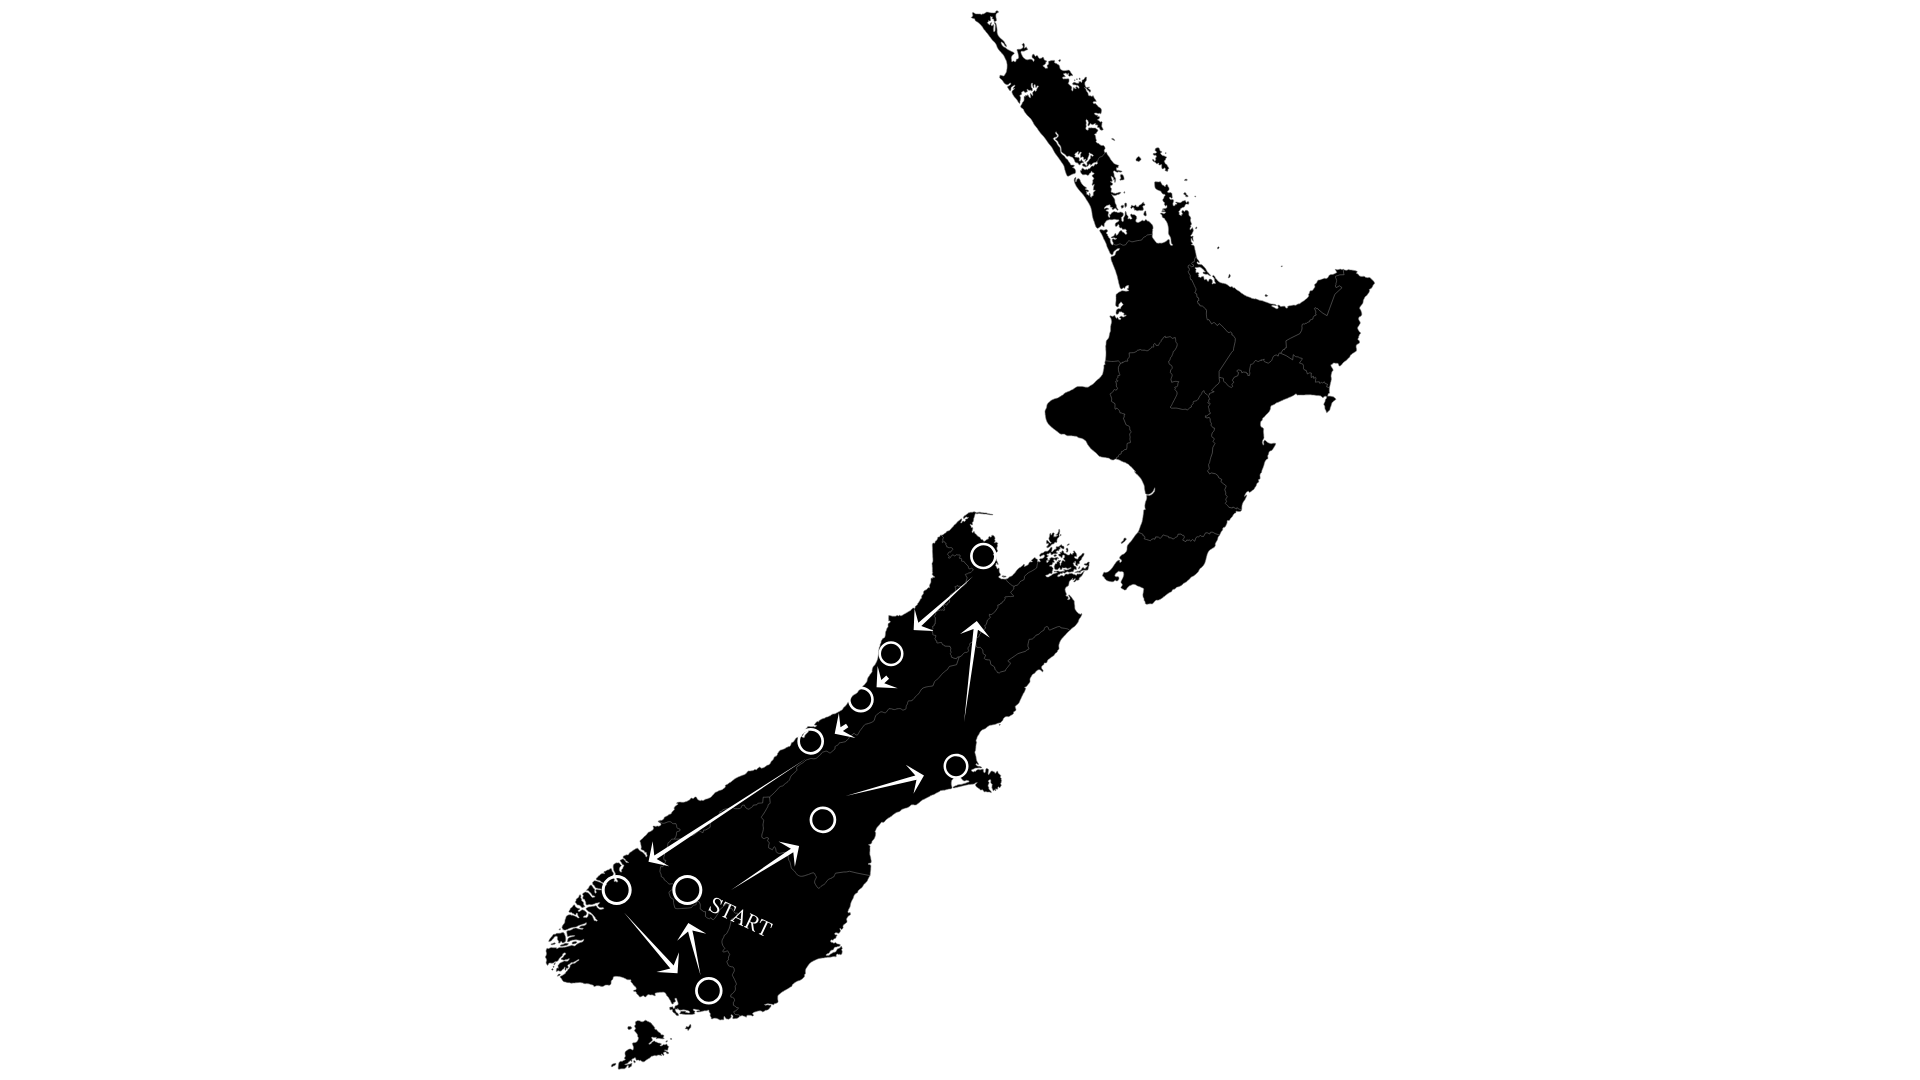
Road trip map of New Zealand
DAY 1: LAKE PUKAKI AND MT. COOK NATIONAL PARK
Why you should go: Lake Pukaki is the sole access point to Mt. Cook National Park, home to New Zealand’s tallest mountain (3,765m). It’s also the country’s deadliest peak, accounting for nearly 80 reported casualities since the early part of the 20th century.
With tons of hiking to choose from, you can be sure that there’s something for all ages and fitness levels. Looking for a view of Mt. Cook? Try the Hooker Valley Track. Although it’s one of the most popular hikes, the 10.5km round trip path takes adventurers over swinging bridges and through the valley before reaching Hooker Lake, all at only 100m of elevation gain - talk about bang for your buck! Whichever hike you choose, I guarantee you will encounter some of the most breathtaking scenery in all the world. For a comprehensive list of hikes within Mt. Cook National Park, click here.
Lake Pukaki is also an optimal basecamp for exploring nearby Lake Tekapo or hopping on a scenic flight to soak up the spectacular aerial views. My personal recommendation would be Air Safaris; great service and a variety of options to fit any budget!
Must Do: Hooker Valley Trek and Air Safari Tour
Total Drive Time: 4 hrs. (Tekapo to Amberley Beach). Make sure to enjoy the views as you drive over Burke’s Pass along Highway 8!
Overnight Stay: Amberley Beach Reserve. Any vehicle is welcome to camp here, with both powered and non-powered sites available. The campground also offers toilets and bucket shower stalls and costs between $5-25 NZD per night, depending on your chosen site and vehicle.
Planning to stay longer in Lake Tekapo? Here’s a list of things to do and see:
Hike to the Mt. John Observatory for sweeping views over Lake Tekapo
Test your hand at astrophotography (Tekapo is a designated International Dark Sky Reserve)
Take flight high above Mt. Cook with Air Safaris as your guide to truly grasp the magnificence of the area
Relax in the Tekapo Hot Springs

Hooker Valley Trek at Mt. Cook National Park
DAY 2: KAIKOURA
Why you should go: The beauty of New Zealand is that you don’t need to be either a water person or a mountain person; you can be both! The sleepy seaside town of Kaikoura can attest. Located at the base of the aptly named Kaikoura mountain range, it is widely known for its resident sperm whale population, making it THE perfect place to hop on a boat and experience the wildlife from the water. Not a fan of the open sea? No problem. Stroll along the Kaikoura Peninsula Walkway to the rock platforms and prepare to “ooh” and “ahh” when you stumble upon a colony of fur seals!
Must Do: Whale watching in the South Pacific Ocean. We used Whale Watch Kaikoura and had an incredible time. Make sure to book in advance as spots fill up fast, even in the winter months!
Total Drive Time: 6 hrs. (2 hrs. from Amberley to Kaikoura and 4 hrs. from Kaikoura to Motueka)
Overnight Stay: Motueka Beach Reserve. This is a free camping area that only allows self-contained vehicles. It comes complete with toilets, showers, designated fire and cooking areas, and is located adjacent to the Motueka Salt Baths, just in case you feel the urge to take a quick dip in the Tasman Bay.

Kaikoura, New Zealand
DAY 3: ABEL TASMAN NATIONAL PARK
Why you should go: What do you get when you add rainforests to waterfalls and and sprinkle golden sand beaches on top? Paradise. Spread along the south island's northern coast, this national park is most well known for the Abel Tasman Coast Track as it winds its way 60km along the pristine water. This particular hike takes a bit of advanced planning, but it is still possible to experience the region by trekking to nearby to Wainui Falls. This 3.4km out and back trail maneuvers it's way through the lush rainforest and over suspension bridges before arriving at the stunning waterfall. Be sure to take a quick dip in the frigid waters and make sure to have a towel at the ready!
Must Do: Wainui Falls was an incredible hike, but our favorite part of the day was simply driving and exploring the area, especially Highway 60 up and over Takaka Hill.
Total Drive Time: 4.5 hrs. ( 1.5 hrs. from Motueka to Abel Tasman National Park and 3 hrs. from Abel Tasman to Murchison)
Overnight Stay: Riverside Holiday Park (Murchison). From 3 bedroom cabins to non-powered tent sites, this accommodation has something for everyone. The facility comes complete with a community kitchen, flushing toilets, and warm showers… this holiday park certainly spoiled us! We opted to rent a powered site for just $35 NZD ($22 USD) in order to hook up the heater in our van to keep us warm during a rainy night.
Want to learn more about this island nation? Check out these essential posts:
Day 4: PUNAKAIKI AND HOKITIKA
Why you should go: Stunning coastline and glow worms galore! The western part of the south island is like nothing I had ever seen before. Lush rainforests stretch from high above in the Southern Alps to the Tasman Sea below.
Driving aimlessly along Highway 6 and spontaneously stopping as you go is worth it in its own right, however this part of the island is where you can find two popular destinations: Punakaiki and Hokitika.
Punakaiki is home to the curious limestone formations known as Pancake Rocks, the perfect place to take a short 1.1km walk around these geological oddities and stretch your legs.
Pro Tip: Try to time your visit around high tide. This is when the surge pools and blowholes will be most active, leading to a truly spectacular show of forece from the ocean.
Feeling adventurous? Bring a headlamp and take a quick detour to the Punakaiki Cavern, located just north of the Pancake Rocks along Highway 6. Don’t forget to look up to spot the glow worms and stalacites as you descend into the darkness!
If you have trouble spotting the glow worms in Punakaiki, don’t worry, so did we! Keep driving south to Hokitika and you’ll find the Hokitika Glow Worm Dell. Located directly off of Highway 6, this leafy canyon is a protected home to these intriguing creatures.
Make sure to go at night as they illuminate the path. It’s free and only a 2 minute walk from the roadside, making it the perfect alternative if you don't have time or budget for an organized tour.
Did you know that the light emitted from these worms isn’t just mesmerizing to the human eye? It’s used to attract their food, luring insects and trapping them in their sticky threads!
Must Do: Hokitika Glow Worm Dell
Total Drive Time: 3 hrs, with PLENTY of roadside stops along the way
Overnight Stay: Hokitika Holiday Park. Powered sites start at $20 NZD per person and access to the community kitchen, lounge area, showers, playground, and free wifi!

Views from Highway 6
DAY 5: FOX JOSEF AND FRANZ GLACIERS
Why you should go: Where else can you hike through the rainforest en route to a glacier? The answer is nowhere!
Franz Josef and Fox Glaciers are the only two that exist in the world. Both offer a unique experience, trekking through the lush forest and up ice-carved valleys to their terminal faces.
The Franz Josef Walk is a 5.4km path up to the 7,000 year old sheet of ice, while the Fox Glacier Valley Walk is a 6km trail that follows the south bank of the Fox River through the ancient podocarp rainforest. A professional guide is needed to access the glacier if you're looking to get more up close and personal.
Check out Franz Josef Glacier Tours and choose your adventure: ice climbing, heli-hiking, and more!
Must Do: The Franz Josef Glacier Walk
Total Drive Time: 4 hrs. to Haast, with stops at both the Franz Josef and Fox Glaciers
Overnight Stay: Haast River Holiday Park. This powered site is slightly more expensive at $48 NZD per night, but provided access to the kitchen, showers, and wifi. Onsite motel rooms are also available.

Franz Josef Glacier from above
DAY 6: WANAKA (TRANSIT TO MILFORD SONUD)
Why you should go: Located on the southern shore of Lake Wanaka, this town is the perfect stopover en route to the Milford Sound. Snap a picture of That Wanaka Tree or simply enjoy a flat white as you peruse the stores along the waterfront.
Have a bit more time to spare? Take a jaunt up Roy’s Peak, a steep 16km trek that ends in sweeping views over the surrounding landscape.
Must Do: Stroll along Lake Wanaka
Total Drive Time: 5.5 hrs. from Haast to Cascade Creek Campground (brief stops in Wanaka and Te’Anu)
Overnight Stay: Cascade Creek Campground. This is the closest campground to the Milford Sound without making reservations in advance and costs just $15 NZD per person. Toilets are available, however powered sites are not. It’s the perfect place to spend the night if you have an early morning cruise of the sound scheduled for the following day!
Pro Tip: Fill up your gas tank in Te’Anu… it’s the last stop you’ll find before reaching the Milford Sound.
DAY 7: FIORDLAND NATIONAL PARK AND MILFORD SOUND
Why you should go: With cascading waterfalls that plummet over the fjords and into the serene waters below, this cherished corner of the world is filled with unrivaled beauty.
The best way to experience the sound is from the water, so be sure to hop on a nature discovery cruise. There are plenty of tour operators to choose from so it’s possible to shop around for the right fit for your wallet. Pro Tip: If you rent a vehicle from Jucy, you’ll receive a $30 discount when you book through Jucy Cruise!
Once your mind has been properly blown, spend some time exploring the rest of the 1.2 million hectares of land that makeup Fiordland National Park. For a full list of hikes available, click here.
Must Do: Cruise the Milford Sound
Total Drive Time: 5 hrs (1 hr from Cascade Creek Campground to Milford Sound and 4 hrs from the Milford Sound to Weirs Beach Campground)
Overnight Stay: Weirs Beach Campground. This is a free site that welcomes any type of vehicle! Non-powered sites only, but bathrooms are available.

Milford Sound, New Zealand
DAY 8: THE CATLINS COAST
Why you should go: Peace, serenity, and wildlife. Oh, and inching closer to Antarctica!
Comprised of the southeastern part of the island, The Catlins aren’t frequently visited by most, but are well worth the effort to get there.
Take a short, albeit windy, walk out to Slope Point and you’ll find yourself standing closer to Antarctica than to the equator.
Beyond creeping closer to the ice continent, The Catlins is one of the best spots to find an abundance of yellow-eyed penguins, sea lions, and starry nights.
Visiting in the winter months? Hunt down the southern lights! This forecast will help make sure that you don’t miss out.
Must Do: Slope Point
Total Drive Time: 3.25 hrs. back to Queenstown to complete the trip!
Overnight Stay: Turner Heights Townhouses (Queenstown). Between the aerial views of Queenstown and the easy walk to Lake Wakatipu, this was the perfect accommodation for our final night!

Slope Point, New Zealand
Have you given yourself more than just one night in Queenstown? Here’s a short list of things to see and do:
Play footygolf with The Remarkables as your backdrop at the Frankton Golf Centre
Wake up early and climb to the top of Queenstown Hill for sunrise
Enjoy breakfast along the water at Vudu Cafe
Take the plunge at the world’s first bungy jump (AJ Hackett Bungy)
Trek up the Tiki Trail for picture perfect views above Queenstown with The Remarkables as a backdrop
Meander along the shores of Lake Wakatipu in the evening light
Although we managed to condense a lot into a short amount of time in New Zealand, we certainly didn’t come close to scratching the surface of all that this nature lover’s paradise has to offer. At the end of the day, it’s important to realize that this itinerary is in no way perfect. It’s merely a starting point for you to pull out a map and begin planning an adventure of your own. After all, I find that some of the best memories are made before the trip has even begun!
Have you been to New Zealand before? What was your favorite part? I want to hear from you in the comments below!
Thanks for stopping by and as always, stay safe & happy travels.
Sharing is caring… pin this post for later!


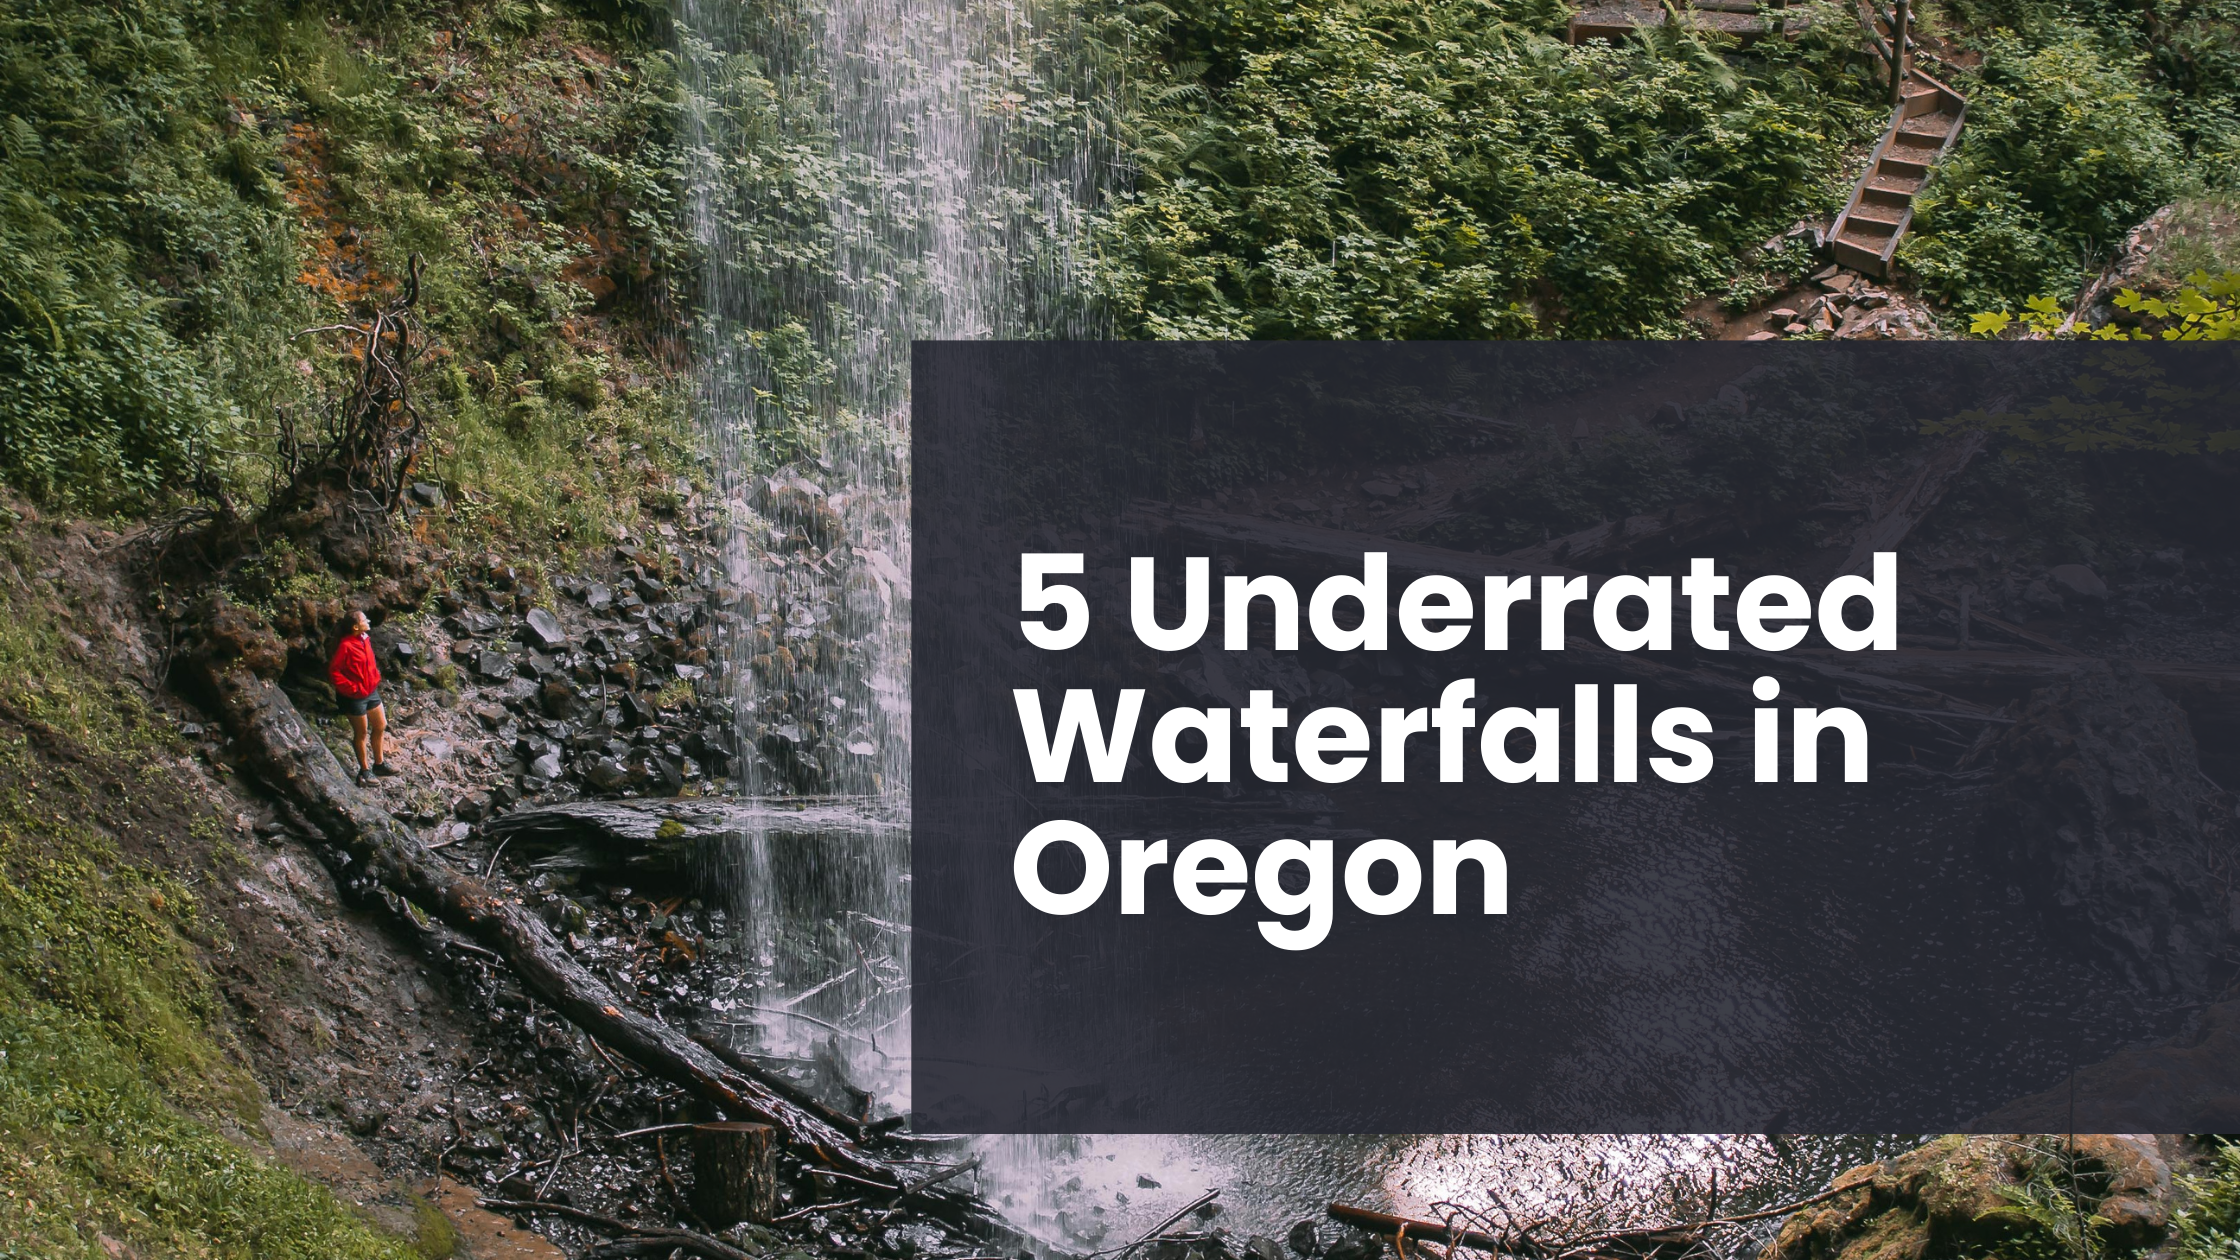
5 of the most underrated waterfalls in Oregon
Although Multnomah may be the most popular waterfall in Oregon, the state is home to at least 237 others! Here’s a list of 5 of the most underrated waterfalls, deep within the verdant forests of this mystical place. It’s time to break out the hiking shoes for these incredible adventures!
Please note: All information below is updated as of May 2023
Growing up just outside of Buffalo, New York, I had the luxury of being able to visit Niagara Falls whenever I wanted. Needless to say, with one of the seven natural wonders of the world in my backyard as a child, my standard for waterfalls may be a bit unfair - or so I thought!
Although Multnomah Falls may be the most well known and photographed waterfall in all of Oregon, the beaver state is home to over 230 others. It’s hard to find a hike in Central Oregon that doesn’t lead to a magical view of these natural wonders.
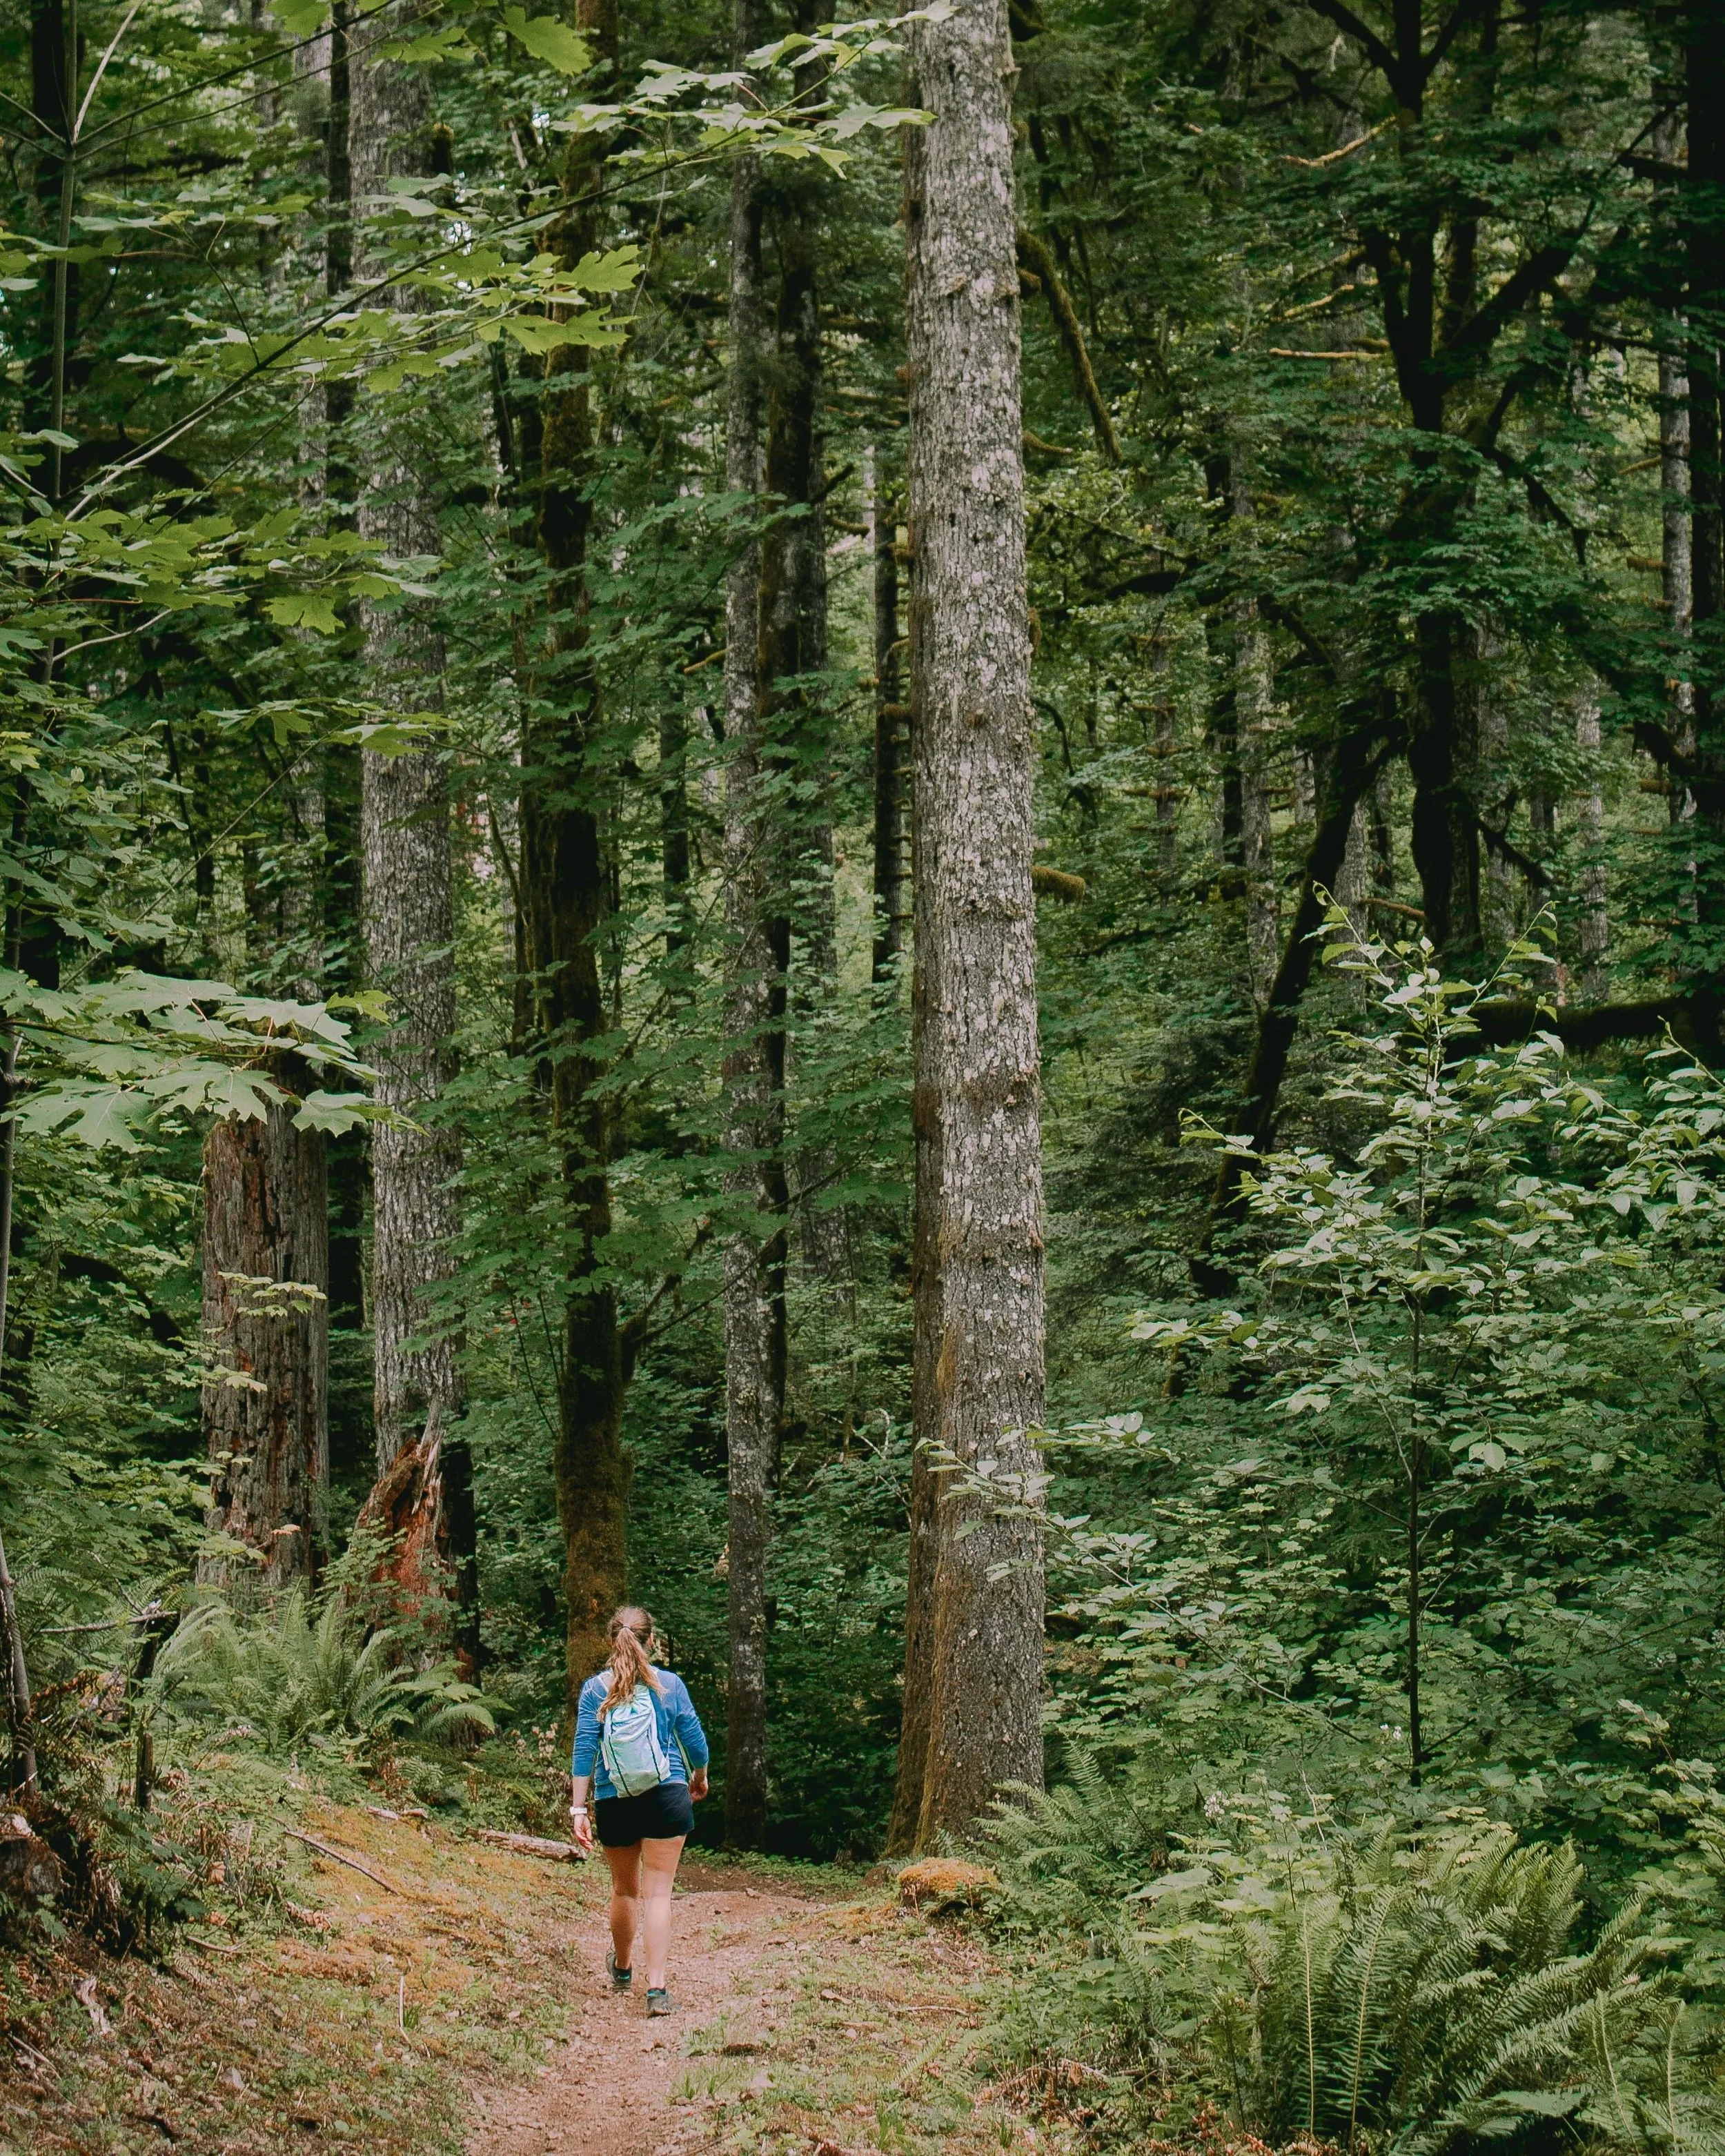
With a plethora of hidden gems all around, here are my top 5 most underrated waterfalls found in Oregon, USA. It’s time to break out the hiking shoes!
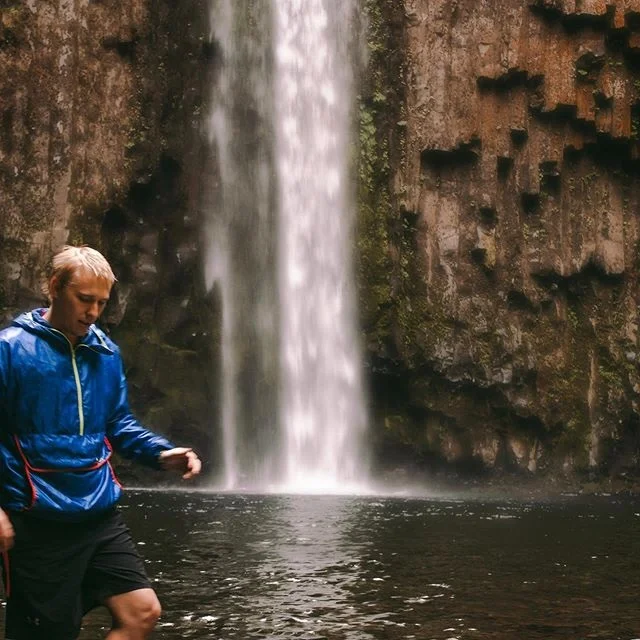
1. SHELLBURG FALLS
Located in the Santiam Foothills near Mehama, Oregon, Shellburg Falls is a 100ft tall cascading waterfall that flows over a stunning basalt ledge.
The hike starts by following a gravel road before entering the old-growth forest. Note: this road is private property and crosses through an open cattle range. Once you’ve reached a small bridge that crosses above Shellburg Creek, there will be stairs on the left that mark the beginning of the trail to the waterfall.
The path leads directly to Shellburg Falls and even takes hikers beneath the ledge and behind the flowing water, offering a unique perspective. Continue trekking through the forest and wildflowers before rejoining the gravel road at the other end of the loop. Pro Tip: Go early. This hike is easily accessible and good for all ages, making it heavily trafficked.
Hiking Distance: 6.0mi loop trail
Elevation Gain: 1,036 feet
Rating: Easy to moderate
Fee: None
Bathrooms: Vault toilets are located at the Shellburg campground, approximately 0.6mi past the waterfall


2. OPAL CREEK WILDERNESS (SAWMILL FALLS)
This trail is currently listed as CLOSED.
The Opal Creek Wilderness trail is a 6.9mi loop near Lyons, Oregon. Surrounded by stunning cedar trees, the hike flanks the Little North Santiam River as it winds its way through an abandoned mining operation from over a century ago.
The real gem of this trail is the numerous cut-offs to various waterfalls and swimming holes along the way, the most beautiful of which is Sawmill Falls. Make sure to bring a swimsuit and take a dip in the beautiful blue water!
Hiking Distance: 4mi. out and back to Sawmill Falls, 6.9mi. loop through Jawbone Flats
Elevation Gain: 652 feet
Rating: Easy
Fee: $5.00
Bathrooms: Vault toilets located at trailhead parking lot and in Jawbone Flats

Sawmill Falls
3. ABIQUA FALLS
Abiqua Falls is an out and back 5.3mi trail located near Scotts Mills, Oregon that features a short hike through the forest and along a crystal clear river before reaching the 92ft. waterfall.
The trailhead can be found by following a single lane dirt road, with parking available in turnouts along the way. Continue following the road by foot as it descends deeper into the forest until reaching the trailhead. From here it’s a short 0.8mi. hike to the waterfall, but keep in mind the elevation gain becomes difficult on the way back out.
Keep telling yourself that it’s worth it because it is! If you’re daring like me, be sure to take a quick dip in the freezing, yet refreshing, pool below the falls. Note: The hike is on private property and can get steep at times. Exercise caution and be respectful.
Hiking Distance: 5.3mi. out and back (dependent on parking location), 0.8mi. to the waterfall from the trailhead
Elevation Gain: 1,397 feet
Rating: Hard (mostly due to the elevation gain on the way out)
Fee: None
Bathrooms: Not available


4. McDOWELL CREEK FALLS TRAIL (ROYAL TERRACE FALLS)
In search of a hidden wonder in Oregon? Look no further than McDowell Creek County Park, located 16mi. east of Lebanon. Here you’ll find McDowell Creek Falls Trail, a 1.8mi loop that leads to two beautiful waterfalls: Royal Terrace Falls and Majestic Falls.
Cascading a total of 119 feet between the two levels, Royal Terrace Falls was named from its unique terraced appearance, often found in royal palaces around the world. The trail itself winds its ways through the lush forest, taking hikers along bridges, stairs, and platforms, all providing the perfect views of the falls.
A great day trip for all ages!
Hiking Distance: 1.8mi. loop trail
Elevation Gain: 288 feet
Rating: Easy
Fee: None
Bathrooms: Not available


5. KOOSAH AND SAHALIE FALLS
Do you recognize any of the pictures below? Dig deep into the 90’s Disney movie vault… Sahalie Falls was featured in Homeward Bound! Still not ringing a bell? It’s ok - it’s still worth a visit!
The Waterfall Trail is a 2.6mi loop that runs adjacent to the McKenzie River as it winds past Koosah (70ft) and Sahalie (100ft) falls.
Along the way, accessory paths veer off and provide viewpoints of the area that many hikers fail to experience, so make sure to wander a bit! The main trail is marked, making it easy to stay on course. Pro Tip: Park at and start the hike from Koosah Falls instead of Sahalie. This lot is typically less congested.
Hiking Distance: 2.6mi. loop trail
Elevation Gain: 357 feet
Rating: Easy
Fee: None
Bathrooms: Vault toilets are available at Sahalie Falls parking lot


Ready to get out and explore yet? Wherever you are the world, make sure to leave time for a new adventure and, if you ever find yourself in Oregon, be sure to check out one of these hikes!
Thanks for reading and as always, stay safe & happy travels.
Enjoy what you read? Pin this post and share with others!


Chasing Choclon Waterfall: Discovering paradise in the Panamanian jungle
As I combed through the research prior to our trip to Panama, I came across a picture of a swimming hole that blew me away. The moment I saw it, I knew we needed to experience it. There was only one problem: nothing I read would tell us where it was located…
Let me clarify one thing right from the beginning: we weren’t actually in the middle of nowhere. That’s simply how it felt, and to be honest, that’s just the way we like it!
As I combed through the research before our trip to Panama, I came across a picture of a swimming hole that blew me away. The moment I saw it, I knew we needed to experience it (click here to see the original post I found).
There was only one problem: nothing I read would tell us the location, let alone how to navigate the hike.
I stumbled deep into the black hole of the internet, searching for any clues that might point us in the right direction. The only objective I accomplished that day was leaving a solid imprint of my butt on the couch cushion. Disappointing, to say the least.
That might be enough to call it quits for some, but it only fueled the fire within. The longer I went without finding what I was looking for, the more determined I became. We were going to find a way to Cascada Choclón. There was no doubt in my mind.
All of the sudden a beam of sunlight shot into the living room. No, it wasn’t actually that dramatic, but shortly after opening the window blinds I came across our first solid lead.
It’s possible that “solid” is a gross overstatement. The website merely provided the GPS coordinates for the trailhead. It wasn’t much to go on, but that was enough to get the ball rolling!
Discover more of Panama. Don’t miss these posts:
I continued scouring every piece of information that I could find. When I took a closer look at satellite imaging, there was a portion where the jungle appeared to part along the river, providing a much-needed hint to where the falls may be.
Now that I had a starting point and a general direction, it seemed like this may pan out. Fast forward to arriving in Panama: it was time for the adventure!
As soon as we turned off the main road in Boquete, we quickly became grateful that we opted for the SUV rental. The pavement disappeared, our cell service wasn’t far behind.
The farther we drove, the slower we went, carefully maneuvering over every bump, boulder, and hole in the road. As the minutes ticked by, so did our confidence even though neither of us would ever vocalize it.
After what felt like hours, we had reached the starting point.
The car came to a halt and a cloud of dust from our tires quickly engulfed our field of vision. Once it cleared, we realized how “off the beaten track” we were. The sounds of the jungle beckoned beyond the open field that lay ahead. One last look at our maps and we were off.

The hike started by traversing through an open meadow as the sun beat down our backs, the humidity making it impossible for any relief. Upon reaching the first junction, we referred to our makeshift maps and descended to the forest floor, following the sounds of the river below.
As we trekked deeper into the brush, the canopy quickly began to rise straight towards the sky, providing a much-needed relief from the heat. Our compass instructed us to go left around a closed gate, but our ears directed us to the right, towards the sound of the rushing water. We stood there confused, unsure of what to do.
At this point the sun forced us to perspire off our umpteen layers of sunscreen and bug spray, leaving us susceptible to the mosquitoes that began swarming around. We were in no position to have a lengthy debate. Lacking confidence in either direction, we climbed back out to the trailhead.
Maybe we had incorrectly interpreted our map. Maybe if we walked another direction we would discover a different, easier way to reach the river.
It seemed like a good idea at the time but, as it turned out, we were wrong. Very wrong.
As we continued down the gravel road the intensity of the sun drained all of our energy. I could feel my body temperature rising, but I was too exhausted to do anything about it. Each step we took was met with an unsuccessful prayer for cloud cover.
Ten minutes and a new sunburn later, we had reached another dead end.
This was the point that every ounce of my being was telling me to pack up and call it a day. Our motivation was waning, the heat was relentless, and we were out of ideas as we slowly retreated back to the car. I remember Heather cracking jokes along the way, trying to make light of the situation and keep my morale in tact.
A second look at the scattered research revealed a small access path farther down the dirt road. Maybe that was what we were looking for, so we decided to keep driving north.
No luck.
I could tell that Heather wasn’t too sure about continuing and, to be honest, even after regrouping in the air-conditioned car, I wasn’t either. As a rainstorm moved through, we took the time to reevaluate what we were doing.
We felt assured and frustrated at the same time. Confident that we were in the general vicinity. Annoyed that no matter how we approached it, we couldn’t find what we were searching for.
The road back to the original trailhead provided some much-needed perspective as we passed run-down homes with missing walls and children playing in the rain. I couldn’t help but think of the number of tourists that travel through Panama each year and yet had no idea that this part of the country existed. Although we concluded that we would give our adventure one more try, I decided that after the experience we had up to that point, I would be content no matter what. After all, it was Dan Eldon that once said, “The journey is the destination.”
Once we descended back into the jungle, reached the gate, and shuffled our way around it, we were back on track and heading in the right direction.
We quickly descended farther into the forest floor, hugging a makeshift PVC pipe railing along a ridge and using the vines as support as we worked our way down into the canyon. The path was completely overgrown with thick brush rising far above our heads. Thrusting the branches aside, we did our best to stick to the trail quickly narrowed with each step.
The ecosystem of any jungle is the most diverse in the world, often-times leading to regular discoveries of new plants and animals. Panama alone is home to over 1,500 kinds of trees and five species of cats, including jaguars, ocelots, and pumas. It feels eerie yet humbling to be amongst it; a place where the silence is deafening and only broken by an occasional howler monkey crying out in the distance or a bird rummaging amongst the fallen leaves for food.
We silently trekked along the forest floor, remaining vigilant of our surroundings.
The moment we began to feel comfortable, a loud crash echoed through the forest and left us frozen in our tracks. We exchanged nervous glances, trying to control our breathing and telepathically communicate what to do next.
Tip-toeing forward as quietly as possible, we did our best to avoid the branches that covered our path. Needless to say it was a humbling reminder that regardless of how isolated we felt, we weren’t alone.
Finally, the thick brush parted and the bank of the river appeared, reinvigorating the idea that we could find these waterfalls.

We searched up and down the river for a way to cross, but it quickly became clear that it wouldn’t be as simple as jumping between rocks. We would have to carefully select the path of least resistance.
Although our faces may have expressed doubt, we were so close that we could feel it. There was no turning back.
The path continued to disappear before our eyes, winding its way through the overgrown brush before depositing us back onto the rocks and leaving us with newly acquired scrapes up and down our legs.
We continued moving northwest, systematically evaluating every step we took as our feet slipped off the rocks. The energy in the forest changed from nervousness to excitement as we inched closer. We were nearly there.
Just beyond the final bend of the river, the waterfalls were waiting to greet us. It was even more majestic than I had seen in the pictures.
We were left speechless as we peered towards an amphitheater of hanging vines and cascading waterfalls.
The beautiful blue waters of the pool were irresistible. We couldn’t help but jump in and soak up the moment. A rush of emotions engulfed us, leaving nothing but a sense of relief, gratefulness, peace. We had uncovered paradise in the Panamanian jungle. More importantly, we never gave up.

The forest floor quickly grew dark as the sun began to drop below the horizon, signaling that it was time to pack up and move out.
Back on the trail we went, accompanied by the beautiful silence, this time with no unexpected noises.
We made it to the car unscathed, feeling sunburnt and dehydrated yet eternally grateful for all that had happened that day. After all, we had found our own slice of Panama that, at that moment, felt truly untouched.
As I reflect on the adventure we had, I can’t help but think of one of my favorite quotes from the late Anthony Bourdain: “The journey is part of the experience - an expression of the seriousness of one’s intent. One doesn’t take the A train to Mecca.”
What have been some of your greatest journeys? Feel free to share in the comments below.
Thanks for reading and as always, stay safe & happy travels.
Enjoy what you read? Pin this post!


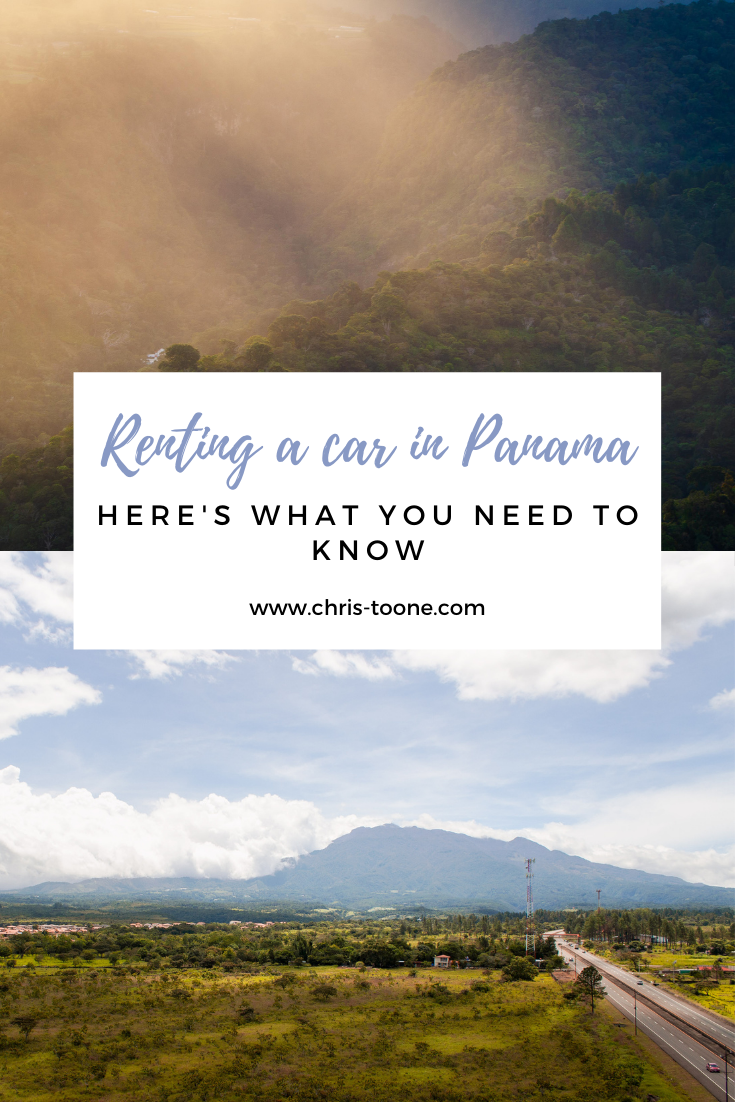
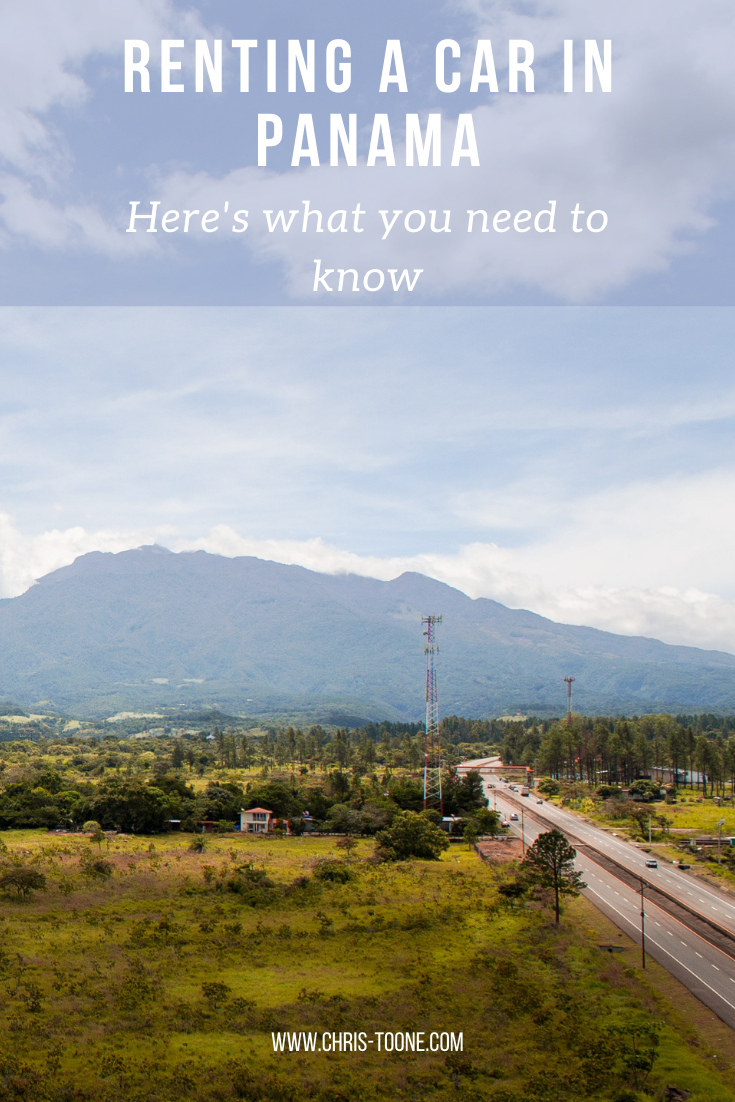
Renting a Car in Panama: Here's what I wish I had known ahead of time
I can already see the eyes rolling around your head. “I know how to use Google, I know how to drive, I’m confident I can rent a car.” Well, that’s probably all true. Who am I to judge your driving? But renting a car in Panama isn’t as cut and dry as in other countries…
*Please note: all information below, including prices, is reflective of the time of writing (2019). Feel free to reach out with questions and I’ll happily help however I can.
I can already see the eyes rolling around your head. “I know how to use Google, I know how to drive, I’m confident I can rent a car.” Who am I to judge your driving? But renting a car in Panama isn’t as cut and dry as in other countries. If you look online like we did, it might freak you out (or in our case, question our entire plan). The reality is it can be done and done well for that matter, but let’s back-up for just one second.
Heather and I have this tendency to book plane tickets mere days in advance and just wing it. Panama was no different. Three days out we found cheap flights and decided to send it down to Central America. We knew that we wanted to make it to Boquete and keep our budget tight. We decided that flying from Panama City to David and Bocos del Toro would hit our bank accounts a little too hard, so we decided to rent a car. We thought we had it all figured out, and then we started to read this thread on Trip Advisor. The more we read, the more doubtful we became. The stress and anxiety began to mount, but like any true adventure, we decided that rolling the dice was the best thing to do.
TRIP ADVISOR SUMMARY
Before you spend hours going down the proverbial rabbit hole on the internet as we did, let me sum up the Trip Advisor thread for you.
Renting a car from Tocumen International Airport is a disaster, especially from Hertz. You’re better off renting from National Car Rentals in the city.
The “Tocumen Banditos” are alive and well and prey on customers like a lion in the wild. They will find fake damage, knowing you have a flight to catch so you won’t put up much of a fight.
Accept the damage and contact Hertz from home, you say? Not a chance. You’ll get no help because Hertz USA has no control over Hertz Panama.
Have insurance coverage from your credit card? Not good enough. You’ll be forced into buying comprehensive.
People have shown up to rental car counters off of the estimate they receive online and are suddenly unable to afford the new price, ultimately walking away in tears (this one gave us the feels).
Crazy, right? If it were all true, it would be. But here’s how our experience went:
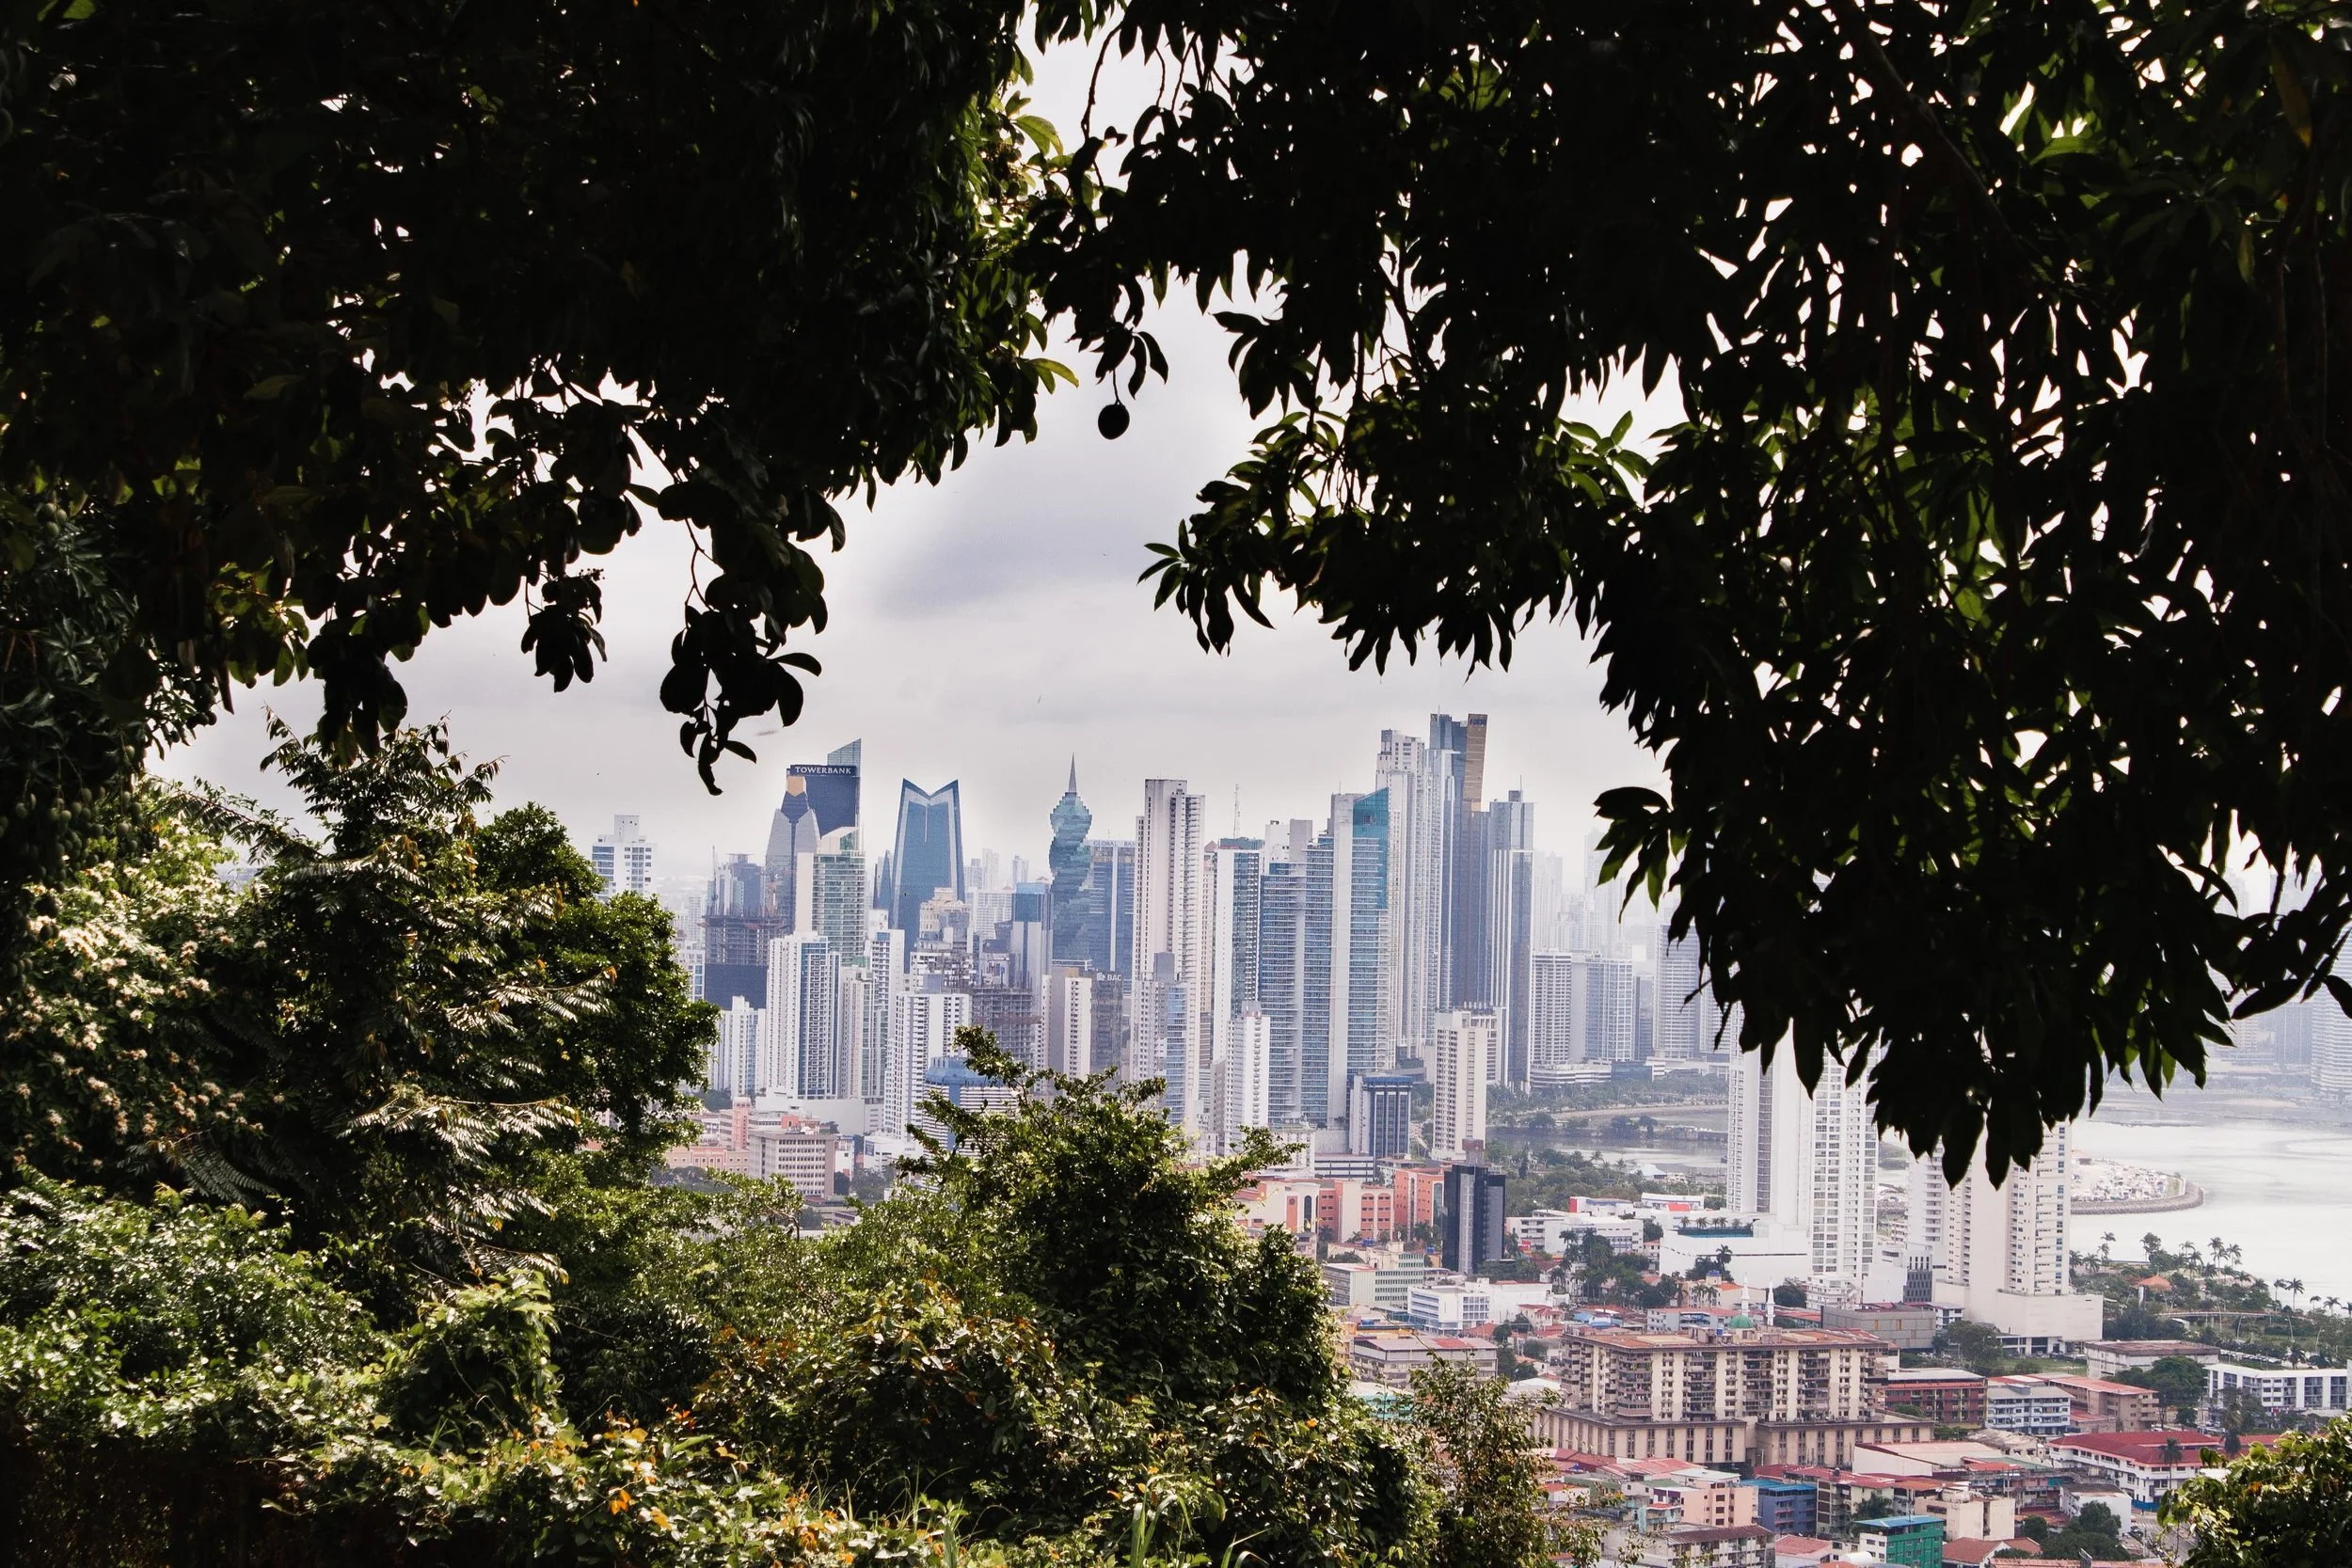
View of Panama City, Panama
BEFORE WE ARRIVED
Generally speaking, we tend to search for any opportunity to save a dime. Many times that strategy includes using credit card miles. Even if you don’t have any to spare, a quick internet search will show car deals starting at “just $5/day.” It might seem too good to be true at an initial glance, and that’s because it is.
Despite our instincts, we opted to use miles and booked with Hertz at Tocumen International Airport. We had no problems with the reservation process, but at the same time, there were no notifications that this was not the actual price.
AT TOCUMEN INTERNATIONAL AIRPORT
As we left the hotel that morning, we had prepared ourselves for battle going as far as calling the credit card company to verify their coverage. We were ready for anything that the rental agent could possibly throw at us. There was only one problem… it was as easy and smooth as possible.
Here are some things to keep in mind:
LIABILITY INSURANCE IS MANDATORY IN PANAMA
It’s a national law that all rental cars must carry a liability policy of $20,000. After doing our research, we expected this to be the case and at around $22/day for 7 days, it was consistent with everything we had read. This is where most people get tripped up. Liability coverage isn’t mandatory in many countries, so it is not included in the rates you find on Kayak, Priceline, etc. It’s completely understandable why people get upset… if you expect to pay $75 total and get charged $200+ when you show up, that’s a significant change (especially if you’re trying to use points to cover the cost). Pro tip: Do your research ahead of time. Ask around and know what to expect.
HERTZ ACCEPTED OUR CREDIT CARD COLLISION COVERAGE
If you read through the thread, you’ll see many stories about companies forcing customers into full policies, telling them that their credit card coverage isn’t valid. I’m not discounting those people, however our experience was much different. We were offered full collision, partial collision, or no collision in addition to the required liability policy. We chose “no collision” and they accepted our credit card coverage, no problem. Pro tip: It’s a good idea to talk to your card company ahead of time and print out a copy of the policy.
BE “THAT GUY”
We’re not normally the self-proclaimed Sherlock Holmes kind of people, searching the car for every little scratch with a flashlight, but in Panama we were. The Hertz agent had a form marked up already with the damage they identified and gave us an opportunity to go over it ourselves (joke was on him). We took full advantage, trying to minimize the risk for false damage claims when we dropped the car back off. By the end of our inspection, the form looked more like a paint-within-the-lines picture. Front, rear, roof… we covered it all and they accepted it, no questions asked. Every. Little. Thing. There were A LOT of things.
DRIVING IN PANAMA
Traveling by car is by far our preferred method of transportation, and Panama was no different. We experienced roads that curved their way through the cloud forest, empanada stands at the top of mountain passes, and so much more. After all, the journey is the adventure! Driving is simple, easy and fun. Panama City is chaotic, but nothing more than you’d expect from an extensive urban area. Traffic can get backed up though, so plan ahead! Pro tip: Download the Waze app. The directions are accurate, easy to follow, and Panamanians are religious about updating police locations so you can be sure to avoid the speed traps. We drove from Panama City, up to Boquete, over to Bocos del Toro, and back down to Tocumen with no problems at all.

Driving from Panama City to Boquete through the mountains
RETURNING THE CAR
Beyond the fear that our credit card insurance would be rejected, this part was our second biggest concern after reading all of the information on Trip Advisor. As we walked back into the arrivals hall to return the keys, we again braced for a battle. In reality, it was the easiest part of it all. We were told that tolls would be billed electronically (all tolls in Panama are electronic, so every car is equipped with the proper technology to handle that), and that a receipt would be emailed. After a couple of weeks of holding our breath, the final bill came with no signs of “fake damage.”
Looking for ideas of things to do in Panama? Be sure to check out these other posts:
PRICE BREAKDOWN
Online booking - $85 for 7 days (credit card points used)
Actual cost - $345 for 7 days with 2 drivers and mandatory liability insurance
Tolls - $11.95 (Tolls are only present on roads surrounding Panama City)
All in all if you do your research, know what to expect, and make an effort to really evaluate the car before you drive it off the lot then you should have no problems! Keep in mind that like any other country, things are constantly changing in Panama and although our experience was smooth and stress free, yours might different!
It’s my goal to provide you all with information to help you get out and see the world. Did this accomplish that? Let me know in the comments below and I hope you enjoy your Panamanian adventure!
Find this post helpful? Pin it for later!