Hiking Mount Krobo, Ghana: Everything You Need to Know
Within a week of regularly driving the Tema-Akosombo road, it was clear that one mountain towered above the rest: cue Mount Krobo. After weeks of trying to arrange a hike the plans finally panned out. Here’s everything you need to know for a great half-day adventure…

Please note: all info below is accurate as of January 2023
Having been to Ghana on and off for the past decade, my trips were isolated to the same stretch of road between Accra, Kumasi, and Berekum leaving the Eastern Region of the country an untouched landscape full of adventure.
Within a week of regularly driving the Tema-Akosombo road, it was clear that one mountain towered above the rest: cue Mount Krobo. After weeks of trying to arrange a hike the plans finally panned out.
Here’s everything you need to know for a great half-day adventure!
Hiking the base of Mount Krobo, Ghana
A brief history of Mount Krobo
Dating back to the 16th century, the Dangme people of East Africa up and left their settlements, deciding to migrate towards present day Ghana. Once they reached West Africa, the group made friends with other ethnicities as they passed through, including the Ewe people.
As the trek progressed, a split from the Ewe became necessary and it was at this point in their journey that the Krobo refer to as Lorlorvor, meaning “love has ended.”
The Krobo people crossed the Volta River in continued search of a new settlement when they found themselves surrounded by the Akan and Guan ethnic groups. Fear of these perceived threats forced them to climb an isolated mountain on the plains near the river, known today as Mount Krobo.
Having experienced first-hand the difficult climb as a natural safety measure they began to establish their new settlement, quickly erecting multi-story homes and irrigation systems.
As the Krobo population continued to expand, the colonial government found it increasingly difficult to monitor and control the settlement. As a result in 1892, the British rulers gave the community 3 days to leave the mountain. The people fled with as much as they could carry and what was left behind was destroyed.
To this day, the Krobos continue to organize a pilgrimage to pay homage to their ancestors.
Experience more of Ghana’s hiking scene. Don’t miss these posts:
How to get to Mount Krobo in Ghana’s Eastern Region
Not the most conveniently located attraction in Ghana, the easiest way to access Mount Krobo is by taking a tro-tro or taxi to Akuse Junction. From here, the unmarked trailhead is 3.1km south on the left side of the road, just past Kings and Queens Teaching Hospital.
Although possible to walk from the intersection, it’s not advisable given the volume of speeding traffic along the Tema-Akosombo Road.
If all else fails, the trailhead is pinned below, and the path can be seen from Google satellite images.
When to go
For sweeping views across the plains, it’s best to avoid the Harmattan season which runs from November to March as the horizon is often laden with dust that obscures the landscape.
Helpful Information
Some reports indicate a 7.50 GHC entrance fee to a local farmer, but we did not encounter anyone. It’s also vital to bring plenty of water and sunscreen as the mountain is exposed most of the ascent.
Other things to consider:
A reliable and comfy day pack
Pack snacks or buy fruit from the stands at Akuse Junction
Wear shoes with plenty of tread
Wear long, lightweight pants
Bring bug spray
Plan for 4 hours, round trip
Walking poles
Start early in the morning to avoid the hottest part of the day


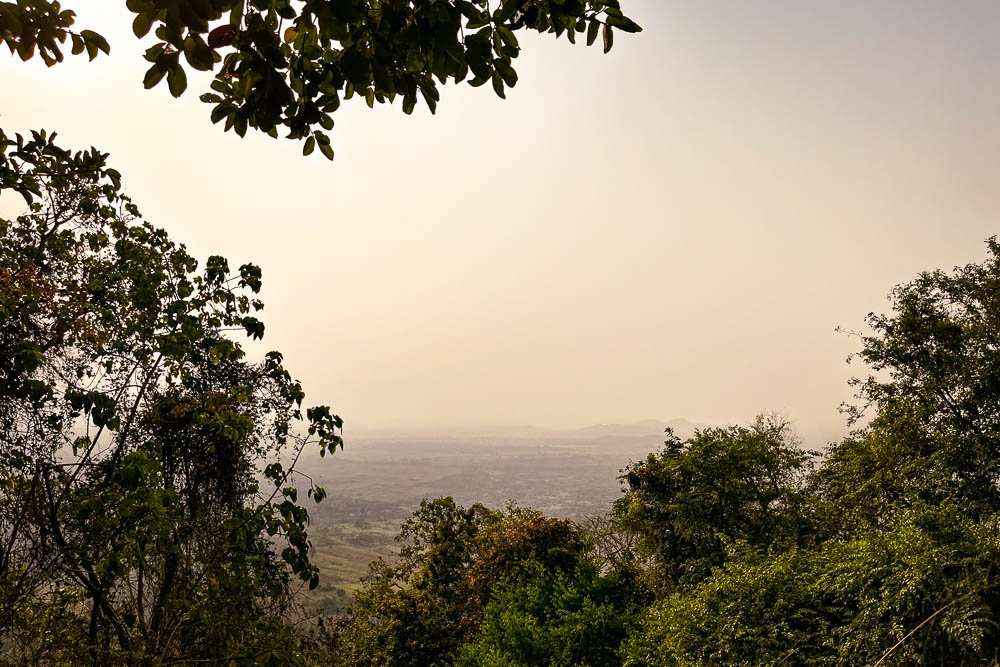
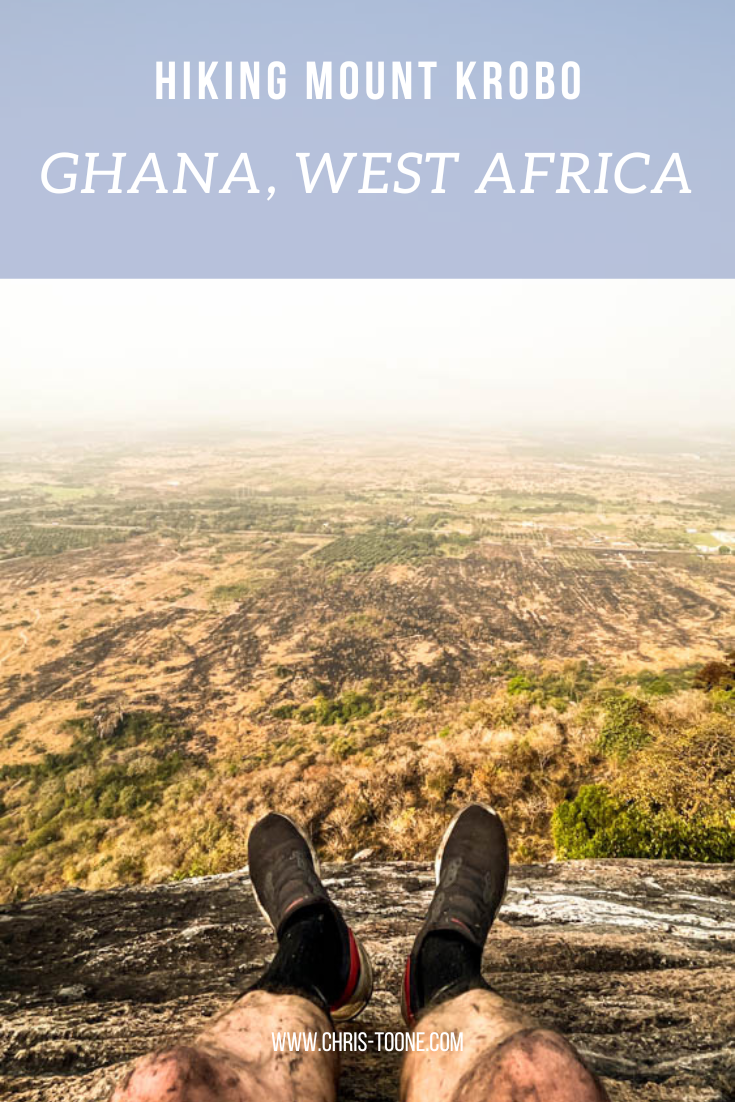
A glimpse of the landscape from the top of Mount Krobo, Ghana
What to expect while hiking Ghana’s Mount Krobo
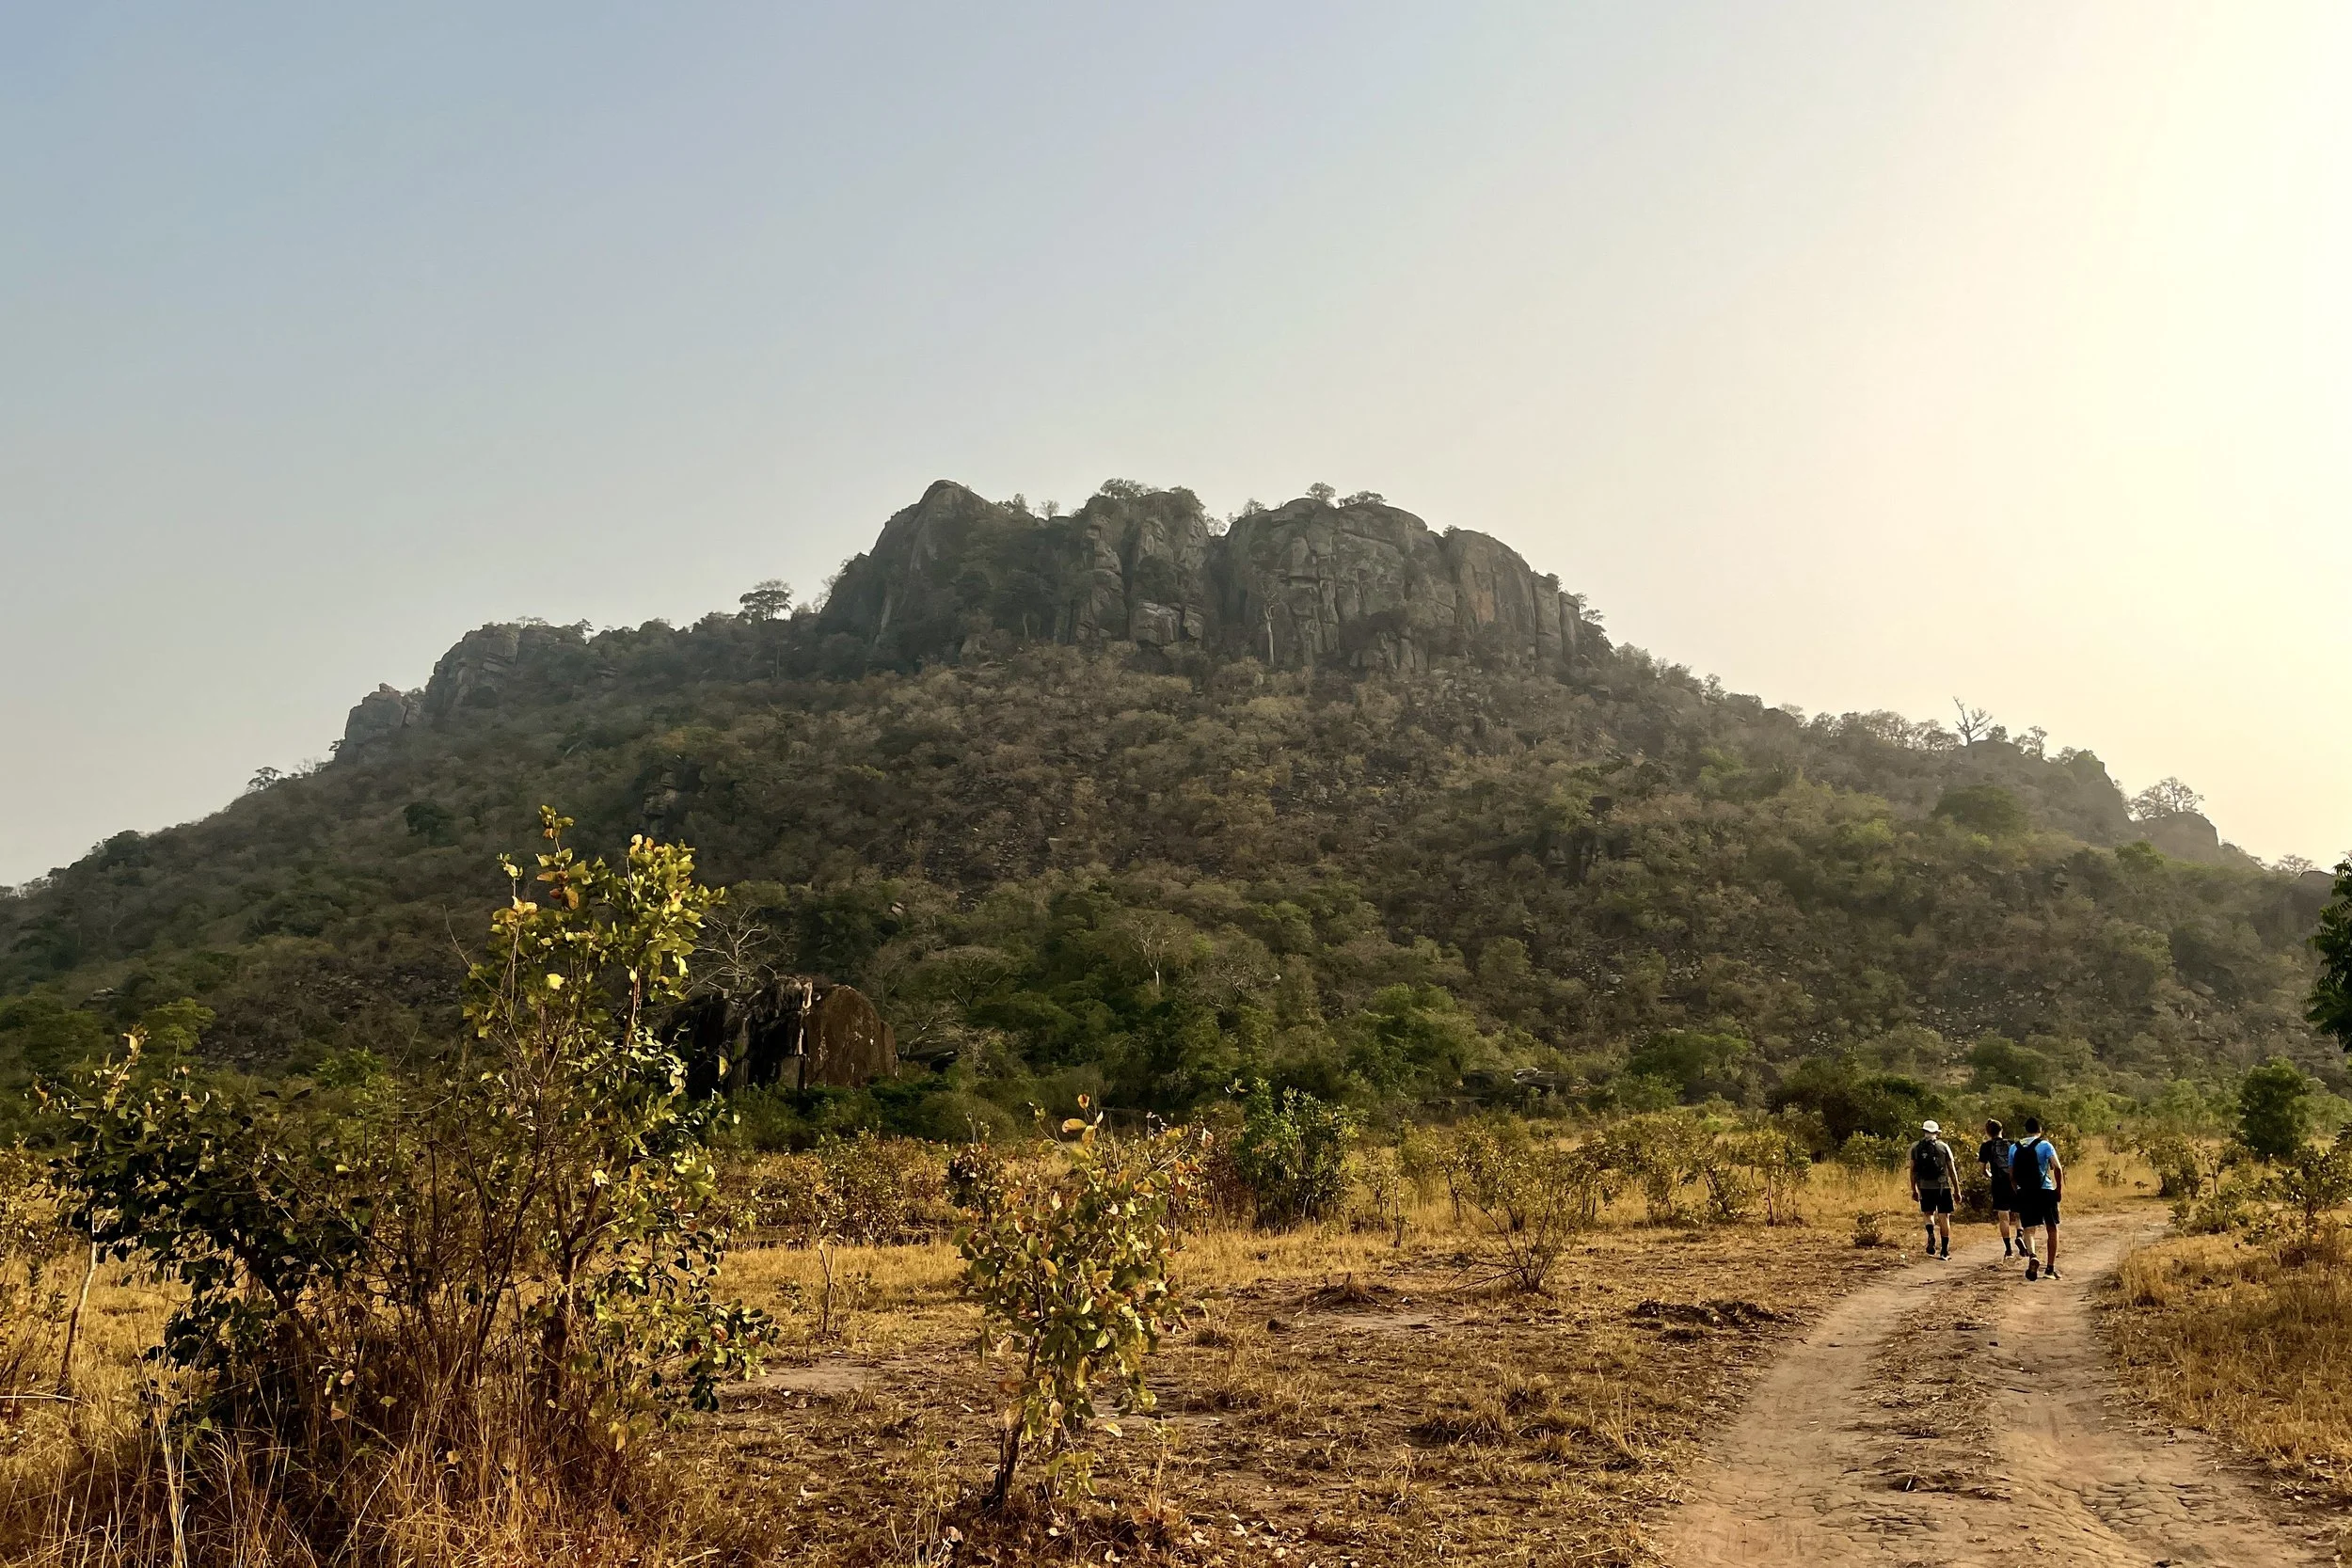
Once turning off the Tema-Akosombo Road, the hike starts flat as the dirt path winds through the brush and approaches the eastern face of the mountain. The tree-lined trail concludes at a clearing with a shelter, washrooms, and a beautiful baobab tree.
From here, the trek begins to quickly ascend through the trees. Remember to pace yourself and stay hydrated – it’s not a race to the top. Take advantage of the many lookouts along the way for some well-deserved rest.
On this particular day, the brush had just been burned along the trail, so the breaks were a welcomed reprieve from breathing in the Harmattan dust and ashy air.
Eventually, the path opens up to ruins from the Krobo civilization that once dwelled on the mountain. We wandered around the old foundations of houses while uncovering clay pots that had slowly been reclaimed by the Earth.

Ruins of the Krobo settlement
At this point, it is not much farther to the first vista that looks west over the plains. Once you have had a chance to take in the sweeping landscape, continue walking north along the top of the mountain to reach the trail's end, marked by a metal cross.
Relax, refuel, and enjoy the views.
The easiest and safest thing to do is treat Mount Krobo as an out-and-back trail. There is no loop however a local Ghanaian we met at the peak insisted we try the “shortcut” down. This included descending a solid rock wall into a ravine and galloping down the western face of the mountain that we had previously labeled “too steep to climb” as we reached the trailhead from the main road that morning.
Truth be told we would never have found this path without a guide, so best to descend back through the Krobo ruins.
Important notes for visiting Mount Krobo
Here’s what I wish we would’ve done differently:
Pin the location of the trailhead and have the taxi stop at the mark. We got out too early at Akuse Junction and had to walk the 3.1km down the Tema-Akosombo road
Bring hiking shoes. I used runners and immediately regretted my decision as we started the steep descent through the ashy brush
Wear long pants. The trail is clearly defined, but that doesn’t mean brush doesn’t get in the way. I left the mountain with scrapes and cuts up and down my legs. Nothing serious, but next time I’ll pack pants
Get the taxi driver’s phone number to call on the descent and meet at the end of the trailhead to avoid walking back to Akuse Junction for a ride

Views from the top of Mount Krobo, Ghana
All in all, it made for a great morning adventure. Be sure to do a little digging on the Krobo people before the hike. Knowing the history of the mountain made the experience meaningful beyond the beautiful fauna and striking landscape.
Have you hiked Mount Krobo before or know of other adventures you want me to experience in Ghana? Leave a comment below and let’s keep exploring!
As always, thanks for reading & happy travels.
Sharing is caring! Pin this post for later.


The Ultimate 3-day Itinerary in Boquete, Panama: Experience cloud forests, coffee, and more!
From ominous cloud forests and lush jungle vegetation to the world’s best coffee bean, Boquete is a magical place nestled within the Chiriquí Highlands of Panama that an adventurer’s dream. Here’s a 3-day itinerary to help you plan your next trip!
First and foremost, let me take a moment to answer the most important question: is three days enough in Boquete?
No.
There’s such a high volume of places to explore and things to experience that it’d be easy to spend weeks, if not a month here. This guide will at least help you to scratch the surface and be well on your way to creating the perfect Boquete, Panama itinerary that works for you!
BACKGROUND
Boquete is a small town located in western Panama about 40 miles from the border with Costa Rica. It’s a place popular amongst travelers and ex-pats alike for the abundance of wildlife, cloud forests, and globally acclaimed coffee beans.
Situated along the Caldera River and surrounded by the Chiquiri highlands, the area offers incredible hiking and outdoor adventures for any age including prime viewing of the elusive Quetzal, Panama’s most popular bird. Visitors will find a unique concoction of both Panamanian culture and cuisine mixed with the ex-pat influence from around the world.
If hiking isn’t your thing, no problem! Visit a coffee farm to learn how Boquete cultivates the world’s most expensive bean, soak up the cloud forest views by driving the Bajo Mano Loop, and even take a chocolate-making class in town. Either way, a trip to Boquete is well worth it!
GETTING THERE
There are three main ways to get to Boquete: car, bus, and plane. Let’s break it down:
Renting a car and driving from Panama City to Boquete will take around 6.5 hours via Route 1. It’s a scenic drive along the highway and allows travelers to take their time, stopping in towns like Santiago and David as they go.
This was the mode of transportation I opted for and although renting a car in Panama is notoriously confusing, it was liberating to have the freedom on the road. Having a car while in Boquete also made the more remote hiking trails more accessible.
The most cost-effective option is via bus. There are direct routes from Panama City to David, in which you’ll then need to transfer to further reach Boquete. Generally speaking, this is what you can expect:
Panama City to David – around 8 hours and $15.75
David to Boquete – 1 hour and $1.75
The quickest and also the most expensive way is via flight from Panama City to David before renting a car or hopping on the local bus. The flight time is around 40min and can cost between $85-$150.
WHERE TO STAY
Thanks to the ex-pat community, there is a wide range of accommodation available from hostels to bed and breakfasts or fully furnished Airbnb rentals!
Sub - $50
$50-$100
$100+
Hotel Finca Lerida Coffee Estate
During this three-day trip, I opted for an Airbnb at Villa Cascada Boquete and could not have had a better experience! The living space is detached from the main home for complete privacy, including entry, and comes complete with a secluded and relaxing koi pond off the back patio. The location is an easy walk to downtown Boquete and made for the perfect home base.
3-DAY ITINERARY
There are a few quick notes to make regarding the itinerary below.
To start with, I tend to travel as most cost-effectively as possible. Often I opt to save money on fancy meals and put those funds towards more experiences. Also, anyone will tell you that I plan very little and explore a lot. Sometimes it works out and sometimes it leaves me wanting more, but it's a risk I'm willing to take.
With these points in mind, let’s dive into a basic, three-day itinerary in Boquete, Panama!
DAY 1:
Breakfast: I opted for a quick and easy breakfast at the Airbnb before packing snacks and heading to the cloud forest for a morning hike.
Two of the best grocery stores to stock up on easy meals and snacks are Super Barú Boquete and Romero Boquete.
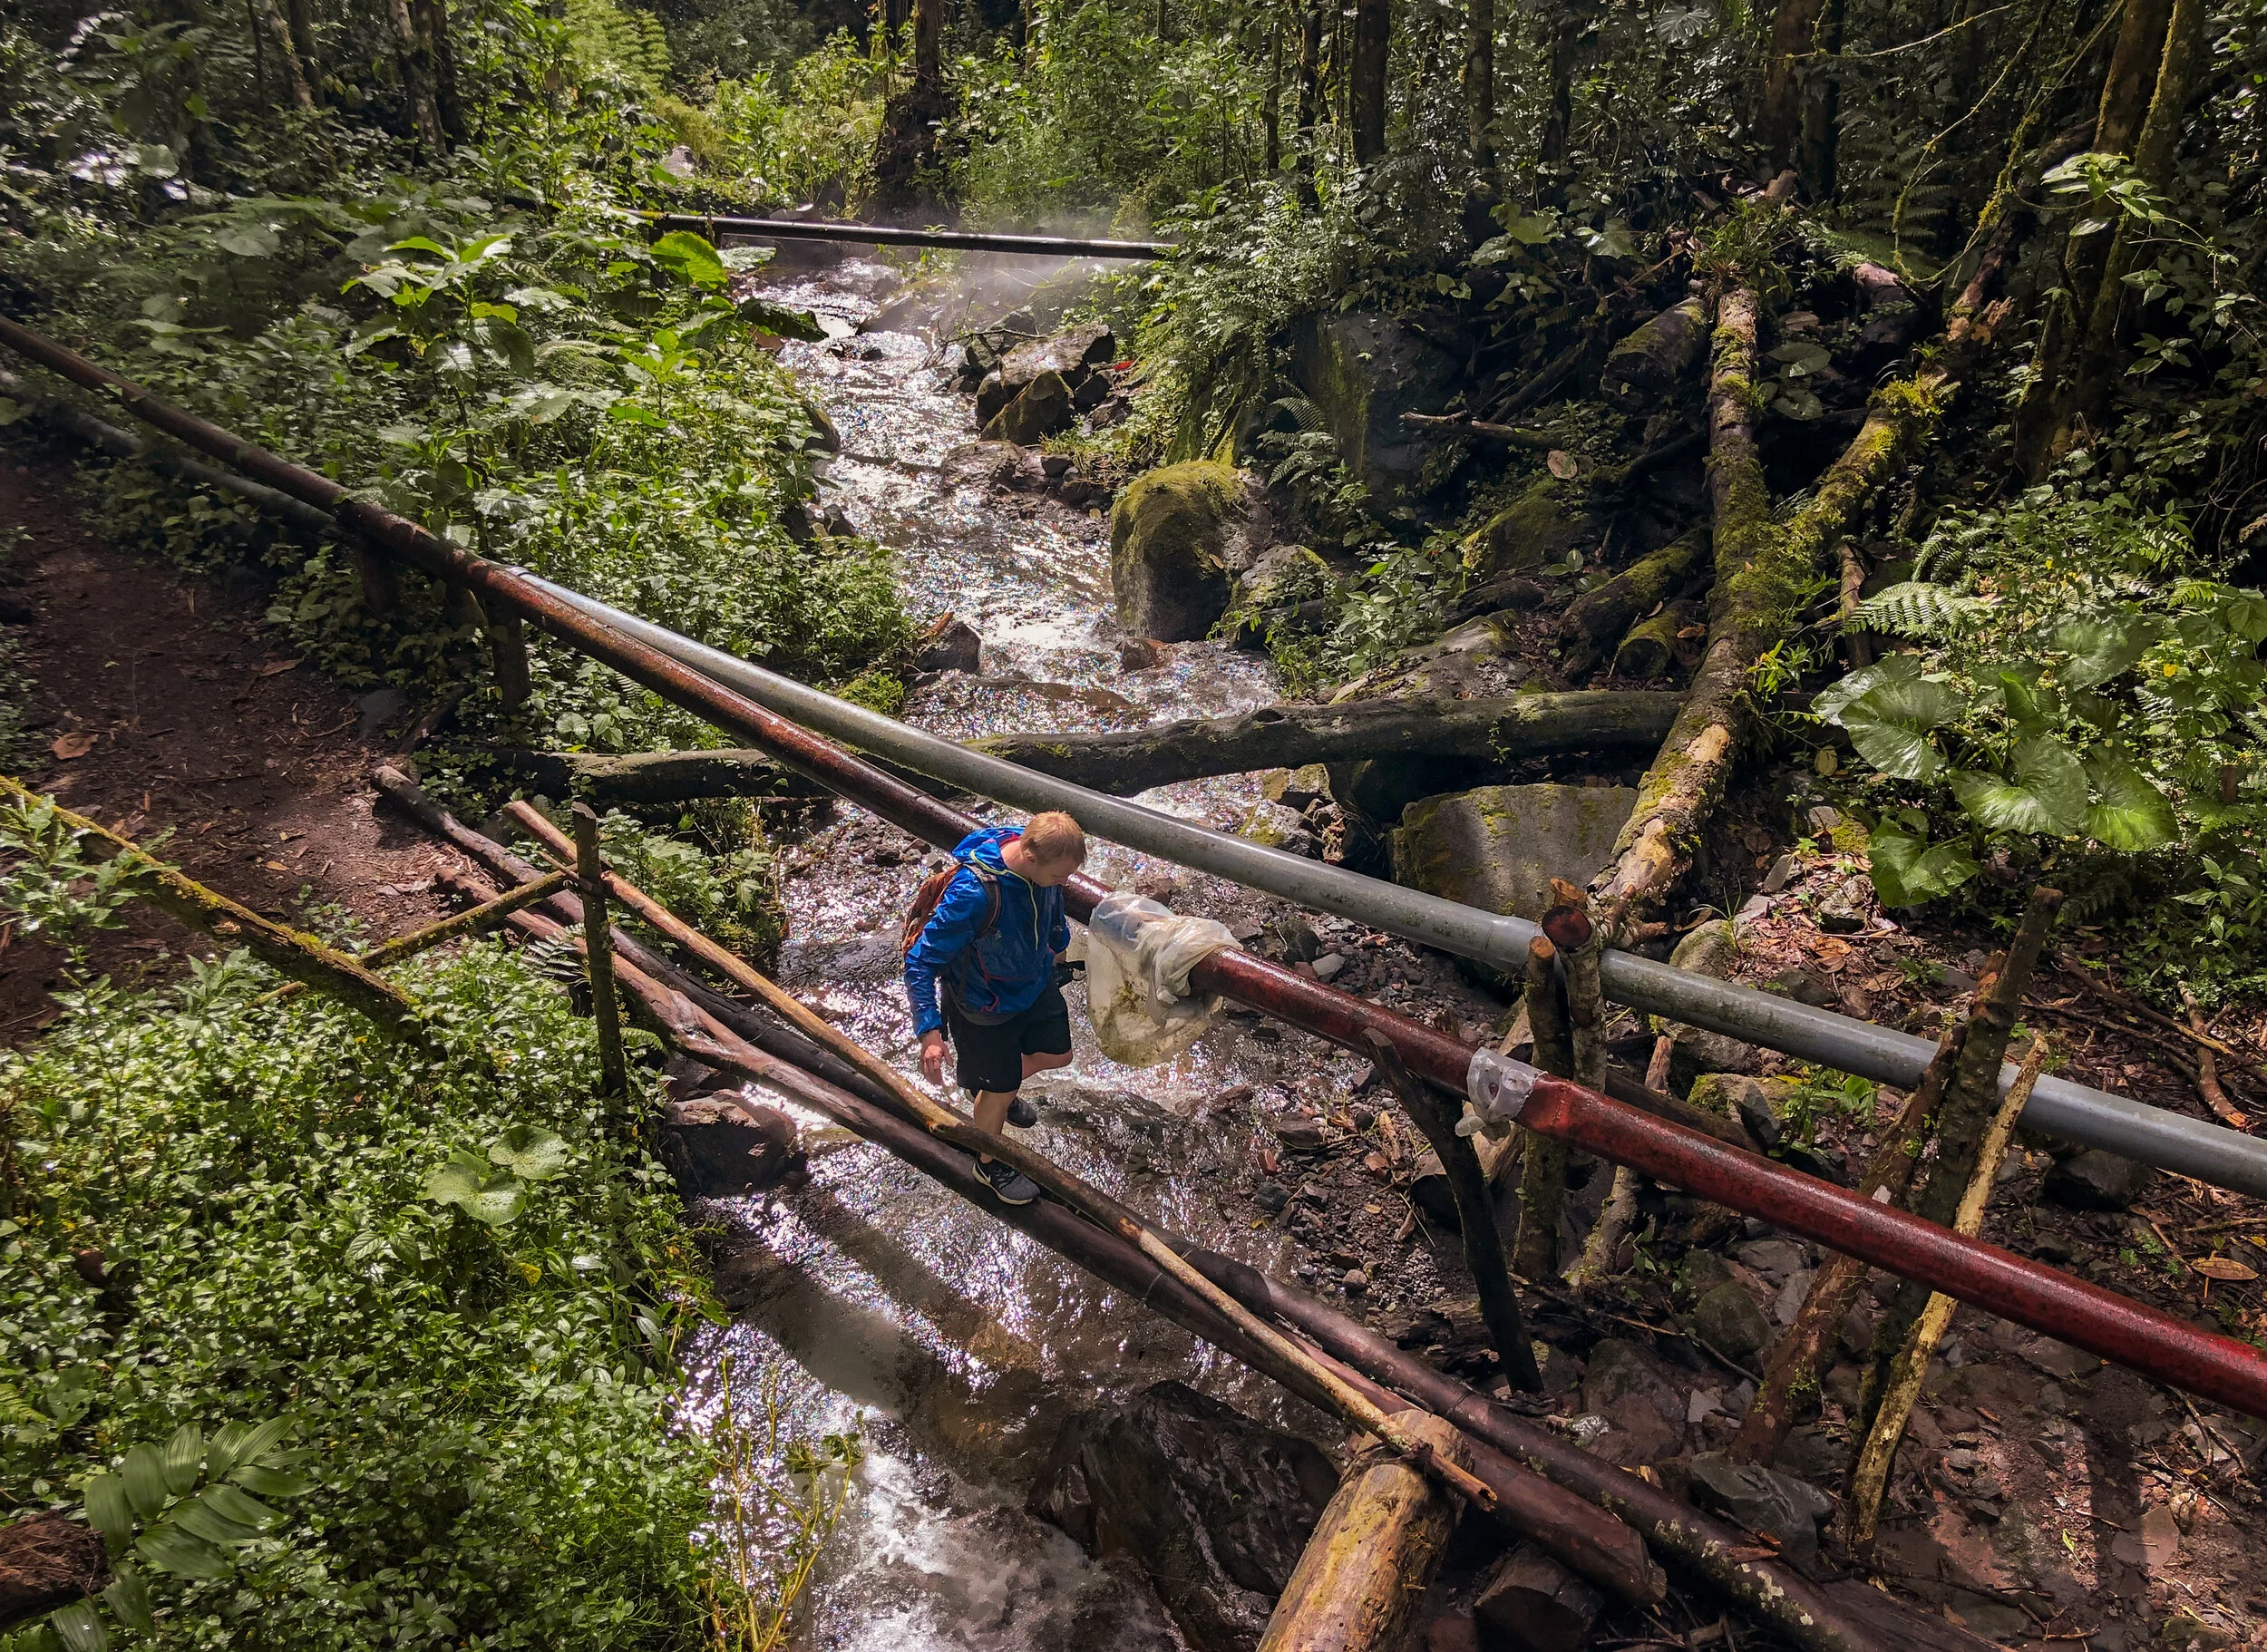
Pipeline Trail: The Boquete area has such an abundance of trails to explore that it can be quite overwhelming to choose one to do, especially if on a limited time. This was my first experience hiking in the jungle, so I chose the Pipeline Trail as it’s well known, clearly marked, and relatively flat. Due to the popularity, it’s best to wake up early and start the trek first thing in the morning.
This hike takes visitors through the lush jungle along a narrow path and is commonly known as one of the best places in town to view the Quetzal bird. Along the trail lies a massive 1,000-year-old tree, shooting straight up into the jungle canopy.
The gem of this 3.8-mile loop hike is the cascading waterfall that provides the necessary mist to cool off and feel energized for the trek back to the trailhead.
Note: The locals regulate the trail and there is a 5 USD entrance fee per person, as well as a required sign-in/out. As you walk up from the “Welcome” sign at the road, a small hut will be on the left before you enter the jungle.


Lunch: After being energized by the Pipeline Trail, I opted for a quick lunch/rest back at the Airbnb before setting out on another adventure.
Choclón Waterfall: This was an adventure for the ages. As I was researching places to visit in Boquete, I came across a picture of these stunning twin waterfalls and knew I needed to visit. The only problem was there was no location listed.
Armed with loose GPS coordinates and blurry Google Satellite images of the area, I set off to see if I could make it happen.
After hours of trying, re-trying, almost giving up, and then trying yet again (you can read more about the full adventure by clicking here), I finally found the correct path that led to the magical Choclón Waterfall.
The path itself was overgrown, narrow, and isolated, but the short hike down to the riverbed beyond worth the effort!

Dinner: After expending so much energy on the hiking trails throughout the day, it was a stay-in and rest type of night for dinner, only stepping foot outside to reward myself with a delicious dessert from Gelateria La Ghiotta, a frequent stop on my trip.
DAY 2:
Breakfast: Still feeling the effects of a day full of exploring in the sun and humidity, day 2 was more about exploring the downtown Boquete area. After several local recommendations, I settled on a place called Olga’s for breakfast.
Situated in her own home and greeting each customer with a hug and a kiss on the cheek, Olga’s food was by far the best I experienced on my Panamanian adventure!

Daytime Adventures:
La Viuda del Cafe
The Boquete area is well known around the world for cultivating the Geisha coffee bean. With a gentle wildflower aroma, a bag of these can go for $600 and just a cup can cost $64 in Dubai!
Luckily by being at the source it’s much more affordable. La Viuda del Café is a boutique coffee shop that translates literally as “the coffee window.” Here a cup of Geisha coffee costs only $4!
Is the delectable bean that good? Yes, it is, my friends.

Pastelería Alemana
Located south of downtown Boquete and along Route 41 lays Pastelería Alemana.
A small German pastry shop, the outdoor seating area makes for an odd yet perfect experience, eating a scrumptious apple strudel while gazing off at the remote jungle in the distance.
Faro Panama
I had passed this attraction on the drive into town from Panama City and was completely taken aback. How does a giant lighthouse make its way to such a remote part of the country?
Long story short, this family fun center opened just before my arrival in Boquete and I was the only car in the parking lot. It was an ominous feeling to see an empty complex and have the staff so surprised to see a visitor, but the top of the lighthouse provided unparalleled 360-degree views of the area, including Volcan Barú.
The cost was 4.25 USD per person.

Café Ruiz
To fuel up for an evening hike, a quick stop at the Café Ruiz coffee farm was necessary. Nestled out of town and amongst lush flora, the tasting flight of various local coffees was a needed afternoon jolt.
Café Ruiz also offers some of the shorter/cheaper coffee tours in town. I tried to sign up for one but unfortunately, it was full. Lesson learned; book in advance!
Learn more about Panama’s coffee culture through these top-rated tours:
La Piedra de Lino
Translated as “the rock of Lino,” this short yet steep hike offers some of the most spectacular views over Boquete and the surrounding cloud forests.
Climbing 1000+ feet in just over 1.5 miles, La Piedra de Lino is a leg burner and not for the faint of heart, but the payout at the top is worth it.
The path can get slippery, especially after a good rainfall. Be sure to wear shoes with good tread and move slowly.

Dinner: Sabrasón
A cafeteria-style buffet full of Panamanian cuisine and incredibly cheap, Sabrasón made for a quick and easy meal after an exhausting and fulfilling hike up La Piedra de Lino.
Dessert: Gelateria La Ghiotta
DAY 3:
Breakfast: Olga’s… again. Enjoying homemade food on the back patio and surrounded by local flora was the perfect way to start the day.
Tuesday Market: If you’re looking to avoid the ex-pat influence, then the Tuesday Market isn’t for you. With that being said, it’s a unique experience in the area as the community congregates to sell local foods and gifts.
Shopping: Finding the right knick-knacks is far cheaper in Boquete than back in Panama City, so before I drove out of town I spent some time wandering up and down the main road while browsing the local selection of blankets, backpacks, and more.
Boquete was a quick stop on a whirlwind trip around Panama and I wish I had been able to spend more time here, but it’s certainly a place that’s high on my list to return to and learn more about.
Questions? Have other ideas for a trip to Boquete? Leave them in the comments below and be sure to check out my other posts about Panama!
Stay safe & happy travels!
Enjoy this post? Pin and share with others!


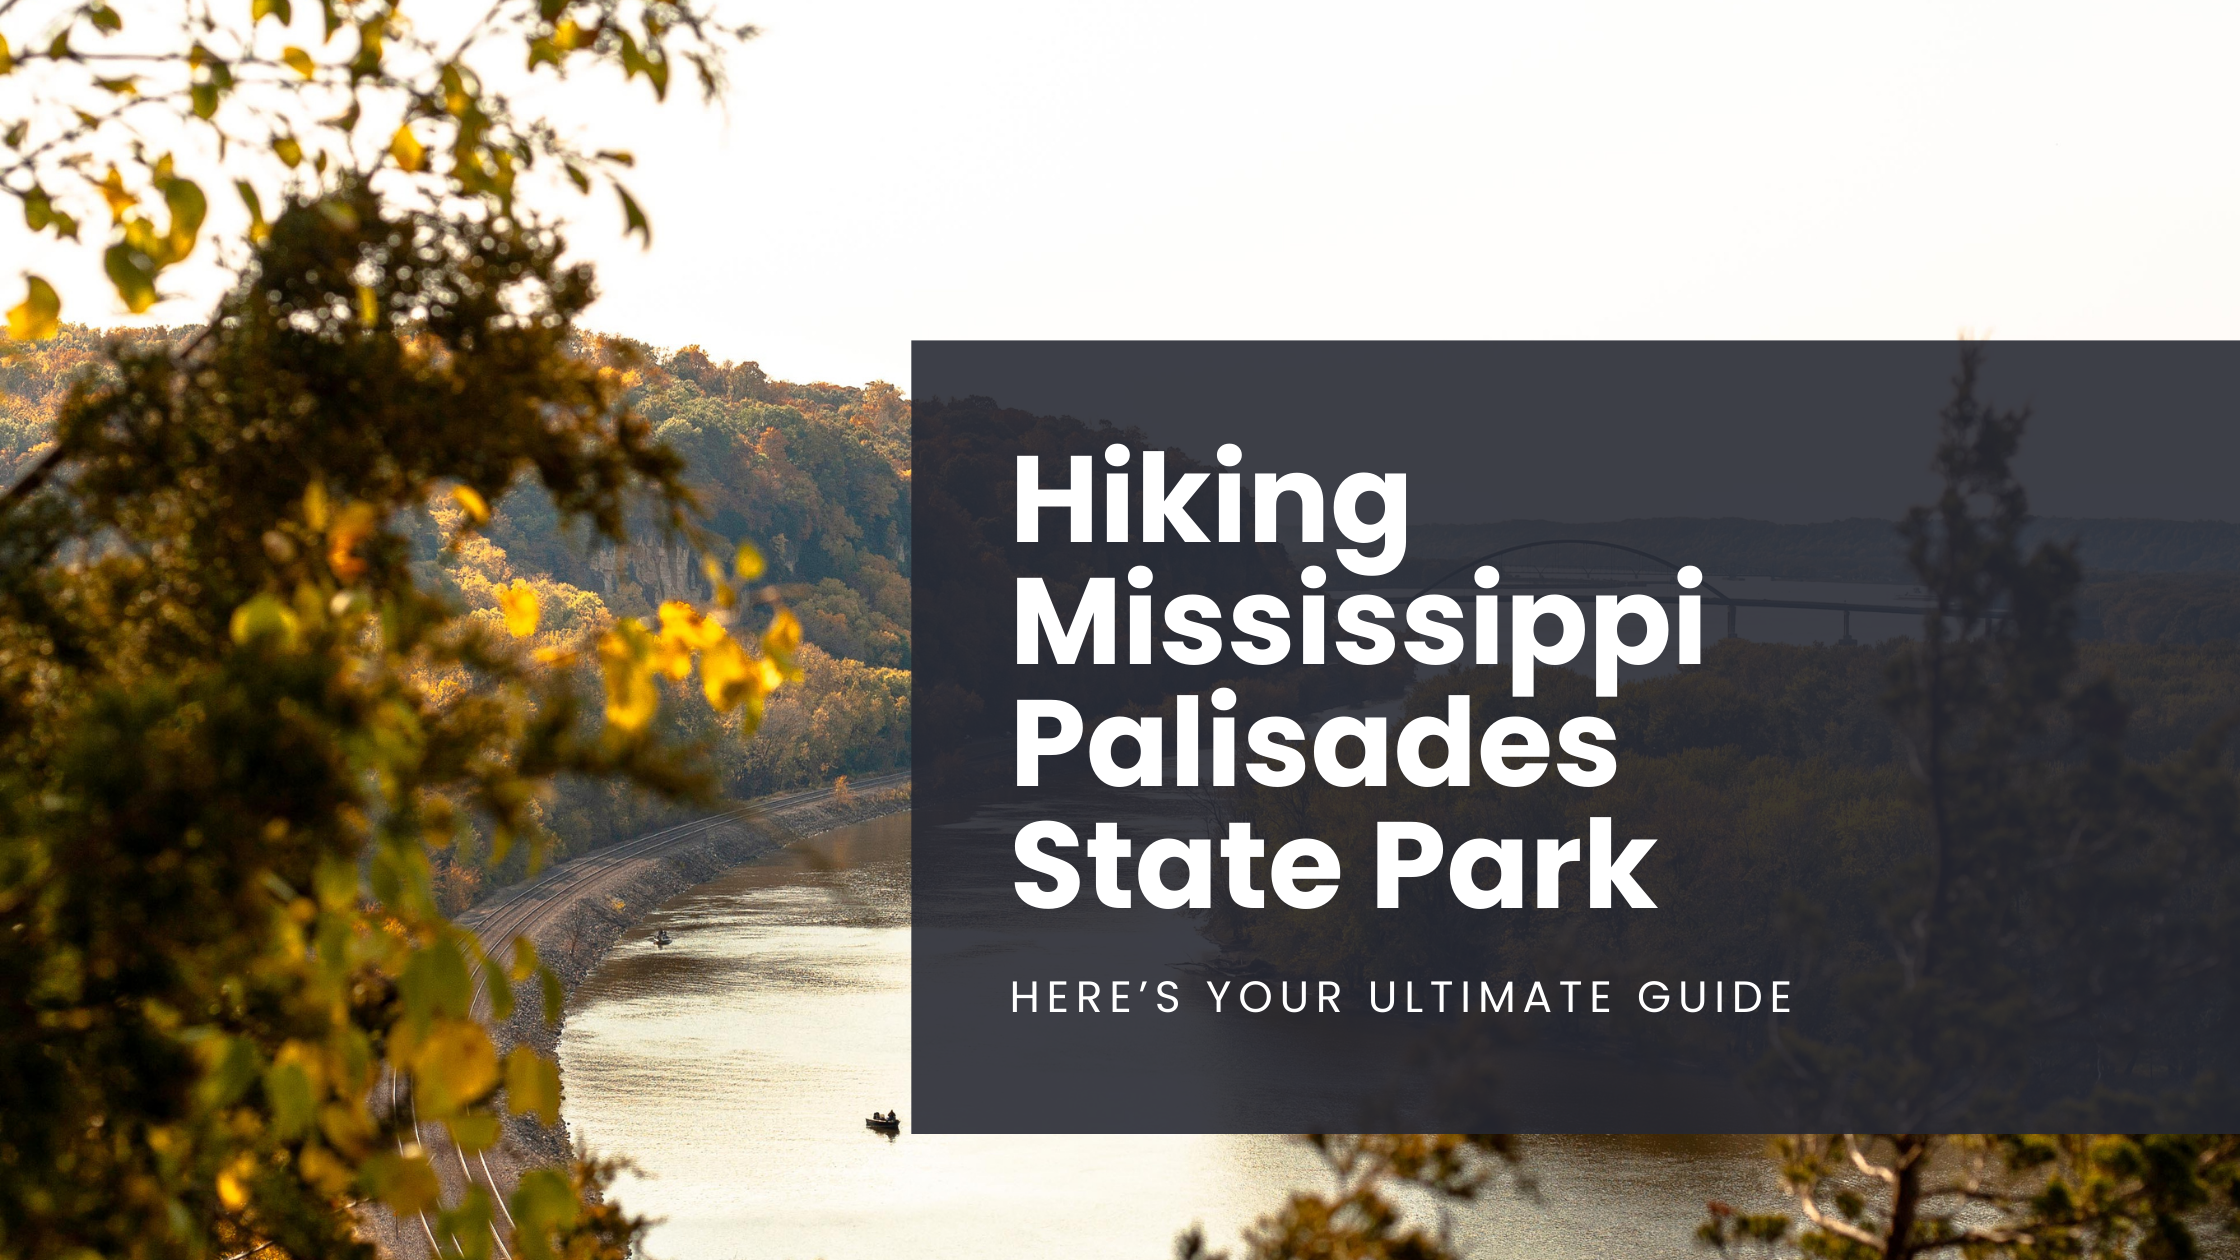
The Ultimate Hiking Guide to Mississippi-Palisades State Park
With local travel the name of the game in 2020, it’s time to explore a little closer to home. With bluffs to climb, fall foliage to soak up, and expansive views of the Mississippi River, there’s every reason to visit Mississippi-Palisades State Park! Here’s everything you need to know…
Local travel is the name of the game in 2020 and with autumn in full bloom, it seemed like the perfect time to migrate away from the bustling streets of Chicago and into the woods to soak up all of the colorful glory.
My alarm rang far too early at 5 am, but it was well worth the sleepless night as I rolled into an empty Mississippi-Palisades State Park at the crack of dawn, nestled along the northern section of the great Mississippi River and complete with sweeping views of Iowa across the way.
Picnic areas, grassy fields, and overlooks are in abundance within the 2,500 acre National Natural Landmark, but the goal of the day was to explore the trails and gain some much-needed elevation (I’m still adjusting to living in the midwest — shout out to the Wasatch Mountains back in Utah).
Here’s everything you need to know about hiking in Mississippi-Palisades State Park:

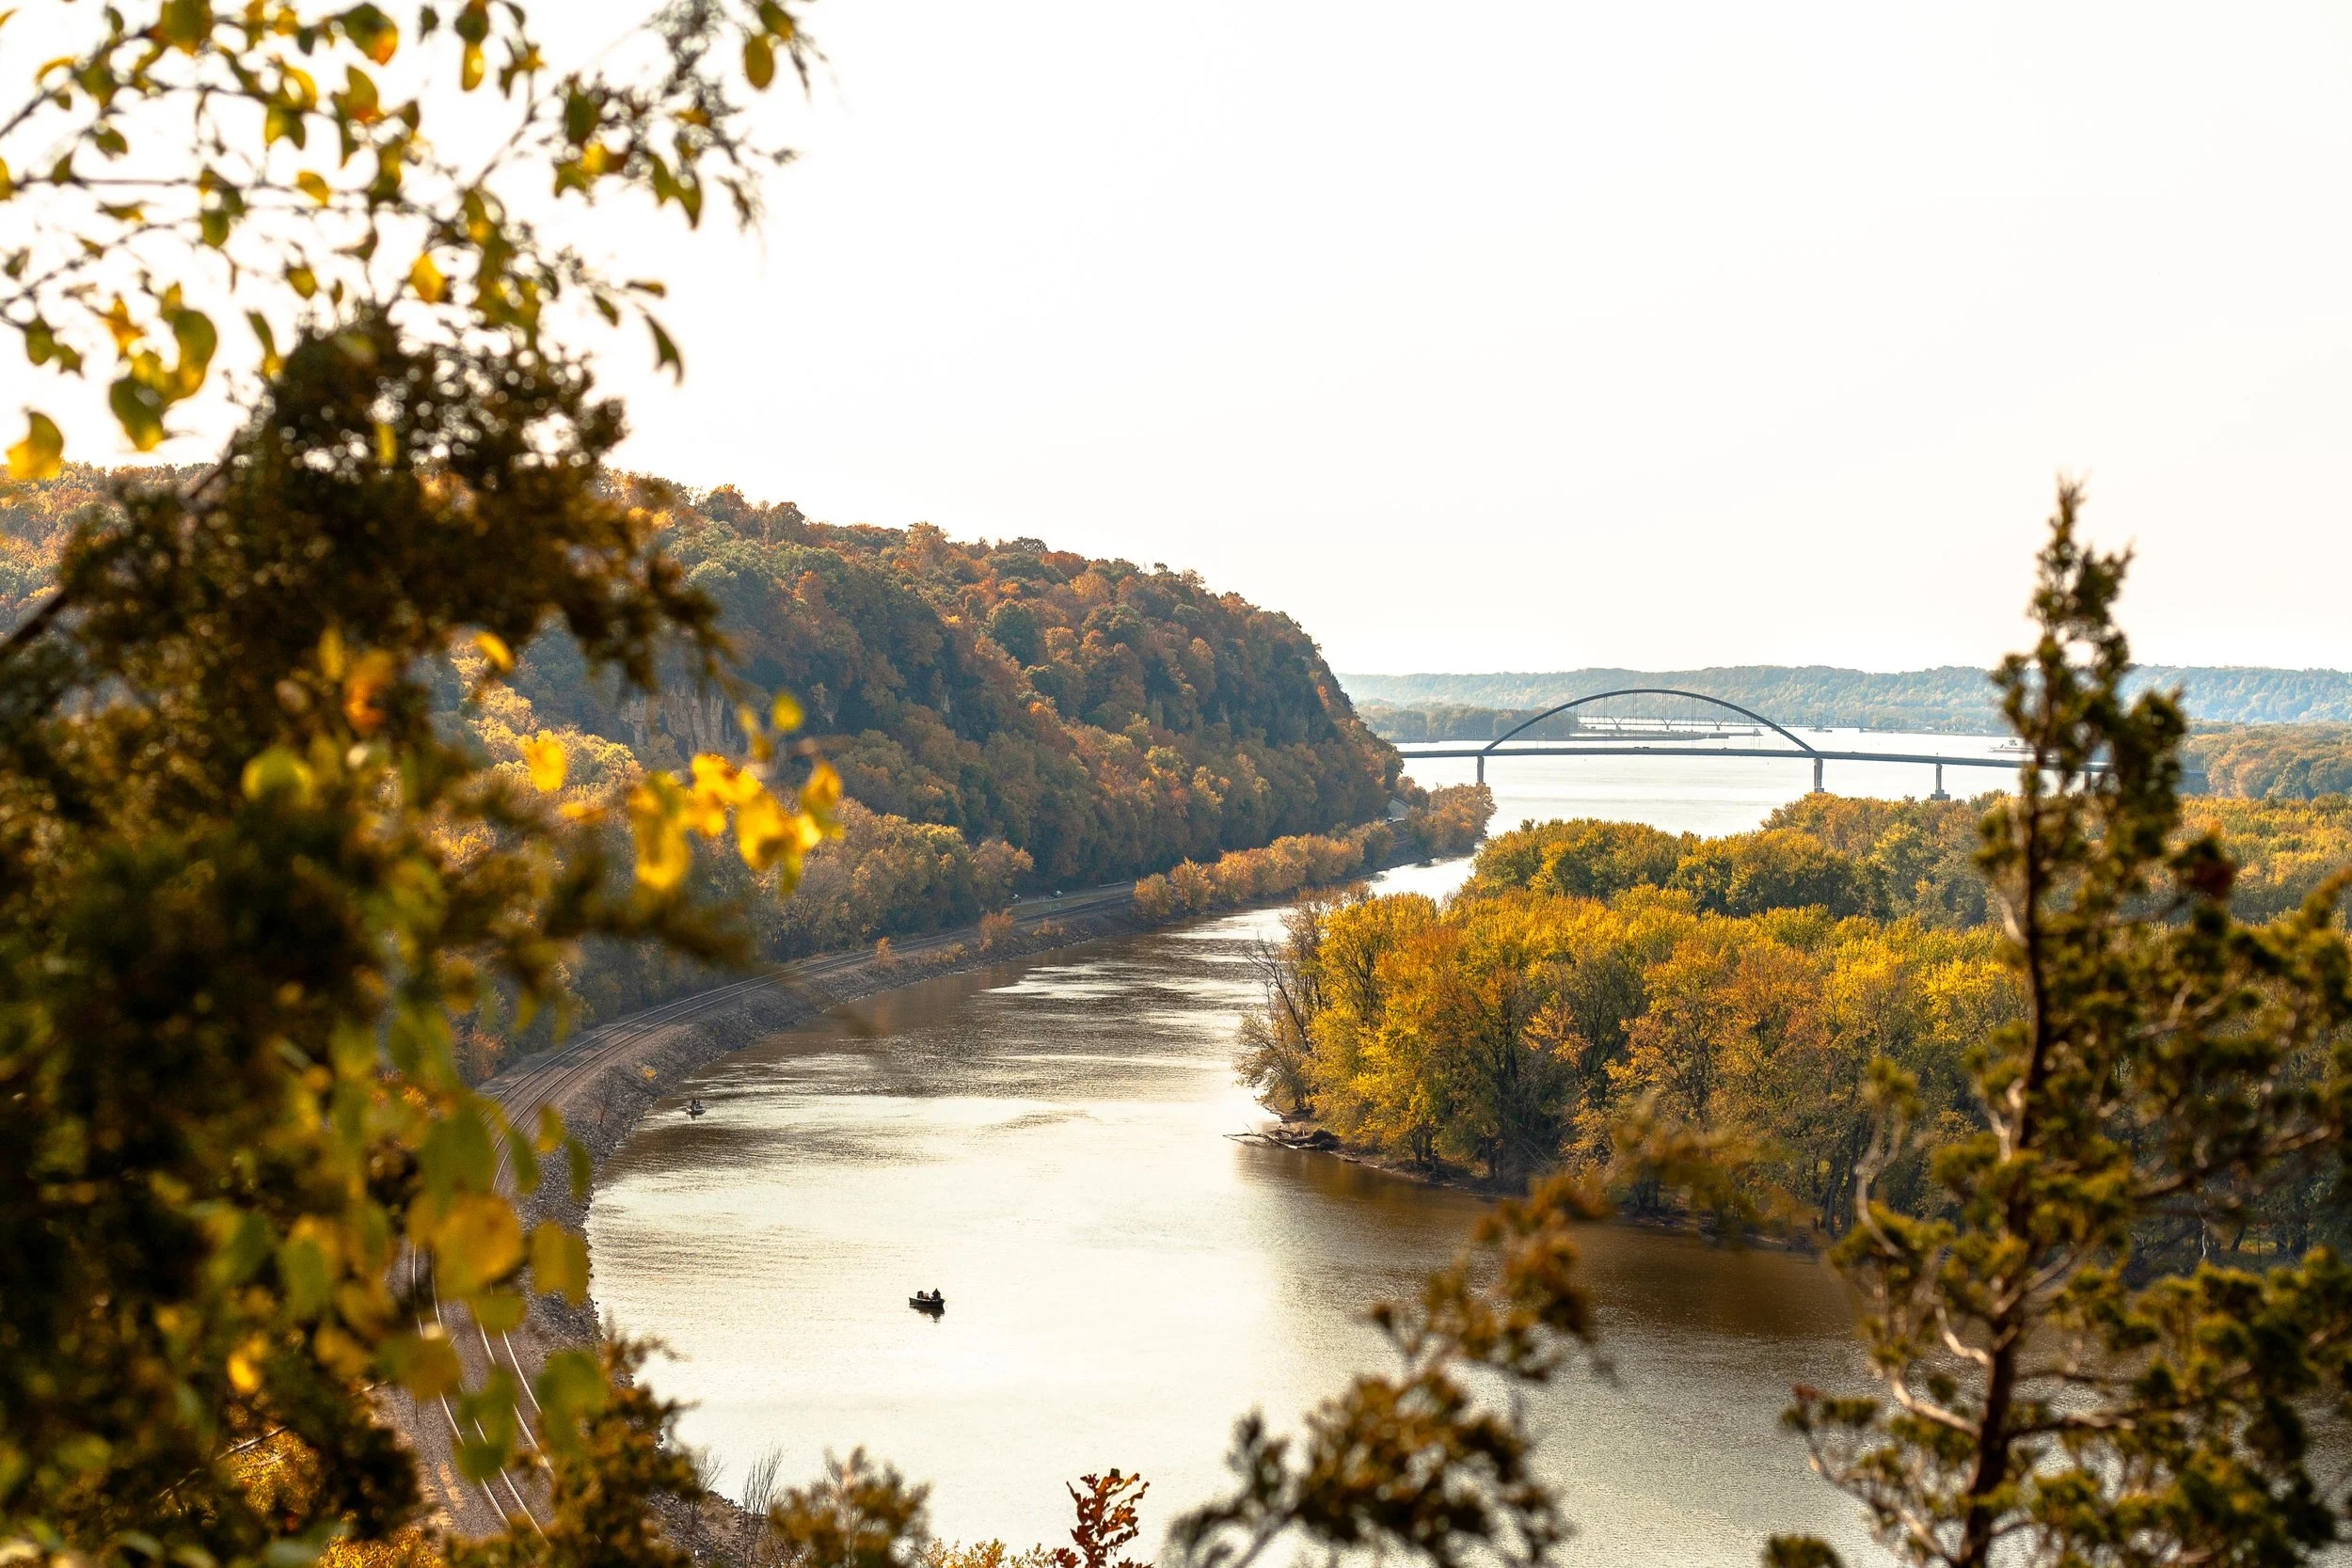
View of the Mississippi River as seen from the Sunset Trail at Mississippi-Palisades State Park
THE BASICS:
Location: Just north of Savanna, Illinois in Carroll County
Established: The park was founded in 1973
Trails: Hiking in the area is divided into the north and south systems, both containing 5 trails of their own for a cumulative 15-miles worth
Note: this post focuses on the southern trail system
Drive Time: 2 hours and 45 minutes from Chicago, depending on the time of day
Cost: FREE!
Facilities: Grills, gazebos, picnic areas, and restrooms can be found throughout the park
Why Mississippi-Palisades: The drive along the Great Northern Road as it pops in and out of small towns is just as stunning as the park itself, but there’s nothing quite like hiking up the bluffs and seeing the sweeping views above the Mississippi River in the peak of autumn
Difficulty: AllTrails rates this 4.6-mile multi-trail loop as ‘difficult’ due to a few sections of steeper terrain, but it’s a great combination of ascent, descent, and level ground. Plenty of families with young children were out and about
Great! Now that we’ve covered the basics, here’s how I spent my time wandering the southern trail system:
SUNSET TRAIL
I’d recommend starting with this trail as early as possible as the Lookout Point is by far the most popular overlook of the Mississippi River within the state park’s southern trail system. It’s here where you’ll soak up the sweeping views of the river and watch trains roll by below for as long as your heart desires.
The steepest part of the trail is departing from the parking lot as you climb the stairs and gain a quick chunk of elevation. Keep in mind that it’s a narrow, single-track dirt path with steep drop-offs to one side, so be on the lookout for other hikers and proceed with caution.
Once you reach the top of the bluff you’ll encounter a road that leads directly to the overlook. Do not head that way. Instead, cross over and continue on the trail. This winding path will take you down into a ravine thick with vegetation, complete with a wooden foot-bridge that’s set beneath a canopy of changing leaves.
As you make your way up and out of the trail’s low-point, you’ll stumble back onto the road and have the opportunity to scope the overlook. Pro tip: If it’s busy, continue south on the trail and you’ll find a separate, unofficial overlook with views downriver.

Sunset Trail in Mississippi-Palisades State Park
Don’t forget to pack these essentials!


SENTINEL TRAIL
Sentinel Trail is an easy 1.2-mile trail that is located directly across the road from the Sunset Trail, next to the picnic shelter and makes for a convenient second loop on the day.
As you cross the bridge and reach the fork, head left. This will take you up another set of wooden stairs and to a t-junction at which point you’ll choose left again. This will take you to an upper parking lot where you will pick up the less-trafficked Pine Trail.
After completing the short Pine Trail loop (see next section), head back up the Sentinel Trail path that led to the parking lot and continue straight past your previous left turn at the t-junction. This will take you back towards the Mississippi River and over to some last-minute views across the water before heading back down to the parking lot via stairs and narrow paths. Be sure to stop and check out some of the caves that have been carved into the side of the bluffs over the years!
Hiking through the narrow trails of Mississippi-Palisades State Park
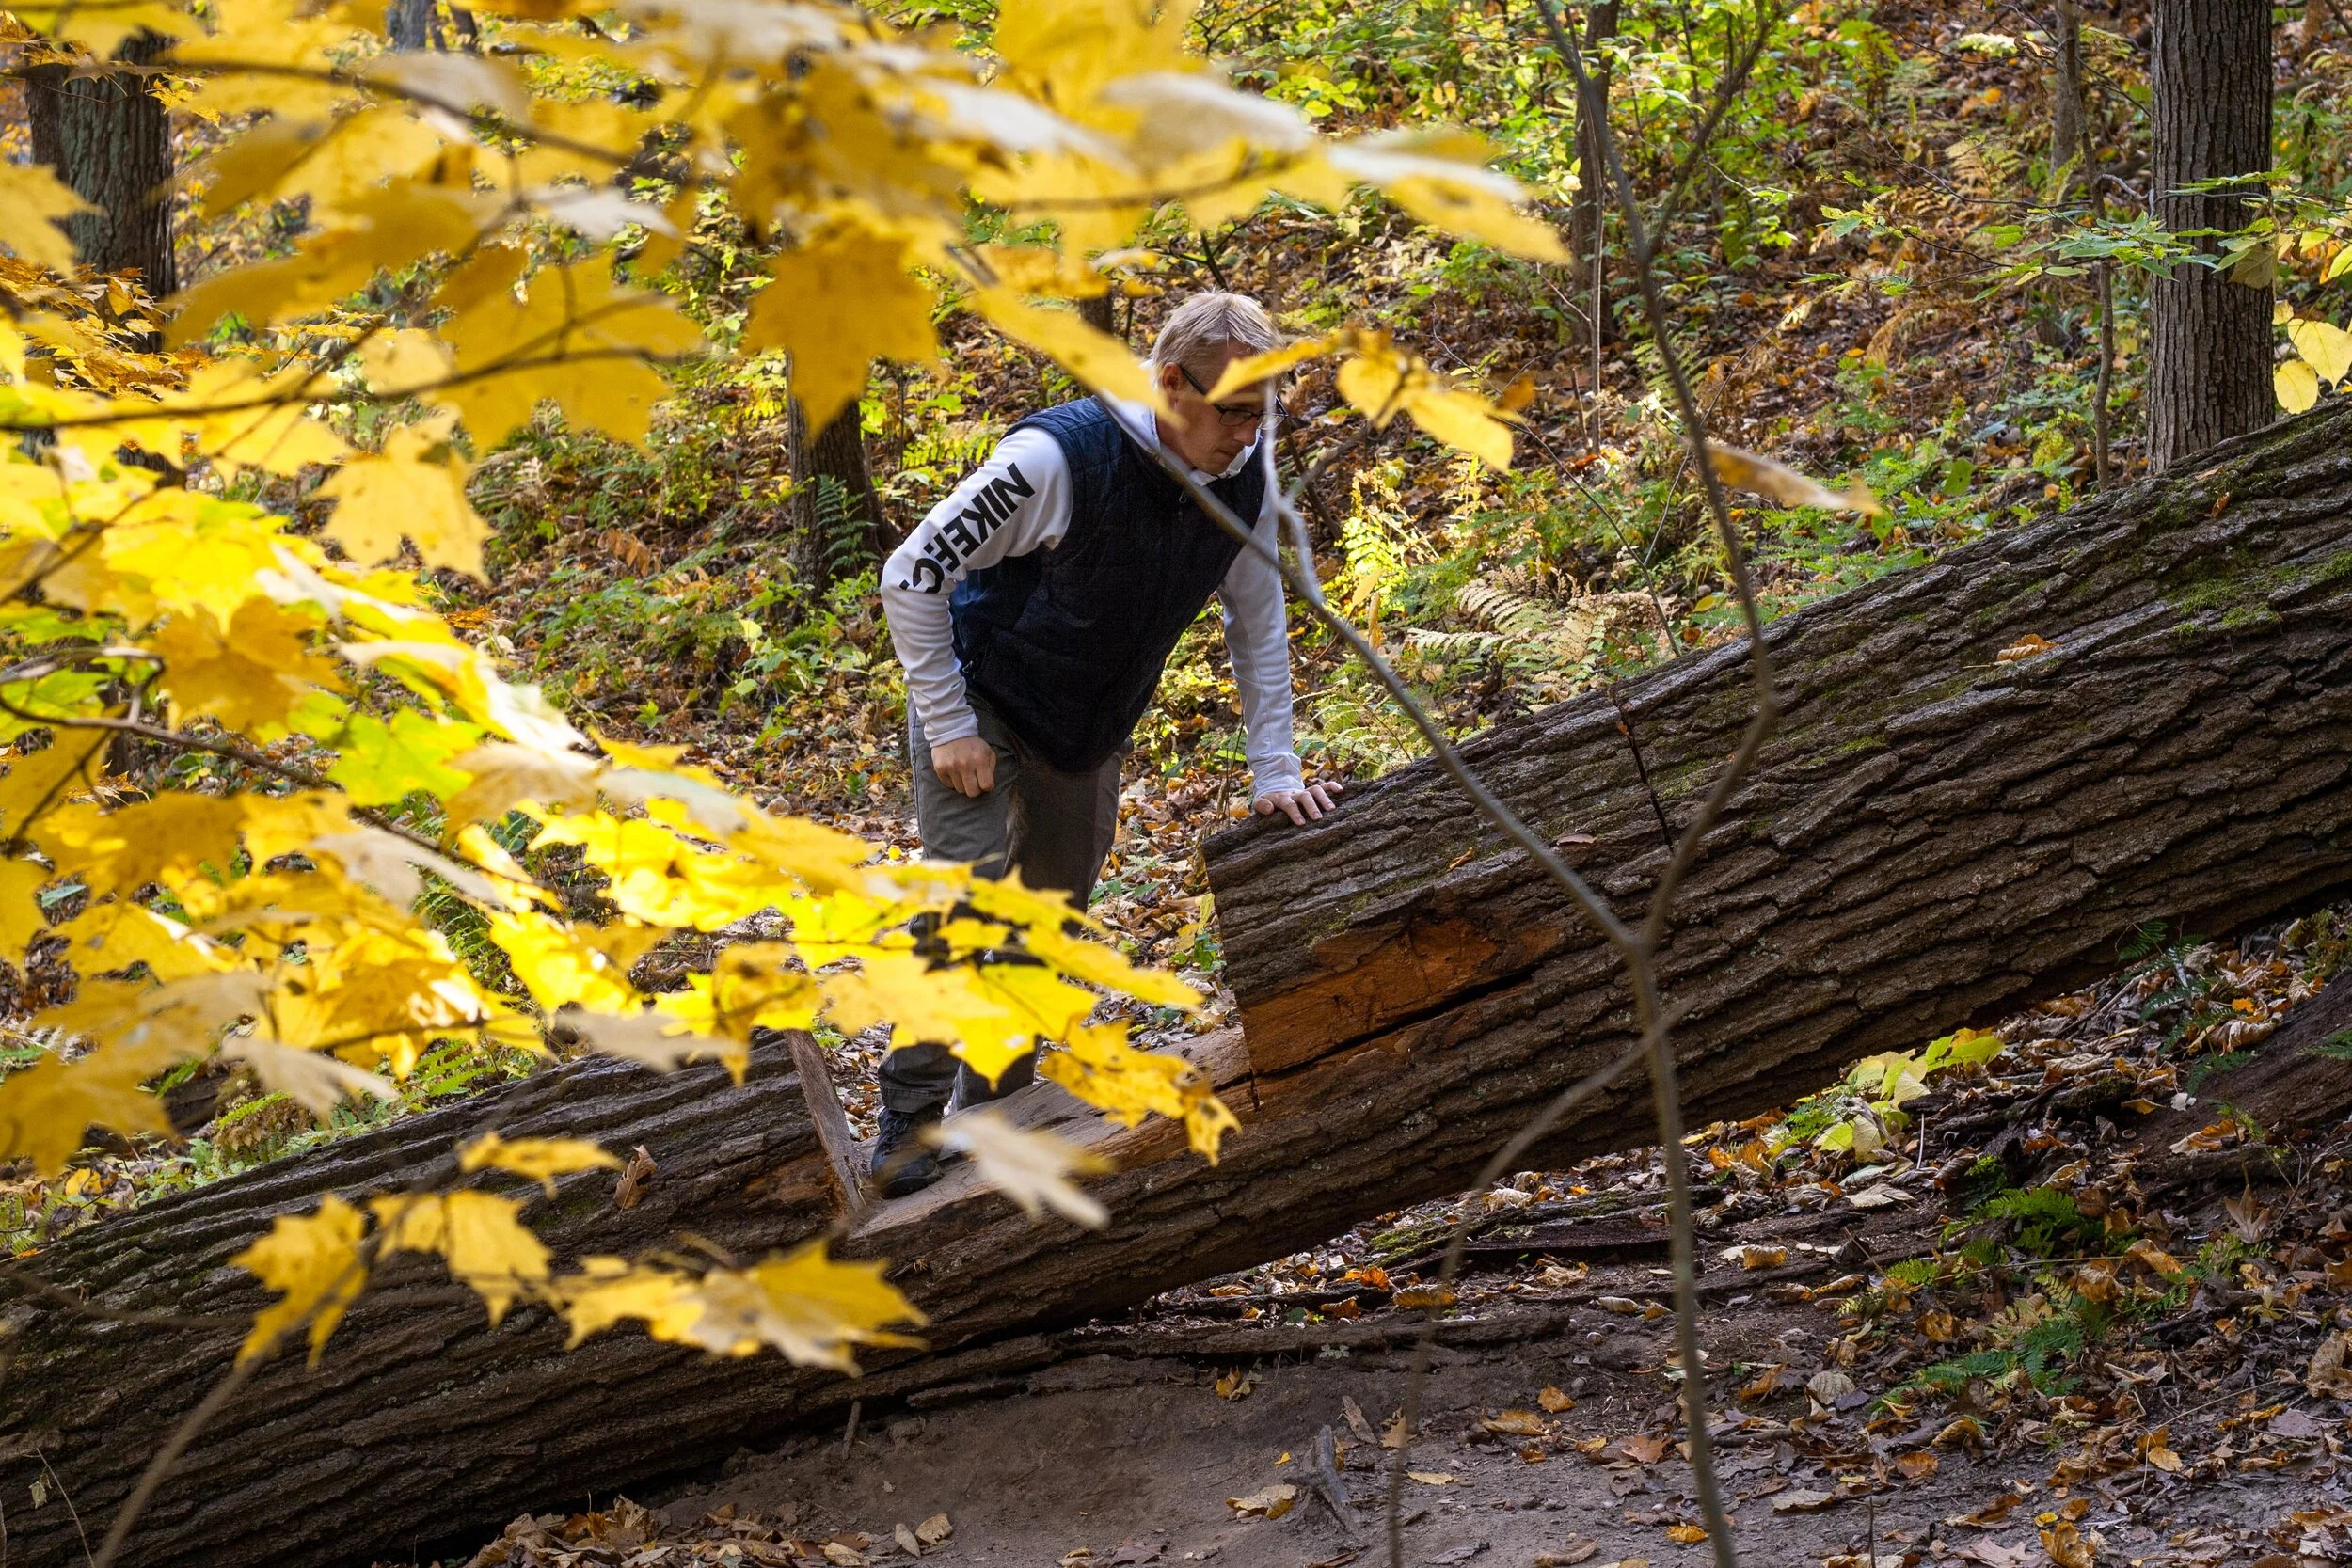
PINE TRAIL
Pick up the Pine Trail once you’ve reached the upper parking lot after hiking part of the Sentinel. This was by far the least crowded path within the park, making it easy to avoid other hikers and find some serenity among the fall foliage.
After reaching yet another t-junction, head left. This will lead you out to a road in which you then follow to the right to pick up the trail again at the next parking lot.
As you start the ascent from the road you’ll immediately notice a gray spire affectionately known as The Sentinel. This is a popular rock climbing area so don’t be surprised if you run into some dare-devils as you make your way up to the next overlook before looping back into the woods and up to the Sentinel Trail.
In regards to peacefulness, fall foliage, and a great workout of ascending/descending paths, Pine Trail was the highlight of the day!

Fall foliage in Mississippi-Palisades State Park
There you have it; everything you need to know about hiking through Mississippi-Palisades State Park! The family-friendly area makes for a great day-trip from Chicago and it’s easy to turn it into a weekend getaway by continuing north along Route 84 up to Galena, a quaint town once home to Ulysses S. Grant.
Happy hiking!
Enjoy this post? Pin it for later!


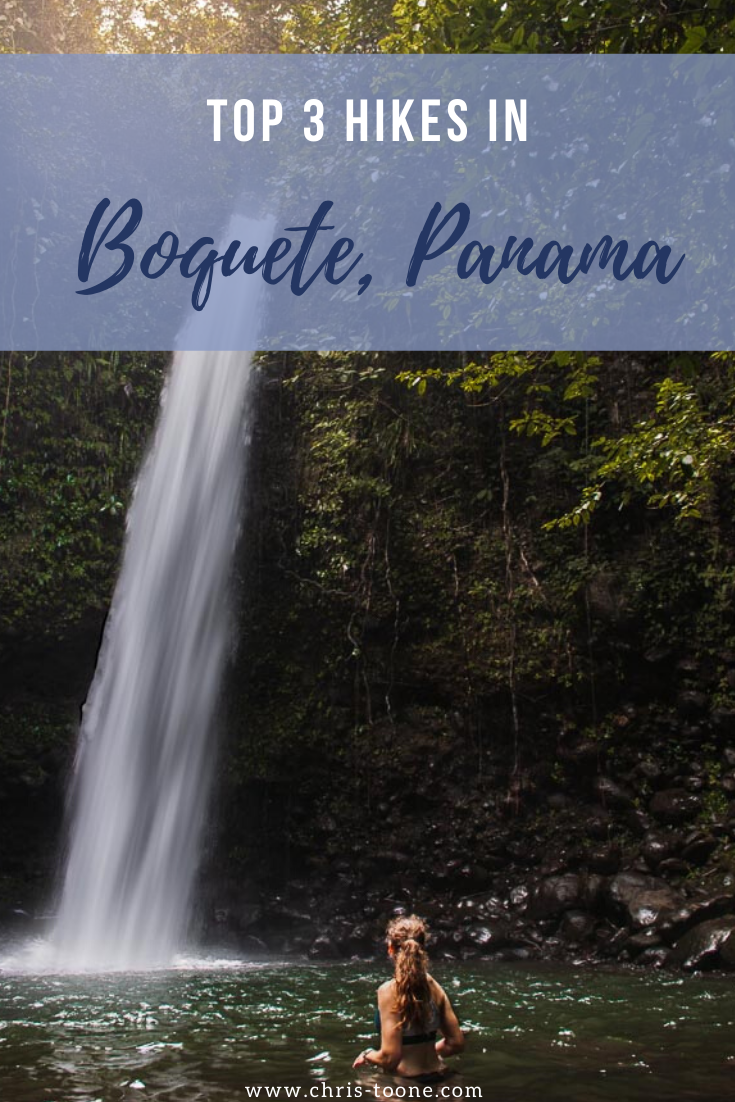
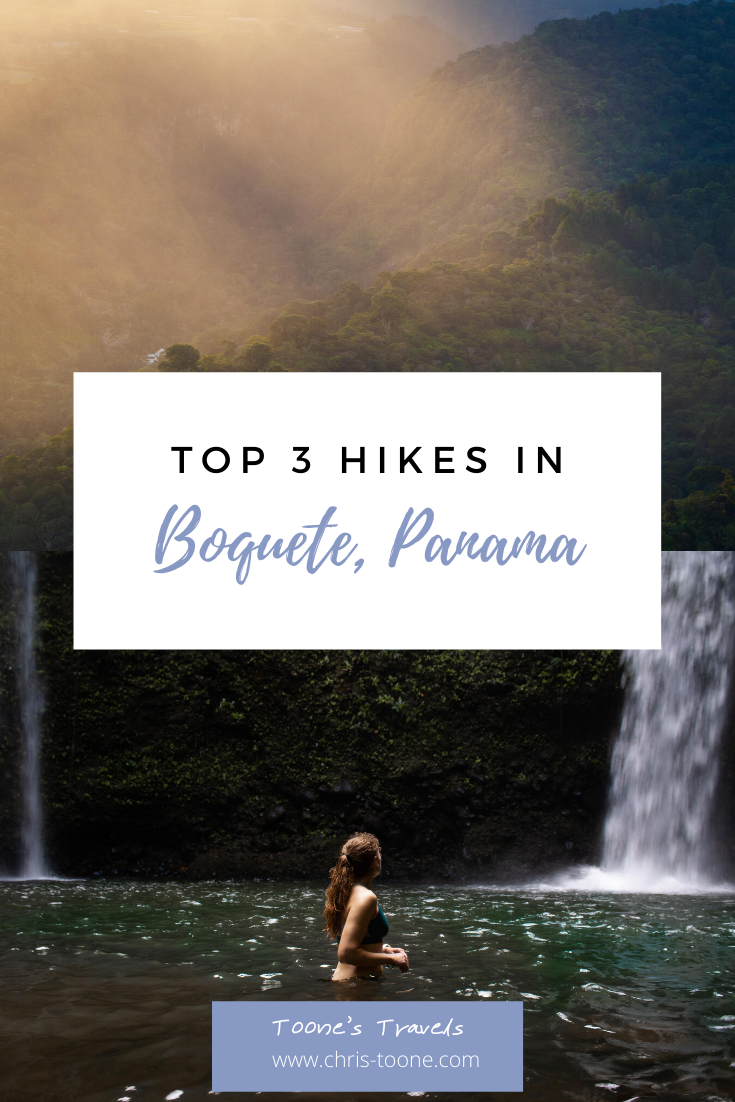
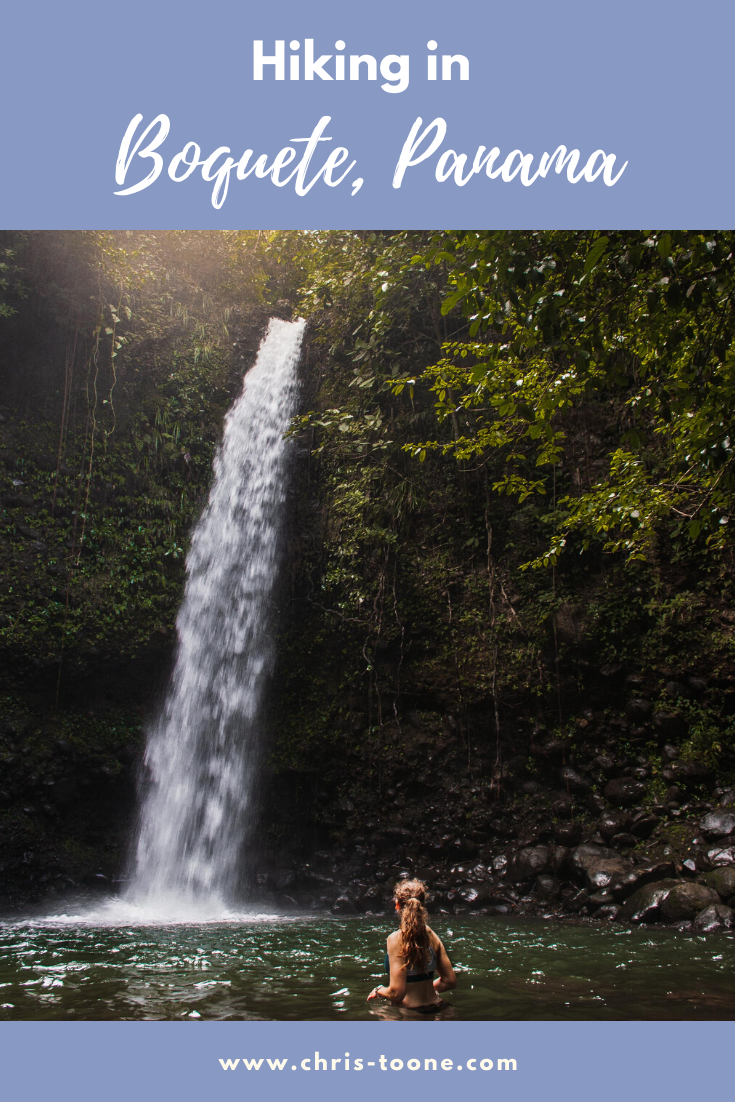
Top 3 hikes in Boquete, Panama
Drive 480km west of Panama City, Panama and the urban metropolis quickly yields way to a seemingly endless supply of rolling mountains and verdant jungle, eventually leading to an oasis named Boquete. Here are the top 3 hikes when visiting Boquete, Panama!

Drive 480km west of Panama City, Panama and the urban metropolis quickly yields way to a seemingly endless supply of rolling mountains and verdant jungle, eventually leading to an oasis named Boquete.
This mountainous town is nestled within a small valley of the Chiriqui Province and is widely known for being the home of the world’s best coffee. Despite this claim to fame, nature lovers from around the world flock here explore the seemingly endless supply of trails and untouched nature.
Although slightly overrun with ex-pats in recent years, Boquete still offers visitors a calming escape, whether sipping a cup of coffee in the foothills or roaming the numerous dirt paths that wind through the jungle.
My time in Boquete was spent hiking by day and enjoying the rolling thunderstorms as the made way for starry skies at night. To be honest, it was my favorite part of my 8-day trip to Panama and I can’t wait to get back!
Here are the top 3 hikes, plus a few others, for your trip to Boquete, Panama!
PIPELINE TRAIL
The Pipeline Trail in Boquete is aptly named because, well, it follows a pipeline along the river before culminating at a cascading waterfall. It’s one of the more popular trails in the area so the earlier you can go, the better.
Pipeline Trail | Boquete, Panama
What to Expect
The hike itself is relatively flat the entire way, making it easy to be on the lookout for wildlife. AllTrails has it listed as moderate, although I’d say it was certainly a family-friendly jaunt through the jungle.
There were a few spots that may be more difficult for those with limited mobility.
Local villagers regulate the Pipeline Trail. Don’t be surprised when someone appears and asks you to sign in and for 5 USD per person. It’s completely legitimate. Just don’t forget to mark yourself as “returned” on your way back to town!
After paying, we followed the trail as it quickly entered the dense Panamanian jungle. We were on high alert for snakes, howler monkeys, and more, although we had no such luck.
The Pipeline Trail is also widely known as a prime viewing spot for the elusive Quetzal, Panama’s most popular bird.
The Pipeline Trail as it enters the dense jungle in Boquete, Panama
Along the trail, we stumbled upon a 1,000-year-old tree. It stood majestically along the left side of the trail, subtly marked and easy to miss if we hadn't been in search of a convenient spot for a water break.
As we continued on and the dense jungle gave way to a towering canyon, the end was near. In the distance, we could begin to see the waterfall as it cascaded down from high above.
The slow-moving water provided a mist and a refreshing hangout spot to cool off from the humidity we had endured throughout the hike.
An hour and several pictures later, it was time to head back the exact same we had arrived, sign-out, and drive back to town.
When I first arrived in Boquete, I was a bit nervous. I have plenty of experience hiking in the desert and mountains, but very little within the jungle. I found the Pipeline Trail to be a great introductory hike to the region and it gave me the spark of confidence I needed to explore elsewhere!
The 1,000+ year old tree located along the Pipeline Trail in Boquete, Panama
The Facts
Elevation Gain: 1,528 feet
Distance: 3.8 miles out and back
Time: Estimated 2-3 hours depending on pace
Cost: 5 USD per person
Wildlife Viewing: Quetzal birds, snakes, howler monkeys
Getting There
From Boquete, head towards Los Naranjos and follow signs to Bajo Mono. Eventually the road will lead to a sign post that says PIPELINE. Park there and walk up the gravel road. You’ll know that you are in the correct place when you spot a hut to the left. That’s where the trail fee will need to be paid.
CHOCLON WATERFALL
Choclon Waterfall is a lesser-known trail located 40 minutes south of Boquete where twin waterfalls fill a secluded swimming hole at the end of a small gorge.
The path through the jungle is not regularly maintained nor is it distinctly marked, but if you know where you’re going it’s a simple hike.

Swimming at Choclon Waterfall in Boquete, Panama
What to Expect
I originally stumbled upon a picture of Choclon Waterfall while planning my trip down to Panama and immediately decided that it should be added to the itinerary. There was only one problem: Nothing I read told me where to find the trailhead.
Long story short, I was eventually able to track down GPS coordinates to the starting point, marked only by a closed gate and a small path through the barbed wire fencing.
We started the hike by sauntering across an open field before quickly descending to the jungle trail that led to a junction. After much deliberation, Heather and I realized that we had to go up and over a small gate rather than continue following the open trail.

View from the start of the hike before descending into the jungle
After the gate, the path is relatively short and easy to navigate. There were a couple of sections that rain had washed out, so be sure to watch your footing as you hug the wall of the gorge and use the ropes for provided support when available. They’re there for a reason!
A short through the overgrown brush and we had reached the river. Although we waded across the water, take a left instead and head upstream.
We were soon greeted by a magical amphitheater of hanging vines, beautiful waterfalls, and our very own private swimming hole.
We shed our clothes and jumped in as the soft sunlight shone through the canopy above and illuminated the refreshing blue water. It was the perfect ending to a full day of adventure!
To read more about the adventure, visit this post: Chasing Choclon Waterfall
Swimming at Choclon Waterfall in Boquete, Panama
The Facts
Due to the lack of information surrounding Choclon Waterfall, here’s what I can offer:
Elevation Gain: Unknown, but remember that it is a gorge trail, so the ascent will occur on the way back to the trailhead
Distance: Unknown
Time: 30min from trailhead
Cost: Free
Wildlife Viewing: Poison dart frogs, various birds and snakes
Getting There
The easiest way to find the trailhead is by tracking mileage.
From Boquete, travel south via Highway 41. As you pass by Faro Panama (the giant lighthouse), start paying attention to the odometer. Approximately 7.2km later, there will be a sharp right turn. If you reach the town of Nuevo Dolega, then you’ve gone too far by 4km.
Follow the road straight. Eventually you’ll reach a junction where the road swings left. On the lefthand side will be a closed gate with a small opening in the barbed wire fencing. This is the trailhead!
LA PEIDRA DE LINO
A short but steep hike, La Piedra de Lino is the equivalent of an endless stair-stepper machine. If you can grin through the pain, the reward at the top is worth it as the trail offers the best views over the Boquete valley below.
Climbing the steep terrain of the La Piedra de Lino hike in Boquete, Panama
What to Expect
La Piedra de Lino directly translates as “the rock of Lino,” a small community 4km from Boquete. The trailhead is clearly marked, making it one of the easier hikes in the area to find.
The steep path started right away as we made our way up the driveways and we were instantly grateful that we had chosen to give ourselves an afternoon full of rest and relaxation around town before tackling this hike.
Once we entered the jungle we passed by an abandoned house before continuing up, regularly turning around to “enjoy the view” because neither of us wanted to admit how out of shape the terrain made us feel.
Our trip to Panama coincided with the start of the rainy season, which meant that the trail was slippery and washed out in some areas. We hiked in running shoes, but in hindsight would have been much better off bringing a shoe with better tread and a pair of walking poles.
The hike continued to be one recurring theme: up, up, up.
Once at the top we traversed the ridge through a small shaded area, stopping only to graciously allow a snake to cross the path in front of us.

Clouds moving through the jungle at sunset as seen from the top of La Peidra de Lino
All of the pain and suffering immediately subsided when at the clearing we were greeted to the most spectacular view I witnessed during my time in Panama. To the right were soft clouds moving quickly through the mountains while to the left was a picture-perfect view of Boquete.
Needless to say, it was worth the effort and timing it with the sunset was a bonus (just remember to pack a headlamp for the way down)!
Looking over Boquete, Panama from the top of the La Piedra de Lino trail
The Facts
Elevation Gain: 322m
Distance: 2.7km
Time: 40min, but varies greatly based upon fitness level
Cost: Free
Wildlife Viewing: Birds and snakes
How to Get There
Have a GPS available? Simply search for Hostal Casa Pedro and this will lead you straight to the trailhead. If you don’t see a sign that reads “Sendero La Piedra de Lino” then you’re in the wrong place!
If this luxury isn’t available to you, simply head north on Via Boquete and turn right at Avenue Buenos Aires. This road takes you straight to the trail and all you’ll need to do is be on the lookout for the white sign.
If you reach IL Pianista, then you’ve gone too far.
BONUS HIKES
El Pianista
A 3-4 hour out and back trail with 2,000 meters of elevation gain, El Pianista leads you through a moody cloud forest that’s dripping with life before arriving that the summit.
The trail made headlines around the world when two dutch girls in their early 20’s went missing back in 2014. Although officially ruled a hiking accident, many locals believe that Lisanne and Kris were met by foul play in the jungle.
The Lost Waterfalls
One of the more popular hikes in Boquete, The Lost Waterfalls trail winds through the dense jungle, over a suspension bridge, and culminates at 3 stunningly beautiful waterfalls.
Sendero Los Quetzales
Sendero Los Quetzales is a 15.6 mile trail that connects Boquete to Cerro Punta through the jungle. It’s common to hike sections of the path in search of the elusive Quetzal bird.
Volcan Baru
It’s often suggested to begin this 15 mile trail at midnight in order to reach the summit of the tallest mountain in Panama by sunrise. On a clear day, it’s possible to see both the Caribbean Sea and the Pacific Ocean from the top.
Whether you prefer sauntering along in search of diverse wildlife or grinding out elevation gains to the top of a peak, Boquete is truly a mecca for nature lovers and was hands down my favorite stop during our Panamanian adventure. Next time, I plan on spending far longer than 2 days hiking around the town!
Have you ever been to Boquete before? Have a favorite hike abroad? Let me know in the comments below!
Thanks for reading and as always, stay safe & happy travels.
Ready to pack? Don’t forget these items to make your life easier:


Pin this post for later!

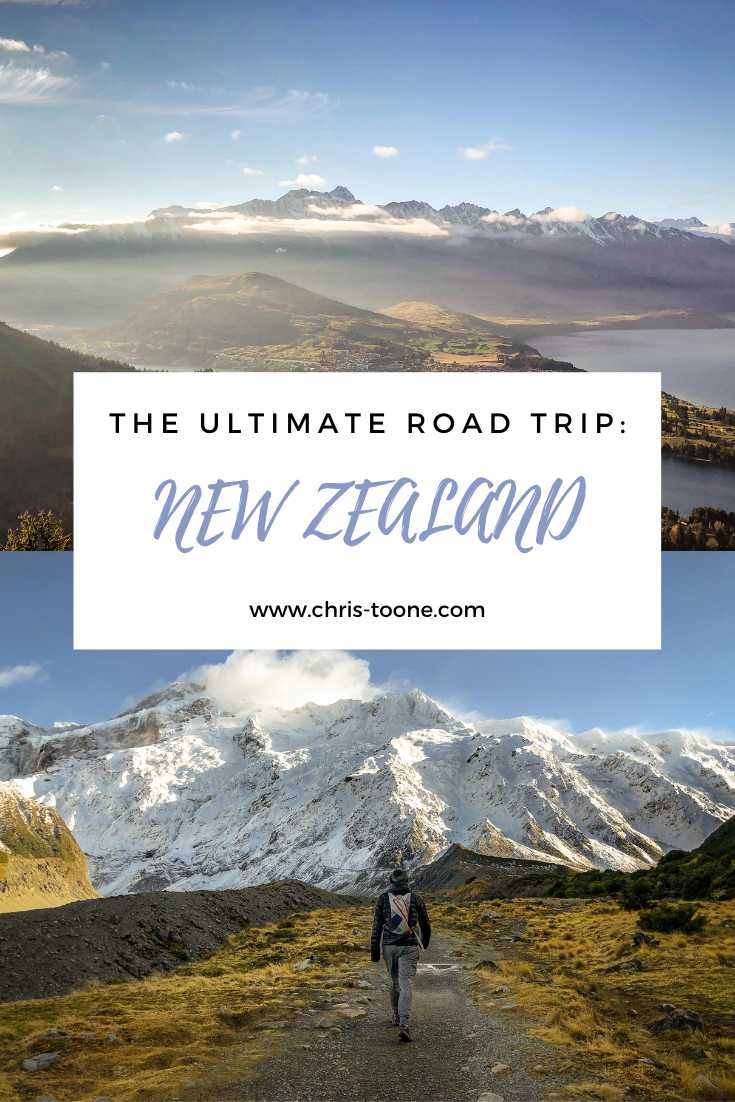
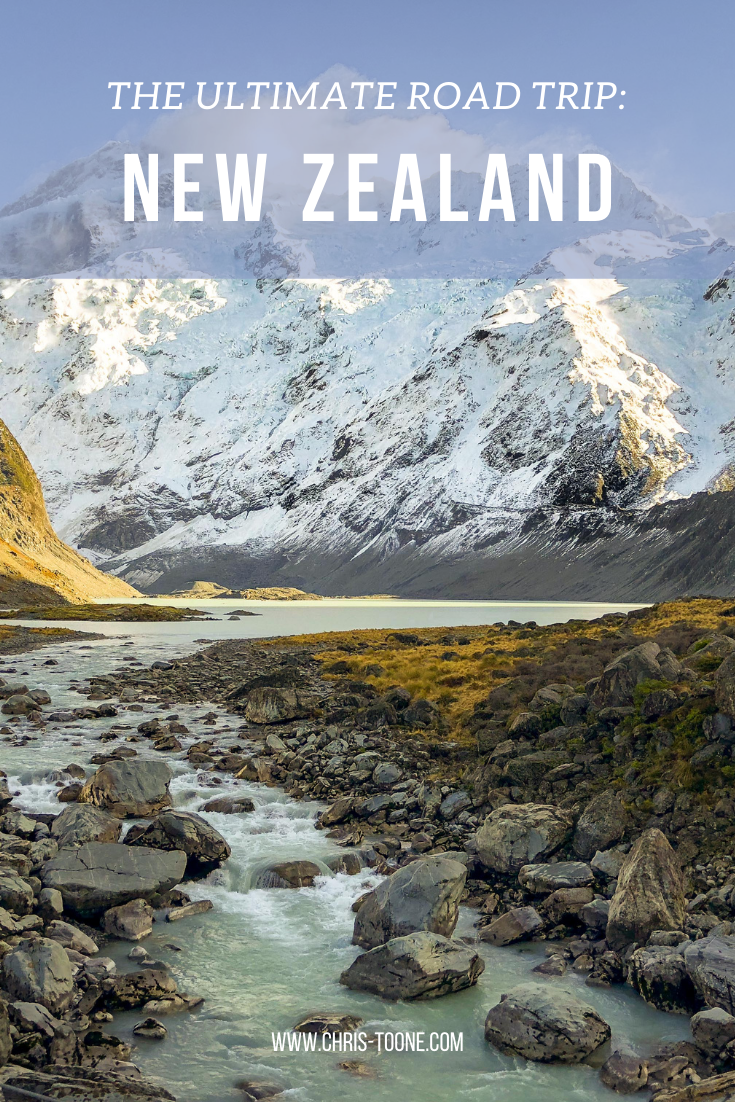
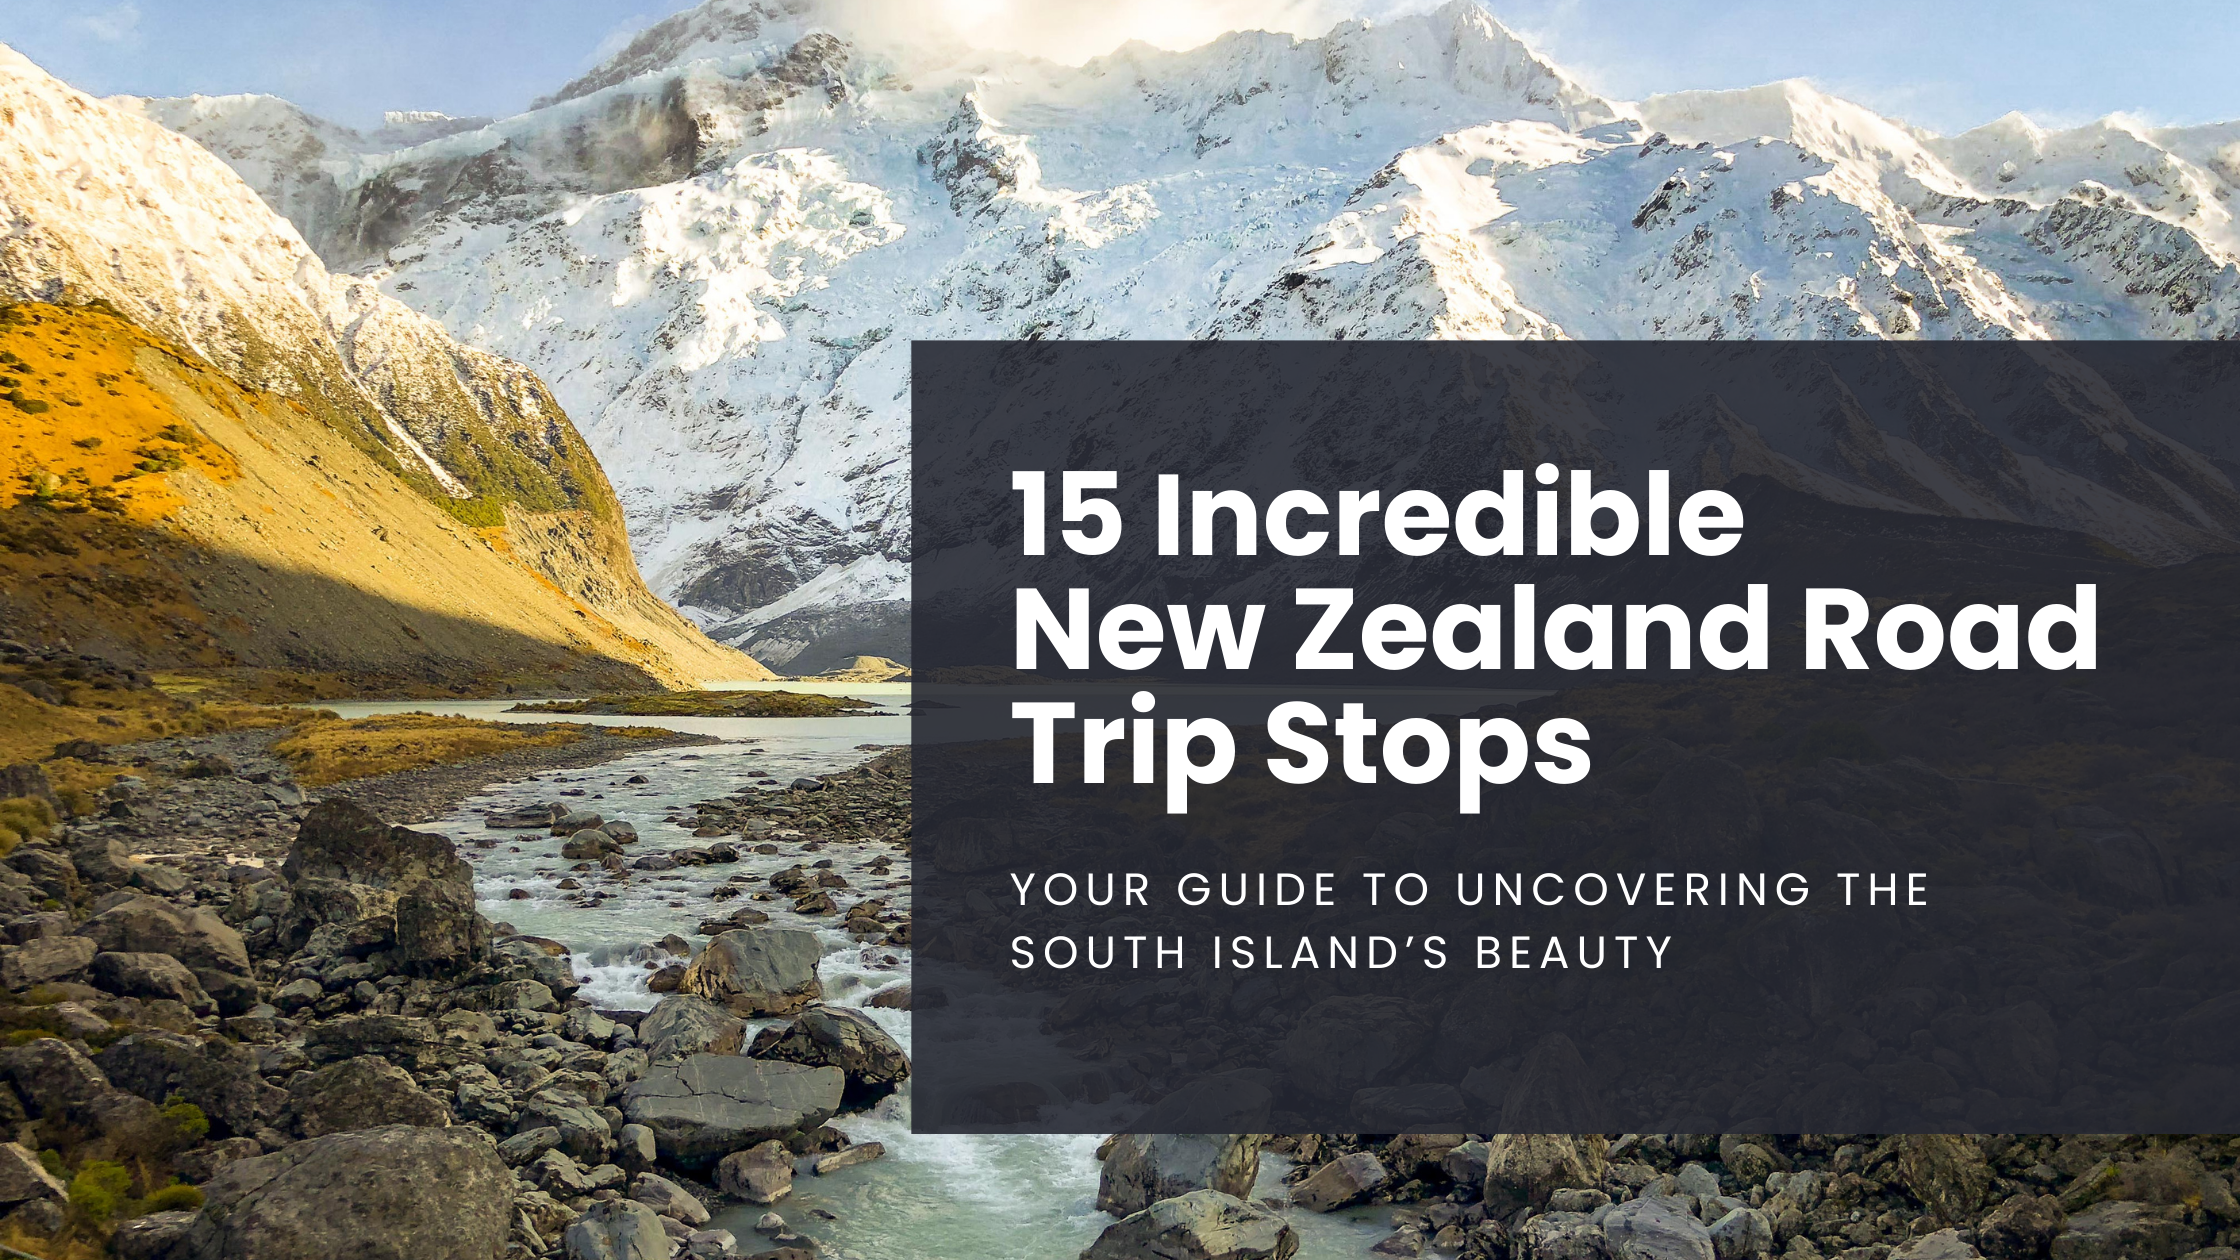
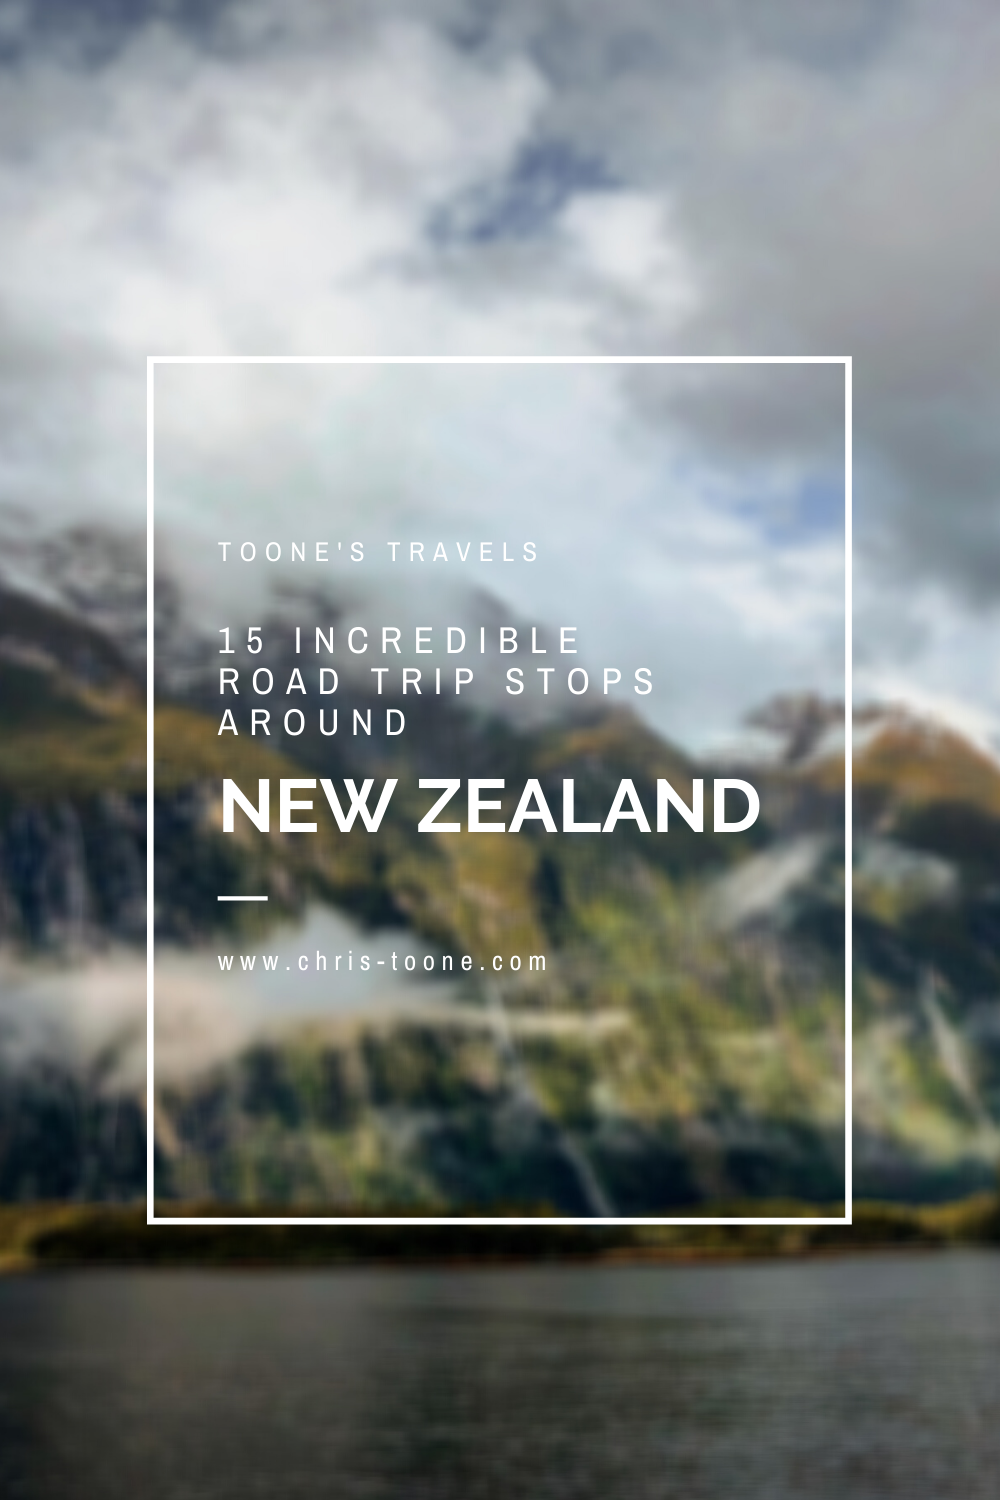
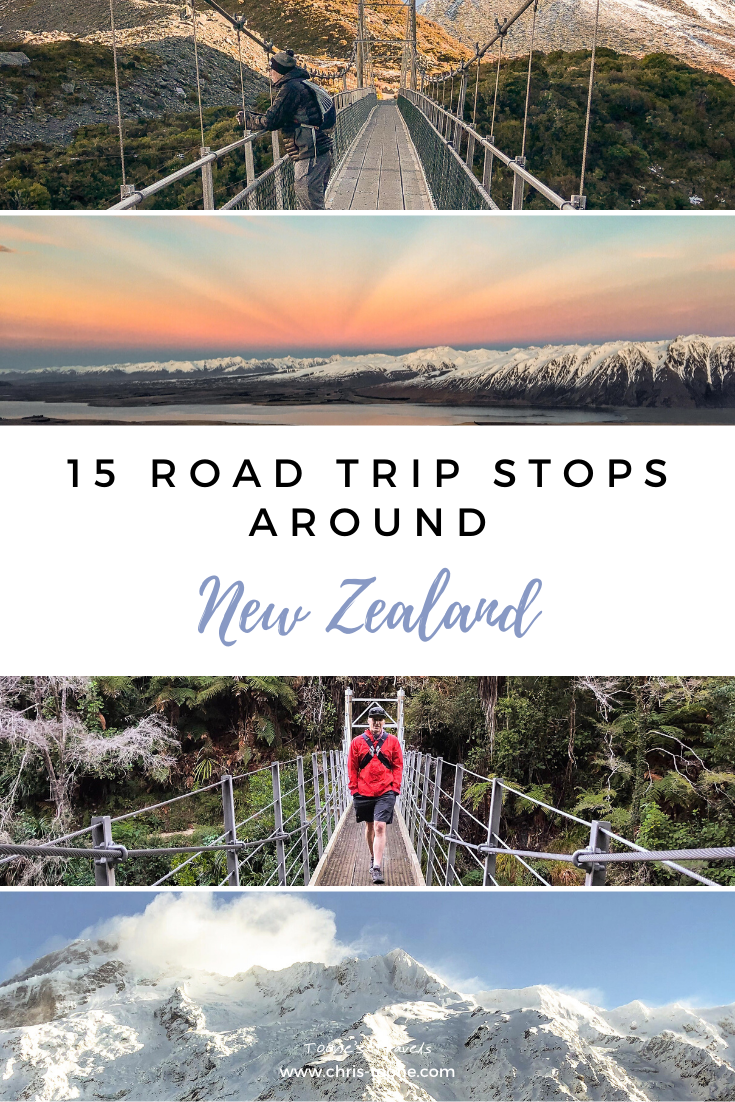
15 Incredible New Zealand Road Trip Stops: Your guide to uncovering the South Island's beauty
From Queenstown to the Milford Sound, New Zealand has plenty of natural beauty to offer, but what should you make time for during your trip? Here’s your guide to discovering 15 of the best road trip stops around the south island… you won’t be disappointed!
Please note: This post has been updated as of December 2023
New Zealand might seem like a blip on the map, but it is far more expansive than it appears.
The diversity of landscapes is unparalleled to anything I’ve ever encountered and with so much to offer, it can be overwhelming when attempting to narrow down what to see and where to go.
That’s certainly how I felt when my girlfriend and I planned a New Zealand road trip of our own last year.
So, I thought I’d throw together a short guide to unlocking the immense beauty that the south island holds. Here are 15 of the best road trip stops in New Zealand!
1. QUEENSTOWN
An adrenaline junkie’s heaven, Queenstown is situated on the shores of Lake Wakatipu and sits in the shadows of the famed Remarkable mountain range.
The raw beauty alone makes this stop worthwhile, but there’s plenty to do beyond staring at the surrounding mountainscape.
Strap yourself to the world’s first bungee jump and plummet 43 meters off of the Kawarau Bridge. or ride the Queenstown Gondola up to Skyline, a collection of restaurants, shops, and the most scenic zip-lining experience you’re likely to ever have. It’s also a perfect spot to observe the spectacular sunrise!

View from Queenstown Skyline
2. MOERAKI BOULDERS
The Moeraki Boulders are most easily described as unusual spherical rocks that dot the shoreline of Koekohe Beach along the south island’s Otago Coast.
Although formed through erosion of the adjacent coastal cliffs, Maori legend states that the boulders are remains of calabashes and eel baskets that washed ashore after the Araiteuru, a legendary canoe, capsized nearby.
Located 30min south of Oamaru, it makes for an easy day trip. Just be sure to visit during low tide, otherwise, the boulders become submerged in the South Pacific Ocean as the beach vanishes under the incoming water!
3. SLOPE POINT
The Catlins continues to be the hidden gem of the south island and here is where you will find Slope Point, the southernmost tip of New Zealand.
Once you’ve finished this short, albeit windy, walk out to the signpost, you’ll be standing closer to Antarctica than the equator, a pretty surreal experience if I’m being honest.
It takes less than an hour, is family-friendly and makes for a quick excursion along your road trip through the southern corridor of the island… just remember to pack a windbreaker!

Walk to Slope Point
4. PUNAKAIKI PANCAKE ROCKS
Hidden along the west coast is Punakaiki, best known for a collection of pancake rocks and blowholes that jut out into the Tasman Sea.
To get up close and personal with these 30 million-year-old limestone formations, take the short walking track that’s located across the highway from the visitors center.
Punakaiki is also the gateway to Paparoa National Park, so there are plenty of other activities in the area such as horseback riding, hiking, glow worm cave explorations, and more!

Punakaiki Pancake Rocks
5. HOKITIKA GLOW WORM DELL
Punakaiki is a great place to visit for a guided tour of the famous glow worms, but if your luck hasn’t panned out, be sure to make a quick stop in Hokitika.
Located along the side of the highway, the Hokitika Glow Worm Dell requires a 2 minute, family-friendly walk that’s well worth the small effort. Once the sun goes down, the walls of the forest light up with these luminescent creatures!
The best part? It’s completely free!
6. OAMARU BLUE PENGUIN COLONY
New Zealand prides itself on natural beauty and diverse wildlife, and the seaside town of Oamaru is no different.
It’s here you will find the Blue Penguin Colony, complete with nesting habitats and a grandstand for visitors to watch as the penguins make their return home from a long day at sea.
A visit is certainly not the cheapest of things to do (NZD 43 for general admission to the evening show), but to witness these creatures in their natural habitat is truly something special!
7. AORAKI NATIONAL PARK
Rising to over 3,700 meters, Mt. Cook is New Zealand’s largest peak and can be reached by visiting the sprawling Aoraki National Park.
Although the Hooker Valley Track is by far the most popular and easily accessible (and also leads to a glacier-filled lake in the winter months), there are plenty of other hikes to try as well.
Need to get your altitude fix in? Change things up and hop on a flight with nearby Lake Tekapo Air Safaris to view the landscape from above. Not that I didn’t already appreciate all that New Zealand has to offer, but being able to witness the expanse from the sky was a profound experience that I’ll never forget!

Hooker Valley Trek in Aoraki National Park
8. LAKE TEKAPO
Located just under an hour from Aoraki National Park sits the town of Tekapo, on the shores of… you guessed it… Lake Tekapo.
This tiny community packs a punch as the turquoise waters competing for your attention with the views of the Southern Alps across the horizon.
Make sure to visit the Church of the Good Shepherd, a small stone sanctuary that looks out over the water or stay the night and stare in awe of the expansive starry sky, taking full advantage of Tekapo’s distinction as an International Dark Sky Reserve. It will blow your mind, I promise!

Lake Tekapo as seen from Mt. John Observatory
9. CHRISTCHURCH
If not arriving through Queenstown, Christchurch will likely be your point of entry.
Do yourself a favor and set aside time to explore the town before starting your road trip as there’s plenty to do and see!
Take a jaunt through the Christchurch Botanical Gardens (NZD 25) or enjoy the surrounding scenery as you have a bite to eat aboard the Tramway Restaurant.
10. KAIKOURA
The sleepy seaside town of Kaikoura is located at the base of the Kaikoura mountain range and along the coast of the South Pacific Ocean.
It’s best known for having its own resident sperm whale population, making it the ideal spot to get out on the water with a whale watching tour.
Not confident in your sea legs? That’s ok! Take a stroll along the Kaikoura Peninsula Walkway and spot the colony of fur seals that reside on the nearby rocks.
With the mountains, sea and an abundance of wildlife, this is a road trip stop you won’t want to miss!

Dolphins in Kaikoura, New Zealand
11. FIORDLAND NATIONAL PARK
Also known as Te Wahipounamu, or “the place of greenstone,” Fiordland National Park can be found in the southwestern corner of the island.
With over 500km of trails, this slice of mountainous paradise offers hikers the chance to explore some of the most dramatic landscapes in all of the world. It’s so stunning that the park itself was listed as a UNESCO World Heritage Site in 1990.
Three of New Zealand’s Great Walks can also be found here: the Milford Track, the Kepler Track, and the Routeburn.
Here’s the moral of the story: Don’t just cruise in and out to visit the Milford or Doubtful Sounds, make sure you take some time to experience all that it has to offer!

Fiordland National Park
12. LAKE OHAU
It’s certainly not as popular as nearby Lake Pukaki or Lake Tekapo, but that doesn’t mean you should pass it by!
This off-the-beaten-path location is the perfect stop for a mini hideaway and offers the chance to ski at the Ohau Snow Fields or ride a section of the Alps 2 Ocean Cycle Trail. Be sure to say hi to Mike and Louise, the longtime owners and operators of the Lake Ohau Lodge and a friendly bunch, to say the least.
The drive through the McKenzie High Country to reach this remote location is worth it in its own right as the trademark yellow and orange hues of the fields sit in the shadows of the Southern Alps. The raw beauty here is truly unrivaled.
13. ABEL TASMAN NATIONAL PARK
Rainforests, waterfalls, golden beaches, and the beautiful ocean. Do you need me to name more reasons as to why you should swing by Abel Tasman National Park during your road trip? Although it’s New Zealand’s smallest national park, there are plenty of adventures to be had.
Low on time but still want to get out and stretch the legs? Take the short walk through the lush forest, over the swinging bridges, and up to Wainui Falls.
The hike is suitable for the entire family and, depending on impromptu stops along the way, should take just over an hour to complete.
We didn’t have long here during our travels, but the waterfall-rich forests seemingly colliding with the ocean made me feel as though I had truly discovered paradise.
14. WANAKA
This lakefront town is full of shops, restaurants, and cafes along the main road, providing a healthy dose of social interaction!
Here is where you will find That Wanaka Tree. It is what it sounds like, a tree in Lake Wanaka, and is one of the most popular things to photograph around town.
Wanaka also serves as the perfect home base to hike up to Roys Peak for stunning views towards Mt. Aspiring National Park. As popular as the trail is, it’s not the easiest of workouts, so make sure to do your research and plan accordingly.
Visiting in the winter months? Make some turns at the Treble Cone or Cardrona ski areas!
Much like Queenstown, Wanaka certainly opens the door to a seemingly endless amount of adventures.

Skiing at Treble Cone
15. MILFORD SOUND
Widely touted as New Zealand’s most spectacular attraction, Milford Sound is truly a sight to behold.
Hop on a cruise and get up close and personal with hundreds of waterfalls as they cascade down from the peaks above, or book a kayaking tour for a more serene experience.
We were lucky in that our visit coincided with a recent rainstorm that filled the waterfalls to max capacity and left a layer of clouds that slowly glided between the fiords.
It’s easy to hop on a fully-planned tour from nearby Queenstown, so there’s no reason to not visit this remote part of the country!

Milford Sound
Although I highly recommend these 15 stops based on my adventures, it’s important to note that New Zealand is full of less-traveled nooks and crannies, so be sure to improvise a bit on your road trip. After all, you never know what’s right around the corner until you check it out yourself.
Cheers to a great adventure ahead! Have you traveled through New Zealand’s south island before? What are some spots I should visit the next time I go? Let me know in the comments below and as always, stay safe & happy travels!
Pin this post!


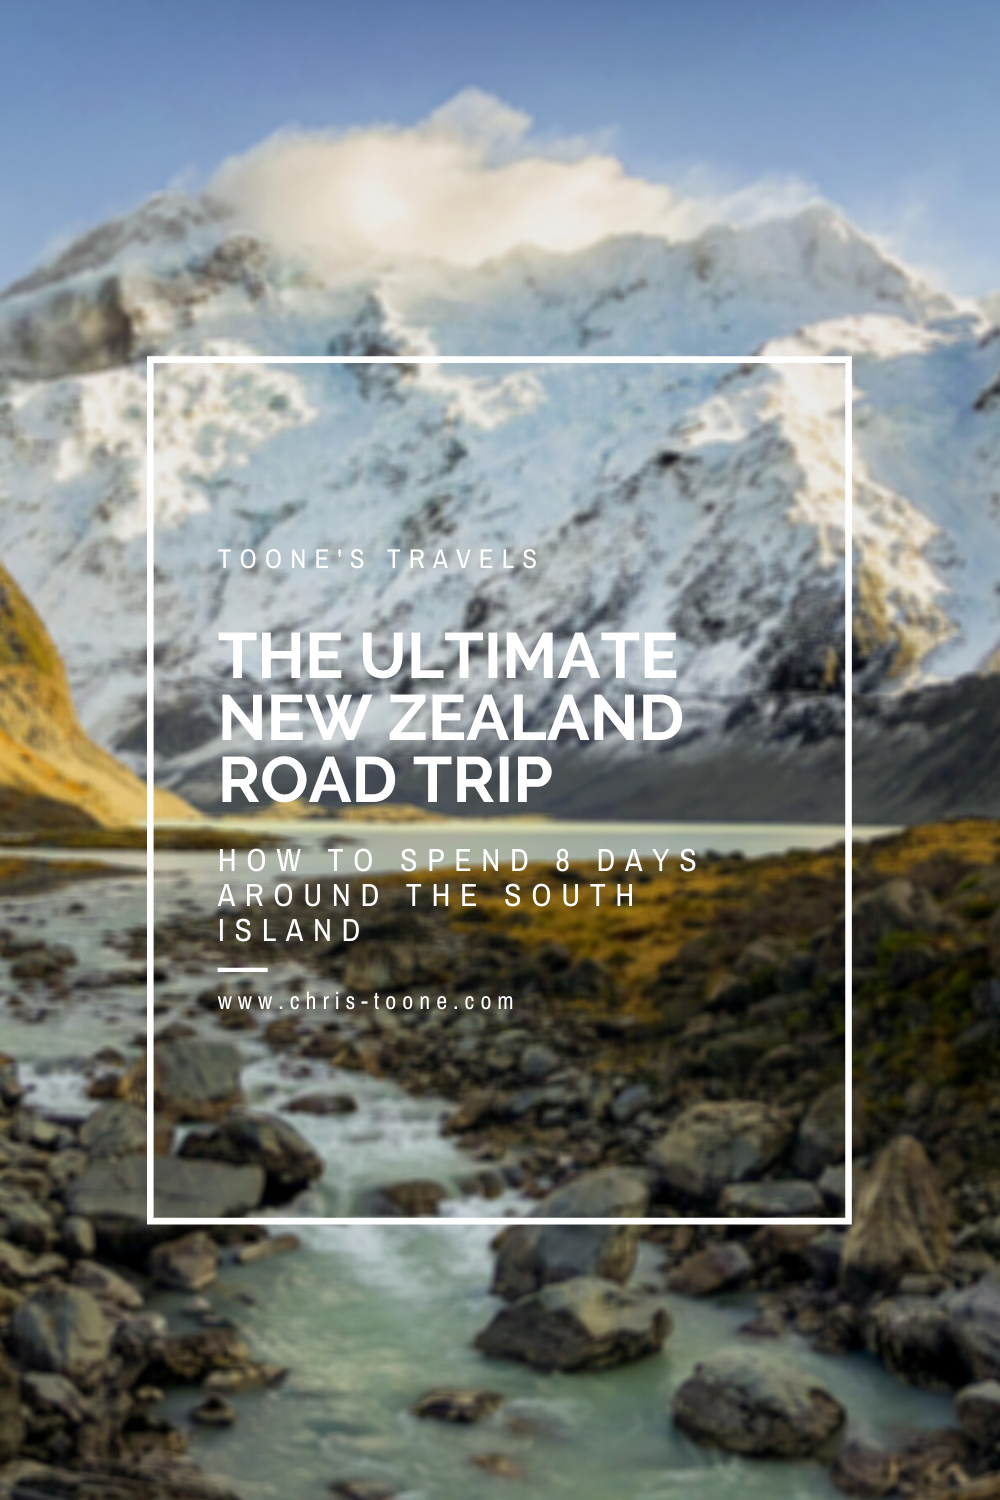
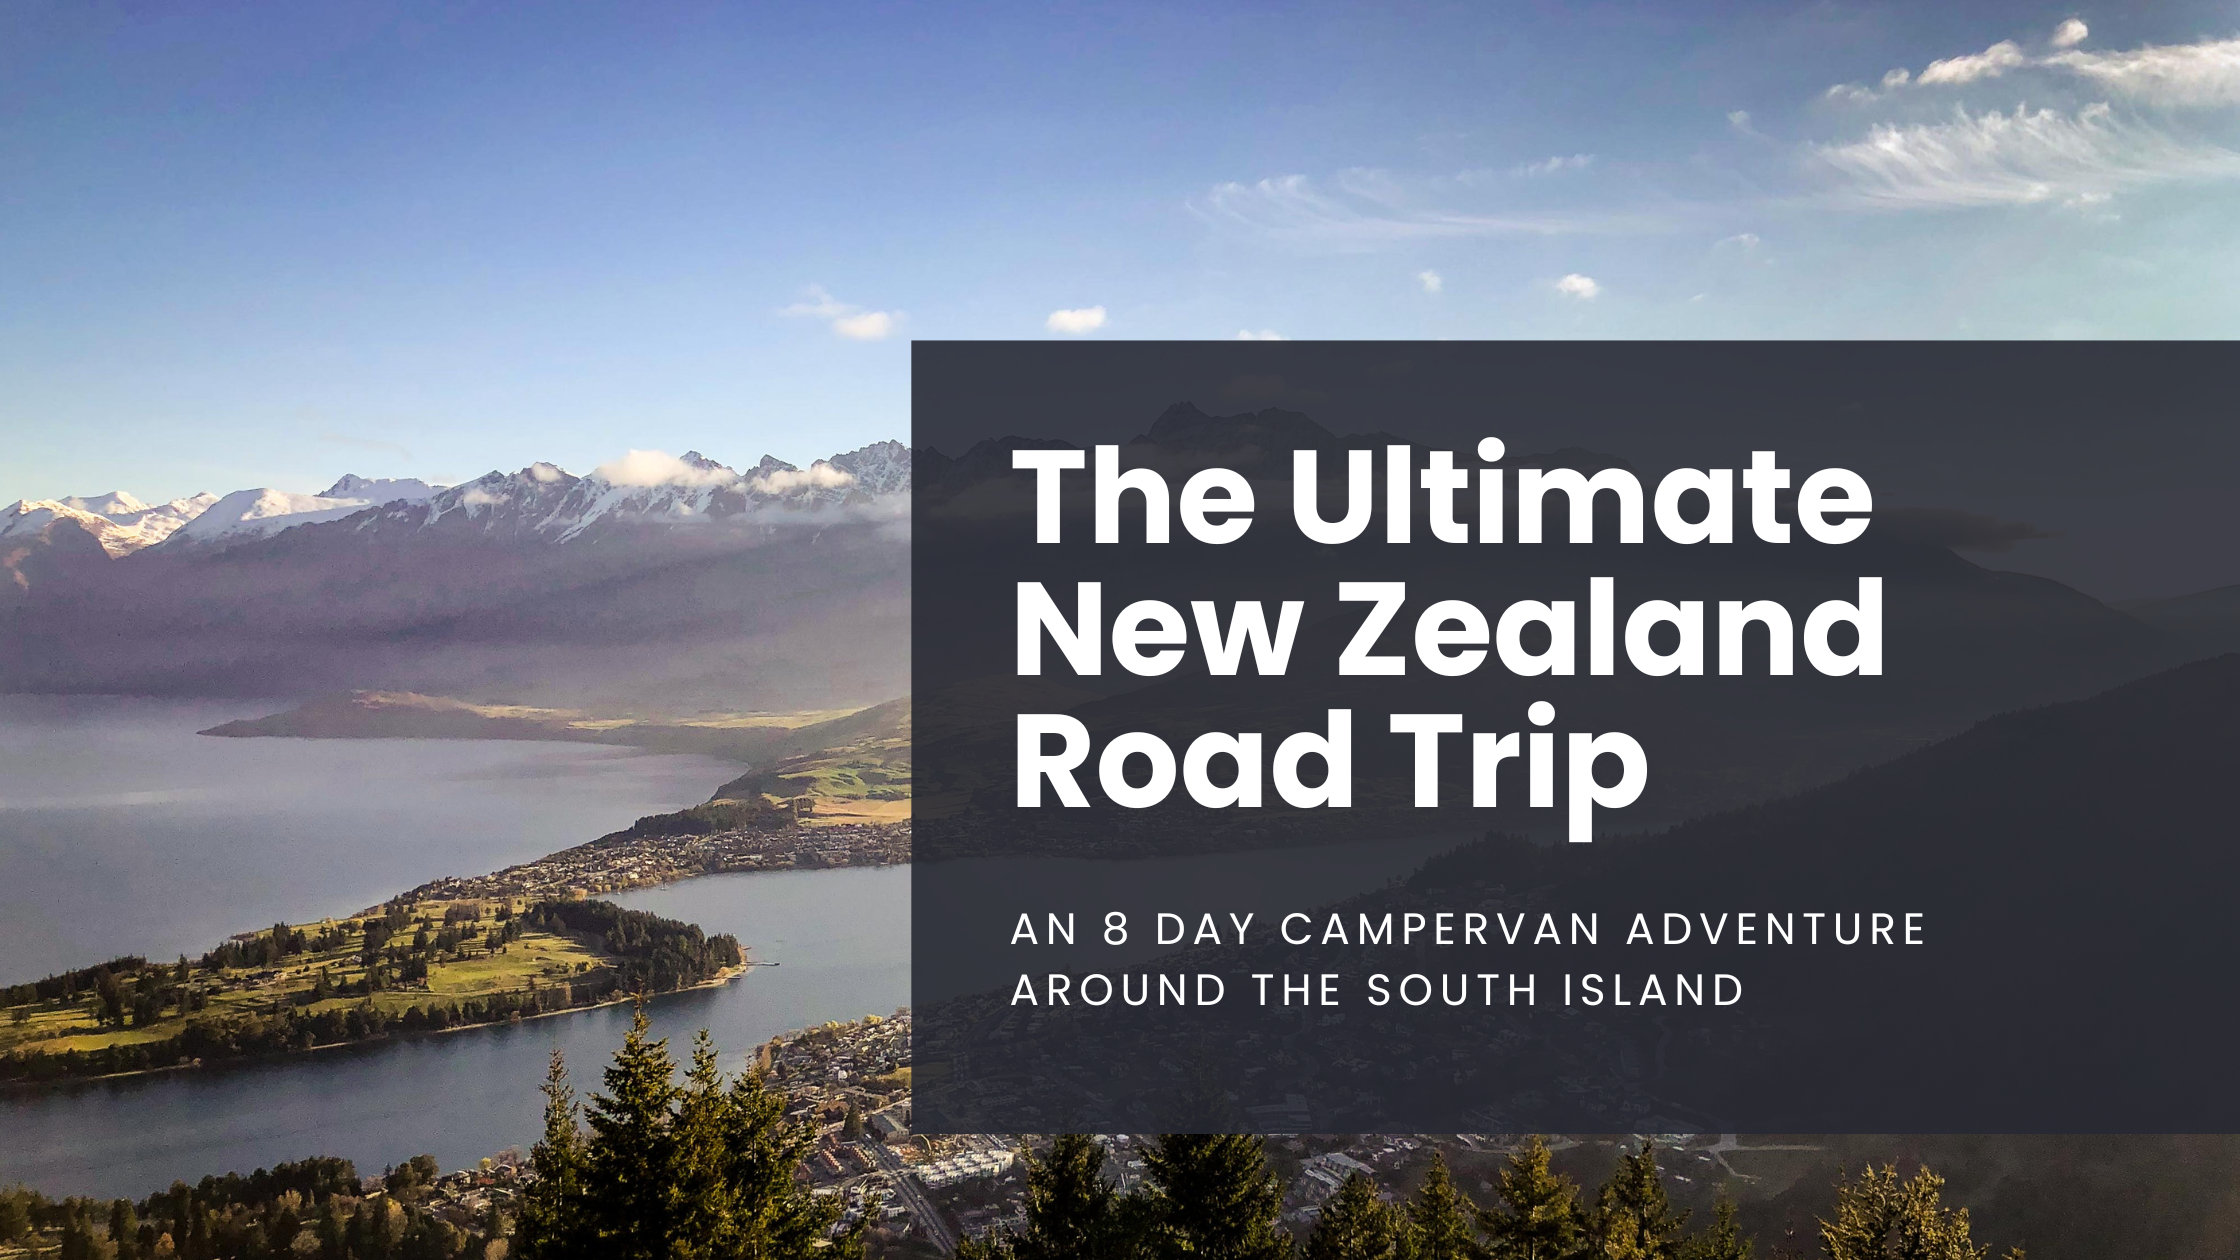
The Ultimate New Zealand Road Trip: An 8 day campervan adventure around the south island
Planning a trip to New Zealand? Be sure to check out this guide about traveling around the south island and discover some of the most beautiful landscapes on the planet. From choosing your route to where to stay and what to do, this post has everything you need to say “let’s go” and book that next adventure!
Please note: All info below is up to date as of May 2023
If I could handpick one destination for you to experience, it’d be New Zealand. An outdoor adventurer’s paradise, the two islands combine for a population of under 5 million inhabitants and come complete with sprawling scenery that begs to be explored. With nearly 33% of the country protected under the national parks system, it’s not hard to stumble upon pure and untouched nature!
It was just over a year ago that Heather and I crammed our backpacks full of winter jackets, caught a flight from LAX, and traveled south for our first campervan experience - driving around New Zealand’s south island.
With only eight days to spare, we knew it’d be long hours on the road and a lot of activities to cram into a short period, but we were committed to making it happen.
Whatever you choose to do and wherever you go in New Zealand, you won't regret booking a plane ticket!
One quick note about campervans in New Zealand: It’s vital to know the classification of the vehicle you’re renting and how that relates to your camping options. Many free sites around the country are for self-contained vehicles only, meaning that the van must be equipped with a toilet and grey water tank. After crunching some numbers, we calculated that springing for the slightly more expensive Jucy Chaser would save us money on accommodations because of it’s “self-contained” status.
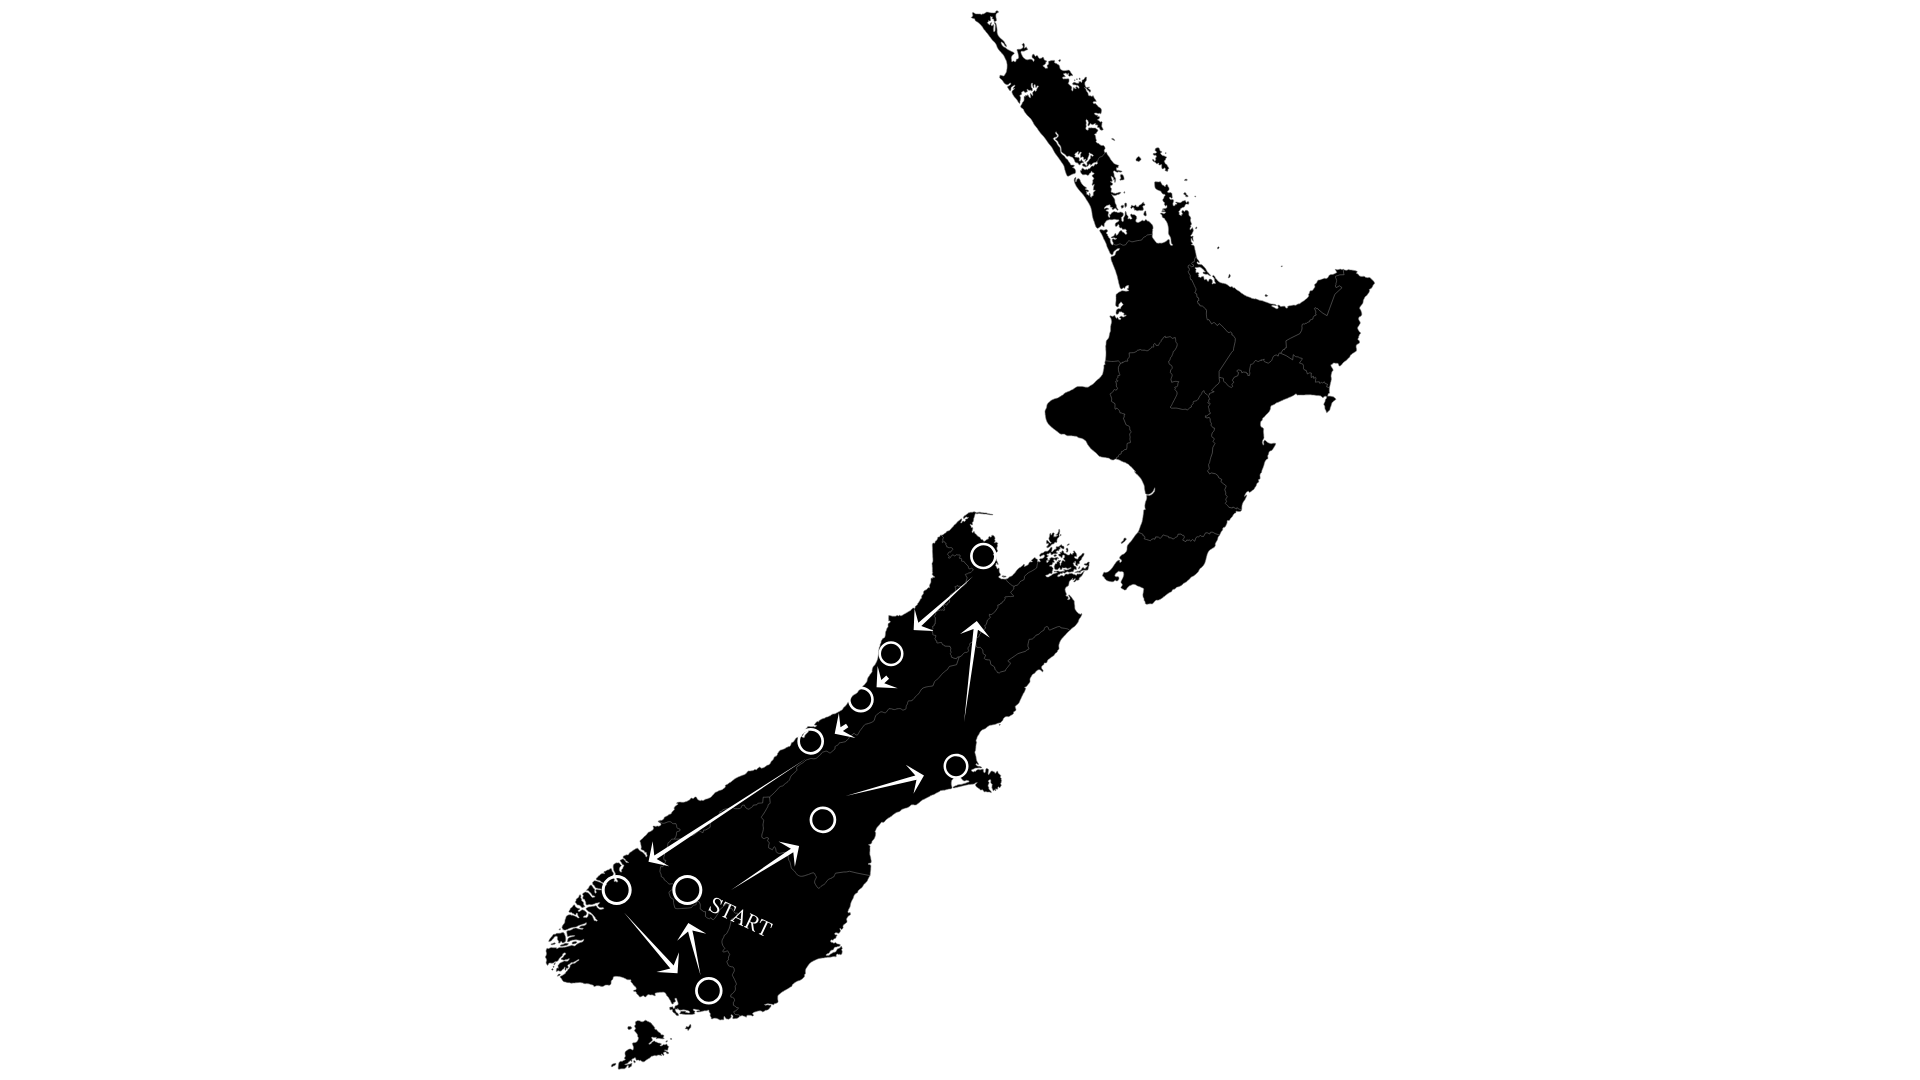
BEGIN IN QUEENSTOWN
One of my favorite parts about visiting New Zealand is simply arriving. The flight path into Queenstown yields mind-blowing landscapes. It’s a pretty special feeling as you step onto the tarmac, look up and see The Remarkables in all their glory.
Pro Tip: Snag a window seat on the left side of the plane for the best views.
From here, we picked up our campervan and drove straight to Lake Pukaki for our first overnight.
Total Drive Time: 2hr 45min
Overnight Stay: Lake Pukaki Overnight Campervan Parking. Onsite toilets are available, but there are no powered sites. Non-self contained vehicles are allowed.
Road trip map of New Zealand
DAY 1: LAKE PUKAKI AND MT. COOK NATIONAL PARK
Why you should go: Lake Pukaki is the sole access point to Mt. Cook National Park, home to New Zealand’s tallest mountain (3,765m). It’s also the country’s deadliest peak, accounting for nearly 80 reported casualities since the early part of the 20th century.
With tons of hiking to choose from, you can be sure that there’s something for all ages and fitness levels. Looking for a view of Mt. Cook? Try the Hooker Valley Track. Although it’s one of the most popular hikes, the 10.5km round trip path takes adventurers over swinging bridges and through the valley before reaching Hooker Lake, all at only 100m of elevation gain - talk about bang for your buck! Whichever hike you choose, I guarantee you will encounter some of the most breathtaking scenery in all the world. For a comprehensive list of hikes within Mt. Cook National Park, click here.
Lake Pukaki is also an optimal basecamp for exploring nearby Lake Tekapo or hopping on a scenic flight to soak up the spectacular aerial views. My personal recommendation would be Air Safaris; great service and a variety of options to fit any budget!
Must Do: Hooker Valley Trek and Air Safari Tour
Total Drive Time: 4 hrs. (Tekapo to Amberley Beach). Make sure to enjoy the views as you drive over Burke’s Pass along Highway 8!
Overnight Stay: Amberley Beach Reserve. Any vehicle is welcome to camp here, with both powered and non-powered sites available. The campground also offers toilets and bucket shower stalls and costs between $5-25 NZD per night, depending on your chosen site and vehicle.
Planning to stay longer in Lake Tekapo? Here’s a list of things to do and see:
Hike to the Mt. John Observatory for sweeping views over Lake Tekapo
Test your hand at astrophotography (Tekapo is a designated International Dark Sky Reserve)
Take flight high above Mt. Cook with Air Safaris as your guide to truly grasp the magnificence of the area
Relax in the Tekapo Hot Springs

Hooker Valley Trek at Mt. Cook National Park
DAY 2: KAIKOURA
Why you should go: The beauty of New Zealand is that you don’t need to be either a water person or a mountain person; you can be both! The sleepy seaside town of Kaikoura can attest. Located at the base of the aptly named Kaikoura mountain range, it is widely known for its resident sperm whale population, making it THE perfect place to hop on a boat and experience the wildlife from the water. Not a fan of the open sea? No problem. Stroll along the Kaikoura Peninsula Walkway to the rock platforms and prepare to “ooh” and “ahh” when you stumble upon a colony of fur seals!
Must Do: Whale watching in the South Pacific Ocean. We used Whale Watch Kaikoura and had an incredible time. Make sure to book in advance as spots fill up fast, even in the winter months!
Total Drive Time: 6 hrs. (2 hrs. from Amberley to Kaikoura and 4 hrs. from Kaikoura to Motueka)
Overnight Stay: Motueka Beach Reserve. This is a free camping area that only allows self-contained vehicles. It comes complete with toilets, showers, designated fire and cooking areas, and is located adjacent to the Motueka Salt Baths, just in case you feel the urge to take a quick dip in the Tasman Bay.

Kaikoura, New Zealand
DAY 3: ABEL TASMAN NATIONAL PARK
Why you should go: What do you get when you add rainforests to waterfalls and and sprinkle golden sand beaches on top? Paradise. Spread along the south island's northern coast, this national park is most well known for the Abel Tasman Coast Track as it winds its way 60km along the pristine water. This particular hike takes a bit of advanced planning, but it is still possible to experience the region by trekking to nearby to Wainui Falls. This 3.4km out and back trail maneuvers it's way through the lush rainforest and over suspension bridges before arriving at the stunning waterfall. Be sure to take a quick dip in the frigid waters and make sure to have a towel at the ready!
Must Do: Wainui Falls was an incredible hike, but our favorite part of the day was simply driving and exploring the area, especially Highway 60 up and over Takaka Hill.
Total Drive Time: 4.5 hrs. ( 1.5 hrs. from Motueka to Abel Tasman National Park and 3 hrs. from Abel Tasman to Murchison)
Overnight Stay: Riverside Holiday Park (Murchison). From 3 bedroom cabins to non-powered tent sites, this accommodation has something for everyone. The facility comes complete with a community kitchen, flushing toilets, and warm showers… this holiday park certainly spoiled us! We opted to rent a powered site for just $35 NZD ($22 USD) in order to hook up the heater in our van to keep us warm during a rainy night.
Want to learn more about this island nation? Check out these essential posts:
Day 4: PUNAKAIKI AND HOKITIKA
Why you should go: Stunning coastline and glow worms galore! The western part of the south island is like nothing I had ever seen before. Lush rainforests stretch from high above in the Southern Alps to the Tasman Sea below.
Driving aimlessly along Highway 6 and spontaneously stopping as you go is worth it in its own right, however this part of the island is where you can find two popular destinations: Punakaiki and Hokitika.
Punakaiki is home to the curious limestone formations known as Pancake Rocks, the perfect place to take a short 1.1km walk around these geological oddities and stretch your legs.
Pro Tip: Try to time your visit around high tide. This is when the surge pools and blowholes will be most active, leading to a truly spectacular show of forece from the ocean.
Feeling adventurous? Bring a headlamp and take a quick detour to the Punakaiki Cavern, located just north of the Pancake Rocks along Highway 6. Don’t forget to look up to spot the glow worms and stalacites as you descend into the darkness!
If you have trouble spotting the glow worms in Punakaiki, don’t worry, so did we! Keep driving south to Hokitika and you’ll find the Hokitika Glow Worm Dell. Located directly off of Highway 6, this leafy canyon is a protected home to these intriguing creatures.
Make sure to go at night as they illuminate the path. It’s free and only a 2 minute walk from the roadside, making it the perfect alternative if you don't have time or budget for an organized tour.
Did you know that the light emitted from these worms isn’t just mesmerizing to the human eye? It’s used to attract their food, luring insects and trapping them in their sticky threads!
Must Do: Hokitika Glow Worm Dell
Total Drive Time: 3 hrs, with PLENTY of roadside stops along the way
Overnight Stay: Hokitika Holiday Park. Powered sites start at $20 NZD per person and access to the community kitchen, lounge area, showers, playground, and free wifi!

Views from Highway 6
DAY 5: FOX JOSEF AND FRANZ GLACIERS
Why you should go: Where else can you hike through the rainforest en route to a glacier? The answer is nowhere!
Franz Josef and Fox Glaciers are the only two that exist in the world. Both offer a unique experience, trekking through the lush forest and up ice-carved valleys to their terminal faces.
The Franz Josef Walk is a 5.4km path up to the 7,000 year old sheet of ice, while the Fox Glacier Valley Walk is a 6km trail that follows the south bank of the Fox River through the ancient podocarp rainforest. A professional guide is needed to access the glacier if you're looking to get more up close and personal.
Check out Franz Josef Glacier Tours and choose your adventure: ice climbing, heli-hiking, and more!
Must Do: The Franz Josef Glacier Walk
Total Drive Time: 4 hrs. to Haast, with stops at both the Franz Josef and Fox Glaciers
Overnight Stay: Haast River Holiday Park. This powered site is slightly more expensive at $48 NZD per night, but provided access to the kitchen, showers, and wifi. Onsite motel rooms are also available.

Franz Josef Glacier from above
DAY 6: WANAKA (TRANSIT TO MILFORD SONUD)
Why you should go: Located on the southern shore of Lake Wanaka, this town is the perfect stopover en route to the Milford Sound. Snap a picture of That Wanaka Tree or simply enjoy a flat white as you peruse the stores along the waterfront.
Have a bit more time to spare? Take a jaunt up Roy’s Peak, a steep 16km trek that ends in sweeping views over the surrounding landscape.
Must Do: Stroll along Lake Wanaka
Total Drive Time: 5.5 hrs. from Haast to Cascade Creek Campground (brief stops in Wanaka and Te’Anu)
Overnight Stay: Cascade Creek Campground. This is the closest campground to the Milford Sound without making reservations in advance and costs just $15 NZD per person. Toilets are available, however powered sites are not. It’s the perfect place to spend the night if you have an early morning cruise of the sound scheduled for the following day!
Pro Tip: Fill up your gas tank in Te’Anu… it’s the last stop you’ll find before reaching the Milford Sound.
DAY 7: FIORDLAND NATIONAL PARK AND MILFORD SOUND
Why you should go: With cascading waterfalls that plummet over the fjords and into the serene waters below, this cherished corner of the world is filled with unrivaled beauty.
The best way to experience the sound is from the water, so be sure to hop on a nature discovery cruise. There are plenty of tour operators to choose from so it’s possible to shop around for the right fit for your wallet. Pro Tip: If you rent a vehicle from Jucy, you’ll receive a $30 discount when you book through Jucy Cruise!
Once your mind has been properly blown, spend some time exploring the rest of the 1.2 million hectares of land that makeup Fiordland National Park. For a full list of hikes available, click here.
Must Do: Cruise the Milford Sound
Total Drive Time: 5 hrs (1 hr from Cascade Creek Campground to Milford Sound and 4 hrs from the Milford Sound to Weirs Beach Campground)
Overnight Stay: Weirs Beach Campground. This is a free site that welcomes any type of vehicle! Non-powered sites only, but bathrooms are available.

Milford Sound, New Zealand
DAY 8: THE CATLINS COAST
Why you should go: Peace, serenity, and wildlife. Oh, and inching closer to Antarctica!
Comprised of the southeastern part of the island, The Catlins aren’t frequently visited by most, but are well worth the effort to get there.
Take a short, albeit windy, walk out to Slope Point and you’ll find yourself standing closer to Antarctica than to the equator.
Beyond creeping closer to the ice continent, The Catlins is one of the best spots to find an abundance of yellow-eyed penguins, sea lions, and starry nights.
Visiting in the winter months? Hunt down the southern lights! This forecast will help make sure that you don’t miss out.
Must Do: Slope Point
Total Drive Time: 3.25 hrs. back to Queenstown to complete the trip!
Overnight Stay: Turner Heights Townhouses (Queenstown). Between the aerial views of Queenstown and the easy walk to Lake Wakatipu, this was the perfect accommodation for our final night!

Slope Point, New Zealand
Have you given yourself more than just one night in Queenstown? Here’s a short list of things to see and do:
Play footygolf with The Remarkables as your backdrop at the Frankton Golf Centre
Wake up early and climb to the top of Queenstown Hill for sunrise
Enjoy breakfast along the water at Vudu Cafe
Take the plunge at the world’s first bungy jump (AJ Hackett Bungy)
Trek up the Tiki Trail for picture perfect views above Queenstown with The Remarkables as a backdrop
Meander along the shores of Lake Wakatipu in the evening light
Although we managed to condense a lot into a short amount of time in New Zealand, we certainly didn’t come close to scratching the surface of all that this nature lover’s paradise has to offer. At the end of the day, it’s important to realize that this itinerary is in no way perfect. It’s merely a starting point for you to pull out a map and begin planning an adventure of your own. After all, I find that some of the best memories are made before the trip has even begun!
Have you been to New Zealand before? What was your favorite part? I want to hear from you in the comments below!
Thanks for stopping by and as always, stay safe & happy travels.
Sharing is caring… pin this post for later!